A question physical therapists get frequently asked is whether to use ice or heat on an injury. Here are some general guidelines to help in many scenarios. If you have certain conditions such as fibromyalgia, Reflex Sympathetic Disorder (RSD), or rheumatoid arthritis, your sensory pathways are affected and don’t fall into the typical response patterns.
Ice is for injuries and after activity and heat is for loosening and relaxing tissues, used before activity.
ICE
- The first 24 – 48 hours after an acute injury onset, use ice. This is true even for simple muscle sprains or pulls.
- After an activity, at the end of the day or when swelling is present, use ice. When things are inflamed, the more you do throughout the day, the more inflamed the area will get. Ice will assist in decreasing pain, inflammation, and swelling.
- Ice can also be used for chronic conditions like overuse injuries to help control inflammation.
Ways to Ice:
- Ice cubes in a plastic bag
- Wet, frozen towel
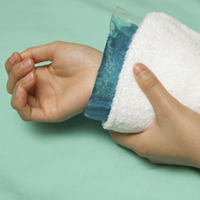
- Gel ice packs
Things to know about icing:
- Don’t ice for more than 20 minutes
- Let your tissues fully re-warm before re-icing
- 20 minutes on, 40 minutes off is a good rule for icing multiple times
- If you’re icing in an area with superficial nerves (elbow), don’t ice for more than 10 minutes
- You never want to ice before an activity. You want your muscles warm, not cold!
- Ice can aggravate symptoms of tightness and stiffness.
HEAT
- Heat is typically used to help relax or loosen tissues.
- Heat will bring more blood flow to the area.
- Heat is usually used in conditions that are more chronic. This helps stimulate blood flow to the area.
- Heat, when needed, is used before activity assisting more blood flow to help loosen and relax the muscles.
Ways to Heat:
- Heating Pad
- Hot, wet towel
Things to know about heating:
- Avoid heating for long periods
- Don’t use heat when sleeping to avoid burns
- Heat can make inflammation significantly worse.
If your pain doesn’t subside after a few days, don’t hesitate to reach out and ask for help. We can evaluate your injury or pain and get you back on your path to recovery.
BONUS!
Looking for an ice pack and can’t find one? No worries. Making your own ice pack at home is practical and easy.
Ingredients:
- 2 cups of water
- 1 cup of rubbing alcohol
- gallon-sized Ziploc bag
Directions:
- Pour the water and rubbing alcohol into the bag ** Double the bag for extra protection against breakage.
- Zip the bag shut removing as much air as possible.
- Place the bag in the freezer until the liquid reaches a slushy mixture.
- When ready, wrap the bag in a towel or pillowcase before applying it to the skin. (DON’T NOT APPLY THE BAG DIRECTLY TO THE SKIN)


