Category Archives: Sports and Fitness

overtraining

Are You Overtraining?

Are You Overtraining_FBsize

Maintaining a rigorous workout schedule without allowing enough time for the body to recover, often leads to what is known as overtraining. Not only is an athlete at a higher risk for injury but overtraining can manifest itself in several other ways.

WHAT CAN CAUSE OVERTRAINING
• Sudden increase in exercise frequency
• Intensity or duration of training sessions
• Not allowing your body adequate recovery
• The length of time you have been training

SIGNS AND SYMPTOMS OF OVERTRAINING
• Persistent muscle soreness
• Elevated resting heart rate.
• Increased susceptibility to infections.
• Increased incidence of injuries.
• Irritability
• Depression
• Loss of motivation
• Insomnia
• Stop noticing progress towards training goals
• Becoming restless and losing focus
• Feeling sluggish all day

HOW TO AVOID OVERTRAINING
• Get enough sleep – this is the time when your body is able to heal the most
• Proper nutrition- get plenty of protein, fats and carbs
• Monitor stress levels

leg press

Exercise Smartly:
• Find a balance and avoid workouts that are too intense for you
• Progress workouts slowly

Allow Proper Recovery Time Between Workout Sessions:
Take one or two days between workout sessions or alternate intensity levels for each workout

Stay Active On Off Days:
• Try a less intense mode of exercise (Active Rest)
• Yoga, stretching, or foam rolling can be done on these days

Information provided by the Center for Physical Rehabilitation – Grand Rapids, MI
To learn more about the Center for Physical Rehabilitation click here.

bike fit

Does Your Bike Fit?

DoesYourBikeFit_FBsize

There is a misconception that only competitive cyclists benefit from bike fittings. The truth is that anyone that rides a bike on a consistent basis should ride a bike that fits them properly. Granted, competitive cyclists are looking for every advantage with respect to power and performance. However, fitness and recreational riders can gain the same benefits while also improving comfort and reducing the risk of on-the-bike injuries. Often, a few basic changes to a bike can make a significant difference with respect to comfort, power, endurance and overall performance. In this blog we briefly examine some of the key areas that must be considered to ensure a proper bike fit.

THINGS TO LOOK FOR

Frame Size
Obviously, not all frames are created equal. Frame geometry can vary dramatically depending on material, the manufacturer and overall design. Head tube angles, seat tube angles, top tube length, wheel base, etc. are all factors which contribute to how a bike handles and rides. This is where test riding a bike will pay dividends. For example, having a steep head angle may sound like a good idea to achieve a responsive ride. However, you may find it a bit unnerving on a steep, fast descent or even when you try to take your hands off the bar to eat or drink. With regard to mountain bikes, different suspension and wheel size options also affect the way a bike handles and rides. All are personal preferences that should match your intended use.

For general fit, most manufacturers will have measurements that you can take on yourself to help you decide which frame size will likely be best for you. However, you may also fall within the acceptable range for two different frame sizes. In that case, there is no substitute for going to a shop that carries the bikes and riding them both. In all likelihood, you will quickly feel the difference and easily decide which will work best for you. If you are leaning toward the larger of the two sizes, make sure to check the stand over height before laying your cash on the counter. Keep in mind that your primary concern with respect to frame size is the fit from the waist down. Reach is obviously important as well. However, most upper body adjustment can be achieved by varying bars or stem length/angle assuming the length of the top tube is appropriate.

Crank Arm Length
This is one area where people seem to be content to accept a length simply because that particular crank arm is what they have been told is standard or best. The truth is that many bikes come equipped with crank arms that are too long for the prospective rider. Even when told they should have a shorter crank arm, some feel that if they can push it, they will be a stronger, more powerful rider. This can be a foolish mindset as this can result in knee and/or back problems. Of course, there are also occasions where the crank arms may not be long enough. In this instance, the rider is likely giving away potential power and performance. When deciding on an appropriate crank arm length, we are usually talking about millimeters of difference. However, there are specifications for crank arm length typically based on inseam length and/or seat height.

Cleat Alignment
Pedal choice as well as cleat adjustment are vital components of bike fit. Proper cleat alignment is the starting point for overall fit and essentially aligns the position of the foot in relation to the spindle of the pedal and the crank arm. It can also be one of the most difficult aspects of fit to get accurately established. This is true primarily because it is hard to align your cleat when it is mounted to your shoe which is on your foot and clipped into the pedal. Furthermore, most modern pedal/cleat combinations allow for considerable adjustment with respect to float, rotation, fore and aft, and side-to-side. Equally important is the shoe. People often buy soft cycling shoes that are comfortable on and off the bike. Although these shoes may be more comfortable for walking, you are giving up considerable force production and performance on the bike. Furthermore, on long bike rides, these softer shoes can result in “hot spots” and foot fatigue. Cycling shoes don’t need to be uncomfortable. However, when you are riding a bike, wear the shoe that is made for the job.

Seat Adjustment
This is another area that results in much debate. Do you go higher for better force generation or lower for better control on descents? Once again, improper seat height can result in pain or injury. It can also significantly limit your performance. For most riders, seat height and saddle setback (fore/aft positioning) is crucial for comfort and performance. This is the area where the biggest abuse of the law of averages has befallen bike fit. Seat adjustment is often based on averages and equations. Unfortunately, this is rarely the correct position. Much better than averages are measured angles with the rider on the bike which results in a more exacting fit.

Stem Length/Bar Height
Fitting stem length and bar height should be based on alignment, posture, comfort and performance. These factors can have a great effect on your back, neck, shoulders and wrists.

You may be saying to yourself, “Then tell me how my bike should be set up.” The fact is that an accurate fit cannot be done without looking at the individual on their bike. Many bike fits are based on measurements such as inseam, reach, trunk length, etc. which are then plugged into a variety of equations. Adjustments to the bike are then made according to the resulting numbers. The problem is that these equations often vary and are based on averages. Most of us aren’t average. We all have differing body composition and physique. Strength, flexibility, experience and orthopedic issues all play into proper bike fit. Proper fit must be done with the rider on the bike looking at specific measures and alignments.

Ultimately, a good bike fit is well worth the money and can go a long way toward improving comfort on the bike, improving your performance, and reducing the risk of injury. There are obviously many approaches and “schools of thought” when it comes to bike fit. The point here is that the most accurate fits are accomplished by evaluating you on your bike. Remember, depending on your effort and ability, cycling can be a very intense form of exercise. However, that doesn’t mean you have to hurt. If you have pain on the bike, something is typically wrong. More often than not, the problem can be addressed by improving fit. The bottom line is that you want to be sure the bike you ride is fit specifically to you. You should never be forced to fit yourself to the bike.

Written by Michael Choate, MSPT, USA Cycling Certified Coach at North Lake Physical Therapy & Rehabilitation in Portland, Oregon.

North Lake Physical Therapy & Rehabilitation clinics use progressive techniques and technologies to stay on the forefront in their field. OTheir staff is committed to providing patients with advanced healing techniques. To learn more about them click here.

Athletic Training Month

March is National Athletic Training Month

MarchNationalAthleticTrainingMonth_FBsize

March is National Athletic Training Month! Your protection is our top priority. Athletic trainers are health care for life and sport.

Athletic trainers specialize in patient education, injury prevention, and are an athlete’s first line of defense from the time of injury to recovery. Athletic trainers work closely with coaches and parents and may refer athletes to other health care professionals such as physicians, physical therapists and surgeons when needed.

What is an Athletic Trainer?
Athletic trainers hold at least a four year degree from a BOC (Board of Certification) accredited institution. they are licensed, certified health care professionals working with athletes on and off the field. Generally they are the first responders when injuries occur during sporting events.

Athletic trainers work closely with coaches and parents and will refer athletes to other health care professionals such as physicians, physical therapists and surgeons when needed.

Athletic trainers hours are determined by sports schedules. Typically they are available after school and stay until sporting events have concluded.

For more information about our athletic trainers, and what they do visit NATA’s websites at: www.nata.org or www.atyourownrisk.org

Throwing Injuries

Guidelines to Prevent Throwing Injuries

In this monthly series, we examine the proper ways to exercise and prevent throwing injuries in baseball. If you have any sudden significant increase in pain, swelling, or discoloration while performing or following exercise, discontinue immediately and contact your primary care provider.


PUSH UPS
Start on your stomach with your hands below your shoulders. Maintain a straight line from your ankles, through your hips, to the shoulders. Extend your elbows pushing your stomach away from the floor.


BICEP CURL
Begin seated with your elbow extended and palm facing forward. Bend the elbow as far up as you can without flexing your shoulder or rotating your wrist.


TRICEP DIP
Find two even surfaces to support your upper body with your elbows bent (a chair with arm rests works well). Extend your elbows pushing your body up toward the ceiling. Lower slowly.


OVERHEAD TRICEP EXTENSION
With your shoulder in full flexion overhead, hold a weight in your hand with your elbow bent behind your head. Straighten your elbow toward the ceiling without changing the angle of your shoulder.

This information was written by Advance Rehabilitation Physical Therapy, an outpatient physical therapy group with 24 locations in Georgia and Florida. Advance Rehabilitation is a physical therapy practice that focuses on providing the highest quality rehabilitation services. We specialize in physical therapy, sports medicine, industrial rehabilitation and athletic training. Our staff includes highly-trained professionals that serve as a bridge between injury and recovery to help patients get back to pre-injury status as quickly as possible. For more information click here.

See the entire Guidelines to Prevent Throwing Injuries series here:

   Prevent Throwing Injuries

   prevent throwing injuries

throwing injuries PTandMe

heart healthy physical activity

Heart Healthy Physical Activity

HeartHealthy_FBsize

The heart is often used as a symbol of vitality for good reasons. The heart pushes blood and oxygen to every cell in the body to be used as fuel and carries waste away. Without this process, the body cannot function. The heart plays a role in many aspects of your health and wellness.

Efficiency Matters
The heart beats an average of 60-80 beats per minute, which can add up to millions of beats in just one month. When something works this hard, it is important that it also works efficiently. Well-conditioned athletes can have resting heart rates below 50 beats/minute. Even though their heart beats slower, it can do the same amount of work or more than a heart that beats 60-80 beats/minute. An athlete’s heart pumps stronger during each beat, needing fewer beats to get the job done. Over a lifetime, a difference of 10-30 beats/minute can add up to quite a few beats.

An Ounce of Prevention…
The heart can be affected by physical and mental stressors. You can feel your heart speed up when you sprint across a busy road or when you have a burst of emotion like anger or surprise.

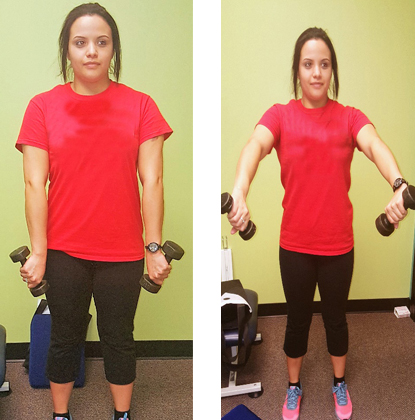
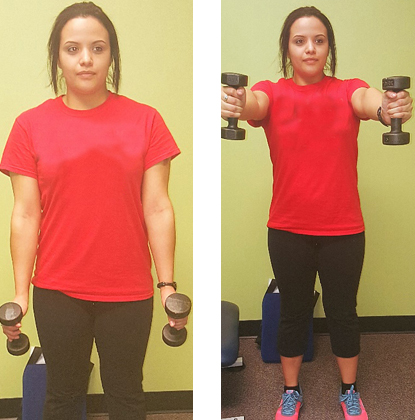
Physical activity can decrease the effect of stress on the heart and body. A fit body and mind will help improve heart health. Regular physical activity can:

Improve physical abilities by:
• Improving the heart’s ability to pump blood
• Increasing energy levels
• Increasing muscle strength and endurance
• Improving agility

Change physical appearance by:
• Toning your muscles which gives you a tighter appearance
• Burning calories which helps with weight loss or maintenance

Improve overall wellness by:
• Helping with stress management
• Improving self-image
• Helping to decrease anxiety and depression
• Improving relaxation
Improving the ability to sleep
• Creating a social activity opportunity
• Promoting healthier cholesterol levels

If you have heart problems, physical activity can still play an important role. A strong and healthy body can help you manage your condition. Physical activity can help reduce the stress on a sick or weak heart and decrease secondary risks like obesity and diabetes. If you do have heart health issues, talk to your doctor before starting an exercise program.

Even if you are healthy, but have not exercised in a long time, you may need to talk to your doctor to make sure that you are in good physical condition to exercise.

heart veggies

Where to Start
For most people, you can begin right away. Find an activity program that you enjoy. Do not pick an activity that does not fit into your schedule, does not fit in with your personal preferences, or has too many obstacles, because you may lose interest quickly. A program that starts with too much intensity is also likely to lose your interest.

Work towards reaching these basic goals:
• 30-60 minutes of physical activity on most days of the week (total of at least 150 minutes/week)
• Include some strength activities at least 2 times/week

Make It Stick
Long-term regular physical activity will count more than a brief and spectacular burst of activity. Most people do not plan to become sedentary. It creeps up on you. Work to increase your physical activity the same way. Gradually add steps. Find activities you enjoy that can replace more sedentary activities.

Here are more tips that have been shown to be useful:
• Find an exercise partner. You are less likely to skip the activity if someone is waiting for you.
• Write it down or use a fitness tracker. Keep a log of your activities and how much you accomplished either by distance or time. It will help keep you honest.
• A long-term goal is fine, but also make short-term goals, because they provide quicker feedback.
• This is important, make it a priority. Plan it out. Find a time in your daily routine when you can regularly fit the activity in.
• Consider doing your activity in 10-minute spurts throughout the day. Spurts can be as effective as being active for 30 minutes straight.
• Be flexible. Life happens and you may find that you need to make adjustments to your routine. A rigid schedule and goal may not be worth the stress. Keep an open mind to new activities and schedules.

Make It Count
Any physical activity is better than none. But at least a few days per week you should aim for more than a leisurely stroll. A moderate intensity level is best to help you make health changes. Moderate intensity activity is enough to get your heart rate up and make you feel a little out of breath but not feel worn out when you are done.

Do not forget to enjoy your activity for the daily benefits it can bring and know that your heart appreciates it as well!

by Pamela Jones, MA

RESOURCES:
American College of Sports Medicine
http://www.acsm.org

American Heart Association
http://www.heart.org

CANADIAN RESOURCES:
Health Canada
http://www.hc-sc.gc.ca

Public Health Agency of Canada
http://www.phac-aspc.gc.ca

REFERENCES:
American Heart Association guidelines for physical activity. American Heart Association website. Available: http://www.heart.org/HEARTORG/GettingHealthy/PhysicalActivity/StartWalking/American-Heart-Association-Guidelines-for-Physical-Activity_UCM_307976_Article.jsp. Updated September 10, 2014. Accessed October 22, 2014.

Guide to physical activity. National Heart and Lung and Blood Institute website. Available at: http://www.nhlbi.nih.gov/health/public/heart/obesity/lose_wt/phy_act.htm. Accessed July 21, 2016.

Haskel W, et al. Physical activity and public health, updated recommendations for adults from the American College of Sports Medicine and the American Heart Association. Circ. 2007;116(9):1081.

How much physical activity do you need? Centers for Disease Control and Prevention website. http://www.cdc.gov/physicalactivity/everyone/guidelines/index.html. Updated June 4, 2016. Accessed July 21, 2016.

Promoting physical activity with a public health approach. American College of Sports Medicine website. Available at: http://www.acsm.org/about-acsm/media-room/acsm-in-the-news/2011/08/01/promoting-physical-activity-with-a-public-health-approach. Accessed July 21, 2016.

2008 physical activity guidelines for Americans. United States Department of Health and Human Services website. Available at: http://www.health.gov/paguidelines/guidelines/default.aspx. Accessed July 21, 2016.

Last reviewed July 2016 by Michael Woods, MD Last Updated:10/22/2014

EBSCO Information Services is fully accredited by URAC. URAC is an independent, nonprofit health care accrediting organization dedicated to promoting health care quality through accreditation, certification and commendation.

ice hockey injuries

Common Ice Hockey Injuries

HockeyInjuries_FBsize

Ice hockey is one of the most popular sports played in North America. Physical therapy can provide specific treatment to a number of specific ice hockey injuries. Here are a few injuries that can happen during a hockey game or practice:

Common Ice Hockey Injuries

BACK INJURIES
Hockey players are at risk for low-back injuries due to the flexed (forward) posture of skating and the frequent hyperextension (backward) stress. Low-back pain and/or a pulled muscle are the most common injuries. Stretching of the hip flexors along with strengthening of the back and abdominal muscles will help avoid these injuries.

HIP INJURIES
The hip joint and groin muscle are susceptible to injury due to the mechanisms of the skating stride. Some of the most common soft tissue injuries in hockey players include a groin strain and a hip flexor strain. Off-season strengthening and dedicated stretching before and after practice are important to prevent these injuries. In addition, a direct blow to the outside of the hip can cause a hip pointer or trochanteric bursitis. Hockey pants with reinforced padding over these areas may help protect them.

KNEE INJURIES
The medial collateral ligament is the most susceptible to a sprain because of the leg position – pushing off the inside edge of the skate blade – and contact to the outside of the knee. Anterior cruciate ligament (ACL) disruption and meniscus tears (torn cartilage) can also occur but are less common in hockey that in other sports such as football, soccer and basketball.

hockey_goalie

SHOULDER INJURIES
The most common shoulder injuries in hockey are a shoulder separation and a broken collarbone. These injuries occur from direct contact of the shoulder with another player, the boards or the ice. Treatment can include a sling, rest and in serious cases surgery.

ELBOW INJURIES
The point of the elbow is a frequent area of contact, which can result in the development of bursitis. Thick and scarred bursal tissue (which feels like bone chips, but isn’t) can be a source of recurrent inflammation. The best prevention method is wearing elbow pads that will fit well and have an opening for the elbow, soft padding and a plastic outer shell.

WRIST INJURIES
A fall on the outstretched arm or contact with the boards that forces the wrist up or down, may cause a fracture. Players should try bracing themselves against the boards using their forearms instead of their hands.

Exercising Do's and Don'ts

Exercising Do’s and Don’ts

In the last post of our 5 part series on exercising do’s and don’ts, we examine the proper ways to exercise at the gym from start to finish. If you have any sudden significant increase in pain, swelling, or discoloration while performing or following exercise, discontinue immediately and contact your primary care provider.

UPRIGHT ROWS

START POSITION
• Standing with feet shoulder width apart
• Palms facing back when holding onto barbell.
• Hands spread apart a bit wider than shoulder width.
• Maintain proper posture throughout exercise.

ENDING POSITION
• Barbell lifted up to chest height with elbows flexed pointing outward.
• Forearm should be aligned with upper arm horizontally.

DON’T
• Swing body back and forth.
• Lift feet off ground.
• Allow elbows to point upward.
• Raise past shoulder height.

OVERHEAD TRICEP EXTENSION

START POSITION
• Seated with feet flat on the ground.
• Hold dumbbell vertically behind head with shoulders slightly out and 90 degree elbow flexion.
• Maintain head upright throughout exercise.

ENDING POSITION
• Dumbbell held above and slightly behind head.
• Elbows fully extended.

DON’T
• Lift feet off ground.
• Lift up from bench.
• Swing body back and forth.
• Let your head lean forward.
• Bring your elbows inwards towards the ears.

This information was written by STAR Therapy Services, an outpatient physical therapy group with six locations in Houston, Texas. At Star Houston Therapy Services, their number one priority is the patient. They strive to provide individualized treatment with hands-on, compassionate care. They perform comprehensive evaluations and encourage patient input for treatment planning and goal setting. For more information click here.

View the complete Exercising Do’s and Don’ts series below:


exercising do's and dont's

How to Exercise at the gym

Exercising Do’s and Don’ts

In the fourth installment of our “At The Gym” series we examine how to exercise at the gym from start to finish. If you have any sudden significant increase in pain, swelling, or discoloration while performing or following exercise, discontinue immediately and contact your physician or therapist at your next therapy session.

How to Exercise at the gym

MILITARY SHOULDER PRESS
* How to exercise at the gym top tip: It is generally not recommended to do this exercise due to undo stress and strain at the shoulder joint.
If you do choose to do a military press, avoid bringing the bar behind the head and make sure that the elbows don’t pass 90⁰ at the bottom of the repetition.

START POSITION
• Seated with back against the seat (if available), with feet flat on the ground.
• Barbell held above head with elbows fully extended and wide grip to facilitate 90⁰ bend at the elbows at the bottom of the rep.

ENDING POSITION
• Bring barbell down until your elbows are bent at 90⁰ with the barbell in front of your face.

DON’T
• Lift feet off the ground.
• Lift off the seat.
• Arch your back.
• Bring barbell down to chest.

MACHINE CHEST PRESS

START POSITION
• Seated with back against the seat and feet flat on the ground.
• Arms out to your side and elbows flexed at 90⁰ but not coming back past your body (This picture shows the arms back a little too far with the angle at the elbows being a little too deep. Most chest press machines are built so that you have to start in this position which can compromise the shoulder if lifting heavy. If adjustable start in a position a little more forward than this).

ENDING POSITION
• Back against the seat.
• Elbows fully extended.

DON’T
• Lift feet off the ground.
• Lift off the seat.
• Bring bent elbows past your body.

CHEST PRESS

START POSITION
• Lay flat on bench with feet flat on the ground.
• Arms out to your side at 90⁰ with elbows flexed at 90⁰.
• Palms facing lower extremities.

ENDING POSITION
• Elbows fully extended.

DON’T
• Allow elbows to come down past bench height or 90⁰ bend.
• Left feet off the ground.
• Arch your back.

CHEST FLY

START POSITION
• Lay flat on bench with feet flat on the ground.
• Dumbbells touching each other with palms facing each other with elbows slightly bent.

ENDING POSITION
• Arms out at your side at 90⁰ with elbows flexed at about 120⁰.

DON’T
• Lift feet off the ground.
• Arch your back.
• Allow elbows to come down past bench height.

This information was written by STAR Therapy Services, an outpatient physical therapy group with six locations in Houston, Texas. At Star Houston Therapy Services, their number one priority is the patient. They strive to provide individualized treatment with hands-on, compassionate care. They perform comprehensive evaluations and encourage patient input for treatment planning and goal setting. For more information click here.

Knowing how to exercise at the gym, can build confidence and reduce the likelihood of injury. View the complete Exercising Do’s and Don’ts series below:


exercising do's and dont's

exercise at the gym

Exercising Do’s and Dont’s

AtTheGym#3_FBsize

In the third installment of our gym series we examine the proper ways to exercise at the gym from start to finish. If you have any sudden significant increase in pain, swelling, or discoloration while performing or following exercise, discontinue immediately and contact your therapist at your next therapy session.

SCAPULAR RETRACTION / ROW

START POSITION
• Standing or seated with back in neutral with feet shoulder width apart.
• Squeeze shoulder blades together.
• Elbows slightly bent and forearms parallel to the floor.

ENDING POSITION
• Elbows at 90⁰ flexion.
• Shoulders pulled back.
• Hands at your sides at shoulder width and forearms parallel to the floor.

DON’T
• Swing body back and forth.
• Let the weight pull you forward between repetitions (keep the shoulders back).
• Shrug.

exercise at the gym

ANTERIOR DELTOID – FRONTAL RAISE

START POSITION
• Standing with spine in neutral position with feet shoulder width apart.
• Palms facing down.

ENDING POSITION
• Arm raised to 90⁰ directly in front of you.
• Elbow in full extension.

DON’T
• Raise arm past 90 degrees.
• Swing body back and forth.
• Rotate wrist.
• Shrug shoulders.

exercise at the gym

LATERAL DELTOID – LATERAL RAISES

START POSITION
• Standing with spine in neutral position with feet shoulder width apart.
• Elbows bent at 90 degrees.

ENDING POSITION
• Arms raised to 90 degrees at your side.
• Palms facing down.

DON’T
• Raise arms past 90 degrees.
• Swing body back and forth.
• Shrug shoulders.

exercise at the gym

BENCH PRESS

START POSITION
• Lay flat on bench with both feet flat on the ground.
• Place a rolled towed in the center of the chest.
• Arms extended with wide grip to facilitate 90 degree bend at the elbow at the bottom of repetition.

ENDING POSITION
• Lower slowly until the bar touches the towel
• Elbows should not pass the height of the bench bending to about 90 degrees.

DON’T
• Lift feet off the ground.
• Arch your back.
• Bounce bar off your chest (barbell should only touch the towel lightly).

This information about exercise at the gym was written by STAR Therapy Services, an outpatient physical therapy group with six locations in Houston, Texas. At Star Houston Therapy Services, their number one priority is the patient. They strive to provide individualized treatment with hands-on, compassionate care. They perform comprehensive evaluations and encourage patient input for treatment planning and goal setting. For more information click here.

View the complete Exercising Do’s and Don’ts series below:


exercising do's and dont's

at the gym

At the Gym: Exercising Do’s and Dont’s

AtTheGym#2_FBsize

In the second installment of our “At The Gym” exercise series we examine the proper ways to exercise at the gym from start to finish. If you have any sudden significant increase in pain, swelling, or discoloration while performing or following exercise, discontinue immediately and contact your therapist at your next therapy session.

Plus Push Up 1

PLUS PUSH-UP

START POSITION
• Get on elbows and knees.
• Knees bent
• Straight or neutral back done by drawing the stomach in and the buttocks down.

ENDING POSITION
Push elbows into mat while trying to increase the space between the shoulder blades (round out your back between the shoulders).DON’T

DON’T
• Drop the head.
• Raise the buttocks or let the low back excessively curve inward.

Plus Push Up 2

PLUS PUSH-UP: STAGE 2

START POSITION
Push-up position

ENDING POSITION
• Push hands into mat while trying to increase the space between shoulder blades.
• Rounded upper back appearance.

DON’T
• Drop the head.
• Raise the buttocks or let the low back excessively curve inward.

Scapular Depression

SCAPULAR DEPRESSION

START POSITION
• Seated with shoulder blades drawn downward (don’t shrug shoulders).
• Hands hold just outside of the curvature of the bar to comfort.
• Knees bent underneath knee pad and feet on the floor.
• Keep your back straight with a slight posterior lean from the hips.

ENDING POSITION
Bring bar to chest with elbows bent.

DON’T
• Lift feet off the ground.
• Rock at the waist.
• Elevate or let shoulders pull forward.
• Hyperextend the low back as you pull in.

Empty Can 1

EMPTY CAN

START POSITION
Standing with hands at your side and thumbs pointing downward with feet shoulder width apart.

ENDING POSITION
Arms raised to about 60⁰ with thumbs facing down and slightly to your side.

DON’T
• Swing body back and forth.
• Shrug shoulders.
• Lift above 60⁰.

Full Can
FULL CAN

START POSITION
Standing with hands in front of you with thumbs pointing upward and feet shoulder width apart.

ENDING POSITION
Arms raised to 90 – 120⁰ with thumbs facing up.

DON’T
• Swing body back and forth.
• Shrug shoulders.
• Lift above 120⁰.

This information was written by STAR Therapy Services, an outpatient physical therapy group with six locations in Houston, Texas. At Star Houston Therapy Services, their number one priority is the patient. They strive to provide individualized treatment with hands-on, compassionate care. They perform comprehensive evaluations and encourage patient input for treatment planning and goal setting. For more information click here.

View the complete Exercising Do’s and Don’ts series below:


exercising do's and dont's