Tag Archives: Injury Prevention

gardening ergonomics

Gardening Ergonomics

gardening ergonomics

It’s that time of year again. Time to exchange snow shovels and winter boots for gardening tools and watering cans. While the warmer weather brings on a new sense of happiness and energy, we need to remember to use proper body mechanics and follow general safety to avoid muscle aches and potentially serious injuries. The number one injury associated with gardening is low back pain. If you have experienced a recent injury or pain, we can help you recover.

Physical Therapy Appointment

Here are a few tips to make your gardening experience more enjoyable and less painful.

LIFTING:

Lifting heavy objects such as bags of soil, planters, and mulch improperly can lead to low back strains and/or sciatic pain. Other options include moving half of the soil/mulch to a separate pot before lifting the bag or planting into smaller pots that are easier to maneuver. Using a garden cart or wheelbarrow can also assist with moving heavy gardening materials. Remember to lift with your legs, avoid simultaneous lifting and twisting and keep heavier objects close to your body to avoid injury.

PLANTING:

Prepping the soil can also be a difficult and tedious task requiring prolonged forward bending and frequent changes in position. Try prepping the planting bed by using long-handled gardening tools. Once the soil is ready, plant from a kneeling position using either a kneeling stool or a cushion. Remember to avoid twisting the spine. Those with known chronic low back pain may want to consider planting into pots, flower boxes, or raised flower beds to avoid further injury.

WEEDING:

Most people dislike weeding their gardens and flower beds. Options to reduce the need to do so include using plants as ground cover or using mulch in your flower beds to minimize weed growth. If using a weed spray, look for bottles that have a sprayer hose to allow you to stand upright while treating your problem areas.

MOWING THE LAWN:

Another task that most people find tedious. When able, use an electric start mower. The action of pulling a cord to start your mower is the most common cause of low back injuries. If you must use a pull start mower, remember to bend at your knees and maintain the natural curve of your spine while reaching for the cord. Make sure you tighten your abdominal muscles just before pulling the cord in order to support your spine. If using a push mower, remember to maintain a proper upright posture and take breaks as needed.

Remember to listen to your body. Take frequent breaks and change positions when you experience aching, cramping, or fatigue. Stay hydrated and wear sunscreen. If you do happen to experience low back pain or any other injury, remember to contact your physical therapist. They can help alleviate your symptoms and educate you on proper body mechanics.

gardening

GARDENING STRETCHES

Stretching before you start gardening can help you from experiencing pain later. Here are some stretching techniques to help get you started!

Gardening Stretches

1.) Fold your hands together and turn your palms away from your body, but this time extend your arms overhead. You should feel the stretch in your upper torso and shoulders to your hand. Hold for 10 seconds and repeat eight times.

gardening stretches

2.) Place your hand just above the back of the elbow and gently push your elbow across your chest toward the opposite shoulder. This is a stretch for the upper back and shoulder. Stretch both the right and left arms. Hold for 10 seconds and repeat eight times.

gardening stretches

3.) Raise one arm overhead. Bend the elbow. Place the opposite hand on the bent elbow and gently push the elbow back further. This is a stretch for the triceps. Stretch both the right and left arms. Hold for 10 seconds and repeat eight times.

gardening stretches

4.) Extend an arm in front of you, making sure the elbow is completely straight. With your palm down, take the opposite hand and bend in the wrist downward. Then turn the palm up, and stretch the wrist backward. This stretches the forearm and wrist muscles. Hold for 10 seconds and repeat eight times.

If you are experiencing pain, trust a licensed professional. Our therapists will help identify the cause of your pain and work with you to help it go away, and prevent pain and injury in the future.

physical therapy near me

The warm-up exercises were developed by professional hand therapists who are occupational and physical therapists specializing in the treatment of the hands, arms, and shoulders. These exercises and tips have been designed to supplement more commonly known gardening safety practices that concentrate only on preventing back injuries.
For more information visit: www.asht.org

Avoid Spring Cleaning Injuries

Do’s & Don’ts of Spring Cleaning

Avoid Spring Cleaning Injuries

It’s that time of year for cleaning out the cobwebs, de-cluttering, and rearranging our homes. Some of us enjoy the task while others dread it. Did you know that the greatest risk of injury we face is in our own homes? From muscle strains to home falls there is no shortage of things that can go wrong but we’ve compiled a list of tips to help you minimize injury. Follow these spring cleaning safety tips to have a safe and productive spring cleaning!

physical therapy near me

    • 1. Do not rush because you are tired or in a hurry.

This is really the most basic spring cleaning safety tip, and all the other ones, at least to a certain degree, stem from this one. Spring cleaning can be tiring work. Do not forget safety even if you have worked hard all day and want to get done. The better thing to do when you are exhausted is to stop and take a break, drink a glass of water, sit under a nice cool fan, and rest instead of being unsafe.

    • 2. Be careful moving large pieces of furniture and appliances.

Use proper lifting technique, keeping your back straight and lifting with your legs. Also, wear shoes when moving heavy items so you don’t hurt your toes. Finally, if you feel it is just too heavy and you can’t find someone else to do it for you, just don’t move it. It won’t be the end of the world to just clean around it. Always have spring cleaning safety in mind.

When doing a task, such as washing windows, where you need to be on a ladder use extreme caution. Do not lean too far to either side. A good rule of thumb is that your belly button should not go beyond the sides of the ladder. Also, have someone available to hold the ladder steady for you if possible, and make sure before you step on them that the rungs are not wet, and you are wearing non-skid shoes.

    • 4. Be careful when walking on wet surfaces.

This spring cleaning safety tip is really important every time you clean. Everyone knows how easy it is to slip on a wet floor. Make sure you take the proper precautions to keep from falling.
Also, make sure others in your family, including children, are also warned of the wet floor to keep them safe. You may need to block small children’s access to wet floors because they just don’t understand not to run and slide on them.

    • 5. Keep stairs, landings, and walkways clear of boxes, bags, and other clutter.

Spring cleaning is a great time to de-clutter your home, but you need to make sure all the boxes and bags of stuff you are getting rid of don’t cause a safety concern. Make sure you place them outside walkways and especially away from steps and stairs where someone may trip on them.

    • 6. Don’t carry too much stuff at once, especially on stairs.

During spring cleaning you will also probably go up and down your stairs a lot carrying things if you live in a home with stairs. Make sure you keep a hand free to hold onto the stair railing. Also, whether you have stairs or not, always make sure you can see over the load you are carrying so you do not trip.

If you are experiencing pain or injury please reach out to a physical therapist. They can evaluate your pain and provide corrective action to help you feel great!

Physical Therapy Appointment

cold weather exercise tips

Cold Weather Exercise Tips: Running Safety

Physical Therapy Appointment

Cold temperatures and decreasing daylight hours do not mean that your outdoor running routine has to go into hibernation for the winter. Running through the cold weather can ease the winter doldrums, improve your energy level and help you to be in better shape for the spring/summer. However, it is important to follow our PTandMe cold-weather exercise tips to run safely and comfortably through wintry weather.

  • Pay attention to temperature and wind chill: If the temperature drops below zero F or the wind chill is below -20F, you should hit the treadmill.
  • Protect your hands and feet: It is estimated that as much as 30% of your body heat escapes through your hands and feet.
  • Dress in layers: It is important to start with a thin layer of synthetic material such as polypropylene, which wicks sweat away from your body. stay away from cotton as a base layer as it holds moisture and will keep you wet. If it is really cold out, you will need a middle layer, such as polar fleece for added insulation.
  • Avoid overdressing: You should feel a slight chill off your body the first 5 minutes of winter running; after that, you should warm-up.
  • Protect your head:  Wearing a hat that will help prevent heat loss is very important.
  • Do not stay in wet clothes: If you get wet from rain, snow or even from sweat in chilly temperatures, you are at risk for hypothermia. It is important that you change wet clothing immediately and get to warm shelter as quickly as possible.
  • Stay hydrated: Despite the cool weather, you will still heat up and loos fluids through sweat. The cool air also has a drying effect, which can increase the risk of dehydration. Make sure you drink water or sports drinks before, during and after you run.
  • Remember sunscreen: Sunburn is still possible in the winter. It is also important to protect your lips with lip balm.
  • Take it easy when it is frigid: The colder the temperature becomes, the greater your risk for a pulled muscle when running in the cold, so warm up slowly and run easily on very cold days.
  • Run in the wind: If at all possible, head out into the wind, so that on your return run, the wind will be at your back when you are sweaty and could catch a chill.

Looking for help with a nagging injury? Find a physical therapist near you.

physical therapy near me

For more cold-weather exercise tips to keep you safe this winter check out the articles below!

Staying Warm in Winter PTandMe  Winter Safety PTandMe  Snow Shoveling Safety PTandMe

Lifting Safety Tips PTandMe

Avoid Back Pain with These 8 Back Safety Tips

Lifting Back Safety Tips PTandMe

During the holidays, back injuries become more prevalent as people maneuver themselves up and down ladders and stairways while carrying or lifting heavy objects. A little bit of lifting safety can go a long way to keeping your holiday season bright.

1. SIZE UP THE LOAD

Check to ensure the load is stable and balanced.

2. PLAN THE JOB

Consider all possibilities. Is the path clear? What is the weight of the load? How much stress will be placed on your back? Is there traffic, a tripping hazard, a doorway to go through, or a stairway to go up or down? Avoid carrying an object that requires two hands to hold, either up or especially down, a flight of stairs.

3. ESTABLISH A BASE OF SUPPORT

Use a wide, balanced stance with one foot in front of the other. Make sure you have firm footing and that your feet are a shoulder-width apart. This staggered stance gives you the stability of not falling over and being able to secure the load.

4. BEND YOUR KNEES, KEEP YOUR HEELS OFF OF THE FLOOR AND GET AS CLOSE TO THE OBJECT AS POSSIBLE.

Always lift with your legs and not your back.

Proper Lifting Technique PTandMe

5. BE CERTAIN YOU WILL BE ABLE TO MAINTAIN A HOLD ON THE OBJECT WITHOUT HAVING TO ADJUST YOUR GRIP LATER.

You can use gloves to help maintain an adequate grip, but don’t rely on gloves because they can de-sensitize the fingers making you unable to feel the object.

6. LIFT GRADUALLY

Lift gradually with your legs without using jerky motions.

7. KEEP THE LOAD CLOSE TO PREVENT ARCHING YOUR LOWER BACK.

As you begin the lift, tighten your stomach muscles, and keep your head and shoulders up. The closer the load is to your spine, the less force will be placed on your back.

8. PIVOT

Don’t twist. Move your feet in the direction of the lift. This will eliminate the need to twist at the waist.

Whether at home or at work safe lifting practices can keep your back healthy and safe. Before lifting heavy objects decide how you will lift carry & place the item before you pick it up. If you are experiencing persistent pain, please contact us. We want to help you to be at your best this holiday season.

physical therapy near me

Treatment Options for Achilles Tendinitis

Treatment Options for Achilles Tendinitis

Treatment Options for Achilles Tendinitis

Physical Therapy Appointment

The Achilles tendon is the largest tendon in the body. It connects your calf muscles to your heel bone and is used when you walk, run, and jump.  Although the Achilles tendon can withstand great stresses from running and jumping, it is also prone to tendinitis, a condition associated with overuse and degeneration. Achilles Tendinitis causes pain along the back of the leg near the heel. If you suffer from Achilles Tendinitis – try these pain relief methods.

Treatment Options for Achilles Tendinitis

REST: Cut back your training by decreasing your mileage and intensity. Also, avoid hills and speedwork. You may substitute running with swimming, running in water, and biking to reduce the irritation.

ICE: Apply ice to the affected area for 10 to 20 minutes with at least one hour between applications. Do not apply ice directly to your skin – a pillowcase or dish towel works well as a protective barrier. Frozen peas or reusable gel packs are flexible and conform well to the injured area.

PROPER FOOTWEAR/ORTHOTICS: This situation can be corrected with arch supports or custom orthotics. Orthotics allow your foot to maintain the correct position throughout the gait. Avoid walking barefoot and wearing flat shoes. If your pain is severe, your doctor may recommend a walking boot or to cast you for a short time. This gives the tendon a chance to rest before any therapy is begun.

NON-STEROIDAL ANTI-INFLAMMATORY MEDICATION: Drugs such as ibuprofen and naproxen reduce pain and swelling. They do not, however, reduce thickening.

PHYSICAL THERAPY: Achilles tendinitis can be a painful, chronic condition if left untreated. Physical therapists may use stretching, massage, custom orthotics, strengthening, and/or balance activities to help your body relieve pain and heal.

CORTISONE INJECTIONS: Cortisone, a type of steroid, is a powerful anti-inflammatory medication. Cortisone injections into the Achilles tendon are rarely recommended because they can cause the tendon to rupture (tear).

physical therapy near me

fall prevention at home

Fall Prevention: Fall Risks & Tips in your home

fall risks prevention tips at home

While falls can happen anywhere, more than half occur in the home. One in every three adults 65 and older fall AT HOME each year in the U.S. One of the easiest ways to help prevent a fall is to make sure that specific tripping hazards are addressed and removed. We’ve compiled a short list below to help you get started.

physical therapy near me

COMMON WARNING SIGNS FOR FALLING ARE:

  • Feeling pain or stiffness when you walk
  • Needing to walk slower or to hold on to things for support
  • Feeling dizzy or unsteady when you get up from your bed or chair
  • Feeling weak in your legs
  • You take more than one medication
  • You have problems seeing
  • You have had at least one fall in the past year

RISKS TO CONSIDER WHEN FALL-PROOFING YOUR HOME:

Lighting

  • Is the lighting adequate, especially at night?
  • Are stairwells well-lit?
  • Is there a working flashlight in case of power failure?
  • Can lights easily be turned on even before entering
    a dark room?

Surfaces

  • Are there any wet surfaces that are frequently wet?
  • Are steps and stairs in good repair and the
    appropriate rise?
  • Do steps have handrails in good repair?

Trip Hazards

  • Are there throw rugs in the walking path?
  • Does the family pet often sleep in walking paths?
  • Is the carpet in good repair without tears or fraying?
  • Are there extension cords or raised door sills in the walking paths?
  • Is there a clear path from the bed to the bathroom?

If you feel that you are at risk for falls, talk to your physical therapy provider. Most physical therapy clinics offer fall risk assessments that can help determine any areas of risk. By participating in a fall prevention program, you can reduce the likelihood of a fall and increase the ability to live independently. Fall prevention programs mainly focus on core strength, flexibility, and patient education.


Physical Therapy Appointment

FLYR_FallPrevention_HomeFalls fall risks

For more information about balance and fall prevention click the links below:


fall risks    fall risks
Back Pack Safety

Backpack Safety 101

Back Pack Safety
With summer coming to an end and the need for school supplies and backpacks returning, here are a few tips to keep in mind when shopping with your child. Continue below for back pack safety tips to make sure your kids don’t have any unnecessary back pain this year.

Size

  • Should Not Extend Above Shoulders
  • Should Rest In Contour Of Low Back (Not Sag Down Toward Buttocks)
  • Should Sit Evenly In Middle Of Back

Fit

  • Shoulder Straps Should Rest Comfortably On Shoulders And Underarms, With Arms Free To Move – Tighten Shoulder Straps To Achieve This Fit
  • Tighten Hip And Waist Straps To Hold Pack Near Body
  • Padded Straps Help Even Pressure Over The Shoulders

ThinkstockPhotos-78779211

Weight Of Pack

  • Should Never Exceed 15% Of The Child’s Weight To Avoid Excess Loads On The Spine

BackPack Weight Charts

Lifting Of Pack

  • Proper Lifting Is Done By Bending The Knees, Squatting To Pack Level, And Keeping Pack Close To Body To Lift First To Waist Level And Then Up To Shoulders

Carrying The Pack

  • Keep Both Shoulder Straps In Place And Pack Centered
  • Spinal Forces Increase With Distance From The Body’s Center

Posture

  • Uneven Stresses On The Spine Can Cause Muscle Imbalances. This Can Lead To Pain And Possibly Functional Scoliosis.

If your child does start to complain of constant back pain, talk to your pediatrician and make sure that it isn’t a more serious issue such as scoliosis.

Scoliosis is a medical condition in which the spine is curved either front to back or side to side and is often rotated to one side or the other. It can occur at birth (congenitally), develop over time having no obvious cause, but often seen related to posture and growth (idiopathically) or due to an injury or the other condition (secondarily), such as cerebral palsy or muscular dystrophy. The most common type is adolescent idiopathic scoliosis. It usually develops between the ages of 10 and 15, during periods of rapid growth. There are two kinds of curves, single or “C” curves and double or “S” curves. “C” curves are slightly more common than “S” curves. The curve can occur in the upper back (thoracic), lower back (lumbar), or a combination of both.

Strength for necessary upright postures of daily life is essential. Sometimes it cannot be maintained due to a “growth spurt,” fatigue from daily postural demands or poor postural habits common among adolescents. A physical therapist can analyze a patient’s history, habits and activities which may be contributing to their curvature and symptoms. Common findings include tightness and decreased motion and strength in the hips and pelvis, causing the lumbar spine to compensate with side bending and rotation. Treatment will include muscular re-educating techniques and manual techniques to restore motion, posture training, specific strengthening and home exercises.

concussion treatment

Concussion Treatment and What to Expect

concussion treatment

Concussion Treatment and What To Expect

Physical Therapy Appointment

  • Our goal is to alleviate all concussion-related symptoms so that you may return to a normal, symptom-free life.
  • Vestibular, oculomotor, cognitive, and cardiovascular exercises will be incorporated into your treatment. Some exercises will bring on symptoms, which is normal. By introducing symptoms in a controlled manner, we are retraining the brain to adapt to these demands.
  • To monitor your symptoms while you are here, imagine that when you come in you have a “gas tank” or work capacity of 100%. We would like to work until your brain is at 50%. The goal is to fatigue your brain to make it stronger, not to make it hurt.
  • In the first 24 hours after therapy, you may experience an increase in symptoms, fatigue, and emotional changes.
  • Routine activities such as work and school may bring on symptoms. you should work until symptoms appear, then rest until they are gone. Finding your limit and not going beyond it will contribute to your success.
  • Symptoms can be limited at home, school, and work by minimizing screen time, especially at night and learning when your body and brain need to rest.
  • Exercises will slowly increase in duration and intensity as your treatment progresses and your brain begins to heal.

This information about concussion treatment was written by Rehab Associates of Central Virginia, they are dedicated to working with one another as a team across their sub-specialty practices and their physician partners. For more information click here.

More PTandMe concussions articles can be found here:


concussion physical therapy   


Physical Therapy Appointment

Types of injuries in sports: types of athletic injuries

3 Types of Athletic Injuries

Types of injuries in sports: types of athletic injuries

Did you know that most athletic injuries can be boiled down into three main categories?  Acute, Overuse, and Chronic.  Physical therapists that specialize in sports medicine, help athletes experiencing pain get back in their sport.  From the time of the injury through recovery and performance, the licensed physical therapists that partner with PTandMe have the know-how and experience to get rid of your pain.

Physical Therapy Appointment  physical therapy near me

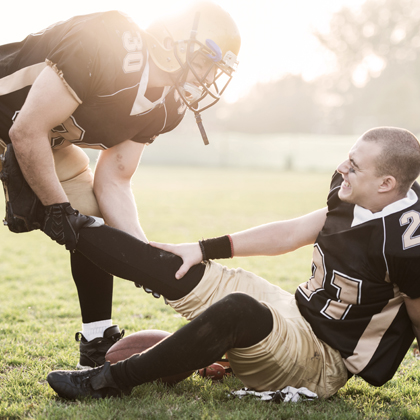
1.) ACUTE: Usually a result of a single traumatic event within the last five days. Examples: fractures, sprains, dislocations, and muscle strains.

2.) OVERUSE: Subtle and occur over time, making them challenging to diagnose and treat. Examples: swimmer’s shoulder, runner/jumpers knee, Achilles tendonitis, shin splints.

3.) CHRONIC: Usually has lasted at least three months or more.

COMMON CAUSES OF INJURIES:

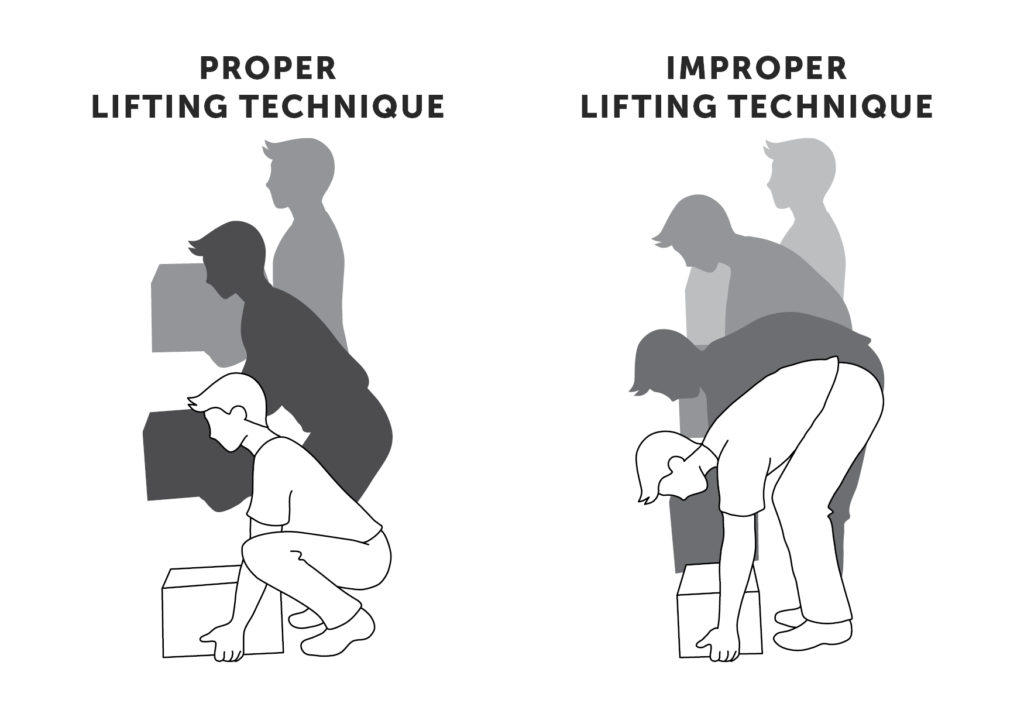
  • Improper training and technique
  • Incorrect equipment fitting and support
  • Anatomic or biomechanical issues of athlete
  • Catastrophic event on or off the field

football injury

OVERUSE INJURIES AND BURNOUT
Overuse/overtraining injuries and burnout are major problems for adolescent athletes. Both can occur when students participate in sports year-round with no “off-season”, or have insufficient recovery time between practices and games.

WATCH for typical burnout signs:

  • Pain during or after activity, or while at rest
  • Lack of enthusiasm for practices or games
  • Dip in grades

PREVENT overuse injuries and burnout with these simple tips:

  • Allow enough time for proper warm-up and cool-down routines
  • Rest 1-2 days per week or engage in another activity
  • Focus on strength, conditioning, or cross-training during the “off-season”

Did you know that 50% of all sports injuries to student-athletes are a result of overuse?

SPRAIN
Sprains result from overstretching or tearing of the joint capsule or ligament which attaches a bone to another bone.

STRAIN
Strains, also referred to as pulls, result from over-stretching or tearing a muscle or tendon, which attaches a muscle region to a bone.

CONTUSIONS
Contusions or bruises are an injury to tissue or bone in which the capillaries are broken and local bleeding occurs.

TEARS
Tears are a complete separation of the tissue fibers.

Physical therapy and athletics go hand in hand. In many cases, your PT may be a former athlete that experienced an injury in their youth, and as a result, found a passion for rehabilitating others. If you are experiencing pain, or have already had an injury, don’t wait to talk to your physical therapist. The faster you ask for help the faster you can get back into your sport.

For more information about physical therapy and sports medicine – try the links below:


This article about athletic injuries was provided by PTandMe physical therapy partner: The Center for Physical Rehabilitation. More information about the Center and its locations throughout Grand Rapids, MI can be found on its website at www.pt-cpr.com

Physical Therapy for Golfer's Elbow

Golfer’s Elbow

Physical Therapy for Golfer's Elbow (Medial Epicondylitis Pain)

Golfer’s Elbow

Golfer’s Elbow, medically known as medial epicondylitis,  is a painful condition where the tendons that attach to the inside of the elbow become inflamed due to repetitive use of the hand, wrist, forearm, and elbow. Golfer’s elbow often occurs with repetitive activities such as swinging a golf club or tennis racket, work or leisure activities requiring twisting and gripping such as shoveling, gardening, and swinging a hammer. Golfer’s elbow can also appear in other sports-related activities such as throwing and swimming. Golfer’s Elbow (Medial epicondylitis) is most commonly seen in men over the age of 35 but can be seen in any population. If these symptoms sound familiar, then going to physical therapy for golfer’s elbow may be just what you need.

Physical Therapy Appointment

What is causing your elbow pain?

Golfer’s Elbow (Medial epicondylitis) affects the group of muscles that are responsible for bending the wrist, fingers, and thumb and that rotate the wrist and forearm. The tendons that connect those muscles to the medial epicondyle (bump on inside of elbow). Tendons are made up of collagen fibers that are lined up next to each other. The repetitive forces pull on those tendons creating pain and tenderness described as Golfer’s Elbow. Without treatment, those tendons can eventually pull away from the bone. Acute injuries to your elbow can create an inflammatory response which can cause redness, warmth, and stiffness in your elbow.

Golfer’s Elbow (Medial epicondylitis) is most often caused by an abnormal arrangement of collagen fibers. This condition is called tendinosis. During tendinosis, the body doesn’t create inflammatory cells as it does during an acute injury. Instead, fibroblasts are created which help make up scar tissue to fill in the spaces between the collagen fibers. This increase in scar tissue can lead to increased pain and weakness in the tissues. Physical and hand therapy is the most common nonsurgical treatment for Golfer’s Elbow (medial epicondylitis). Your therapist will perform an evaluation where he/she will ask you several questions about your condition, pain level, and other symptoms you may be experiencing. He/she will perform motion and strength testing on your entire upper extremity. Your therapist will also palpate your arm to determine which tendon(s) may be inflamed. He/she will use special tests designed to deferentially diagnose your condition from others that may have similar presentations to Golfer’s Elbow, such as Cubital Tunnel Syndrome.

golf ball on tee

What to Expect from Physical Therapy for Golfer’s Elbow

  • Pain Management: this can include Mechanical Diagnosis & Therapy, ice, ice massage, moist heat, electrical stimulation, and ultrasound.
  • Range-of-Motion Exercises: stretches and mobility exercises to help maintain proper movement in your elbow, forearm, wrist, and hand.
  • Strengthening Exercises: progressive resistive exercises to help build strength in your arm, elbow, forearm, wrist, and hand. These can include weights, medicine balls, and/or resistance bands. This will also include your Home Exercise Program.
  • Manual Therapy: used to ensure full, pain-free movement is achieved and can include joint mobilizations, manual muscle stretches, and soft tissue massage.
  • Neuromuscular Re-education (Functional Training): used to help you return to your prior level of function for both home and work activities. This will include retraining proper movement patterns with necessary modifications based on the current level of function and patient limitations.
  • Patient Education: used to help retrain patients on proper postural control during everyday activities including dressing, self-care, work, and sports activities. This can include helping return a patient to their specific sport, such as making adjustments to their golf swing or throwing technique.

Once you’ve completed physical therapy for Golfer’s Elbow you’ll want to do everything you can to prevent this from reoccurring. This can occur by maintaining proper awareness of your risk for injury during your daily movements. Key things to keep in mind:

1. Maintain proper form during all repetitive movements both at work and at home.
2. Continue your Home Exercise Program in order to maintain proper strength in your shoulder, elbow, forearm, wrist, and hand.
3. Use proper posture and body mechanics with lifting or carrying to avoid any undue stress on your joints and tendons.

This information was written by Plymouth Physical Therapy Specialists, an outpatient physical and hand therapy group with fourteen locations in the surrounding Plymouth, Michigan area. At Plymouth Physical Therapy Specialists, they are committed to using evidence-based treatments in their practice. This means that their therapists utilize the most current and clinically relevant treatments in their approach to rehabilitation. For more information click here.

physical therapy near me