Tag Archives: safety

cold weather exercise tips

Cold Weather Exercise Tips: Running Safety

Physical Therapy Appointment

Cold temperatures and decreasing daylight hours do not mean that your outdoor running routine has to go into hibernation for the winter. Running through the cold weather can ease the winter doldrums, improve your energy level and help you to be in better shape for the spring/summer. However, it is important to follow our PTandMe cold-weather exercise tips to run safely and comfortably through wintry weather.

  • Pay attention to temperature and wind chill: If the temperature drops below zero F or the wind chill is below -20F, you should hit the treadmill.
  • Protect your hands and feet: It is estimated that as much as 30% of your body heat escapes through your hands and feet.
  • Dress in layers: It is important to start with a thin layer of synthetic material such as polypropylene, which wicks sweat away from your body. stay away from cotton as a base layer as it holds moisture and will keep you wet. If it is really cold out, you will need a middle layer, such as polar fleece for added insulation.
  • Avoid overdressing: You should feel a slight chill off your body the first 5 minutes of winter running; after that, you should warm-up.
  • Protect your head:  Wearing a hat that will help prevent heat loss is very important.
  • Do not stay in wet clothes: If you get wet from rain, snow or even from sweat in chilly temperatures, you are at risk for hypothermia. It is important that you change wet clothing immediately and get to warm shelter as quickly as possible.
  • Stay hydrated: Despite the cool weather, you will still heat up and loos fluids through sweat. The cool air also has a drying effect, which can increase the risk of dehydration. Make sure you drink water or sports drinks before, during and after you run.
  • Remember sunscreen: Sunburn is still possible in the winter. It is also important to protect your lips with lip balm.
  • Take it easy when it is frigid: The colder the temperature becomes, the greater your risk for a pulled muscle when running in the cold, so warm up slowly and run easily on very cold days.
  • Run in the wind: If at all possible, head out into the wind, so that on your return run, the wind will be at your back when you are sweaty and could catch a chill.

Looking for help with a nagging injury? Find a physical therapist near you.

physical therapy near me

For more cold-weather exercise tips to keep you safe this winter check out the articles below!

Staying Warm in Winter PTandMe  Winter Safety PTandMe  Snow Shoveling Safety PTandMe

concussion treatment

Concussion Treatment and What to Expect

concussion treatment

Concussion Treatment and What To Expect

Physical Therapy Appointment

  • Our goal is to alleviate all concussion-related symptoms so that you may return to a normal, symptom-free life.
  • Vestibular, oculomotor, cognitive, and cardiovascular exercises will be incorporated into your treatment. Some exercises will bring on symptoms, which is normal. By introducing symptoms in a controlled manner, we are retraining the brain to adapt to these demands.
  • To monitor your symptoms while you are here, imagine that when you come in you have a “gas tank” or work capacity of 100%. We would like to work until your brain is at 50%. The goal is to fatigue your brain to make it stronger, not to make it hurt.
  • In the first 24 hours after therapy, you may experience an increase in symptoms, fatigue, and emotional changes.
  • Routine activities such as work and school may bring on symptoms. you should work until symptoms appear, then rest until they are gone. Finding your limit and not going beyond it will contribute to your success.
  • Symptoms can be limited at home, school, and work by minimizing screen time, especially at night and learning when your body and brain need to rest.
  • Exercises will slowly increase in duration and intensity as your treatment progresses and your brain begins to heal.

This information about concussion treatment was written by Rehab Associates of Central Virginia, they are dedicated to working with one another as a team across their sub-specialty practices and their physician partners. For more information click here.

More PTandMe concussions articles can be found here:


concussion physical therapy   


Physical Therapy Appointment

PT can Help

Elf Injuries and How PT Can Help: Part 1 of 3

Elf Injuries_2016-11_FBsize

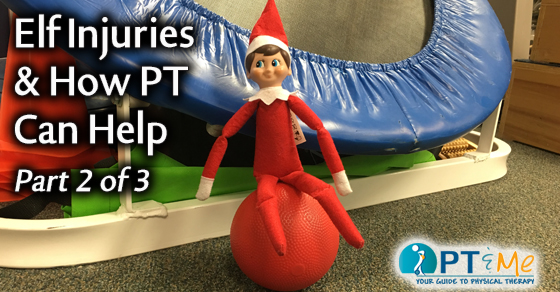
It’s that time of year, when we check in on Santa’s helpers to see if they can use some physical therapy. With their heavy lifting and high demand job they’re always experiencing injuries. Our new elf friend Ziggy, is the perfect patient for physical therapy. Let’s see how PT can help Ziggy!

Here’s part of his story…

Ziggy was working late one night in the North Pole. When all of a sudden… he lifted a large toy scooter and fell over on to his back. OUCH!

elf on PT & Me website

Luckily, Santa and his elves have an amazingly good north pole internet provider, and Ziggy was able to go online to the PTandMe website and find great physical therapy clinics in his area.

elf on pt table

Now Ziggy is at one of PT & Me’s physical therapy clinics with one of our trusted therapists to help relieve him of all his back pain. He will be back to making more toys real soon, just in time for the holiday!

See Ziggy’s complete physical therapy experience here!

elf injuries physical therapy PTandMe   Elf on the Shelf Physical Therapy

elf injuries

Special thanks to Action Physical Therapy, in Houston, TX, for accommodating the demanding work schedule of Santa’s elves. Click Here for more information about Action Physical Therapy.

Exercise Diabetes

Role of Exercise in Type 2 Diabetes

Role of Exercise in Type 2 Diabetes, Healthy Eating

Lifestyle changes play an important role in managing type 2 diabetes. Activity decreases blood glucose and regular exercise helps by improving the way your body uses glucose.It can also reduce the risk of diabetes complications like heart disease.

How it Works
Glucose is a type of sugar that is used for energy. It is present in the blood and stored in the muscle and liver. A hormone called insulin helps most of the glucose move from the blood into cells. For those with type 2 diabetes, the body is resistant to insulin and over time the body has trouble making insulin at all. As a result, glucose has trouble getting to the cells, the body doesn’t get enough energy, and glucose builds up in the blood.

During exercise your working muscles have a greater need for energy and therefore glucose. As a result, glucose can enter the muscles and cells with far less insulin. This leads to a drop in blood glucose levels during exercise and for a few hours after while the muscles recover. This causes an immediate though temporary decrease in blood glucose.

Over time, regular activity can make the body less insulin resistant during activity or rest. This can lead to more long term benefits and may lead to a decrease in the need for medication.

In addition to helping control diabetes, exercise can also improve your overall health by decreasing weight, the risk of cardiovascular disease, and blood vessel damage.

Role of Exercise in Type 2 Diabetes, Healthy Eating

Exercise Recommendations
It is important that you talk to a doctor before starting an exercise program. You and your doctor can work together to choose an exercise program that is right for you.

For greatest benefits, you will need to do both aerobic exercises and strength training. Aerobic exercises include things like walking, bicycling, and swimming. Strength training exercises and classes use things like weight machines, free weights, and resistance bands. Adults should aim for:

  • At least 150 minutes per week of moderate-to-vigorous intensity aerobic exercise
  • 2-3 days of strength training per week
  • Try not to go more than 2 days without some type of activity

Look for opportunities during the day to add to your overall activity level. Take the stairs instead of the elevator, take a short walk during the day, or walk instead of taking the car. Even 10 minutes of activity can provide some immediate benefits.

Safety Steps
Certain diabetes medication can lead to a dip in blood glucose called hypoglycemia. Talk to your doctor to understand if this may be a problem for you. Be aware of signs of hypoglycemia during exercise such as dizziness, shaking, or confusion. If you have these symptoms, stop exercising and manage hypoglycemia. Let your doctor know about any episodes, since your medication may need to be adjusted.

Diabetes can also affect the nerves and blood flow to the feet. Inspect your feet frequently, since diabetes can sometimes lessen your ability to feel pain from a foot injury.

Keep in mind that exercise is only one piece of an overall diabetes management plan. You will also need to control your blood glucose levels with good nutrition.

by Cynthia M. Johnson, MA

RESOURCES:
American Diabetes Association
http://www.diabetes.org

Centers for Disease Control and Prevention
http://www.cdc.gov

CANADIAN RESOURCES:
Health Canada
http://www.hc-sc.gc.ca

Public Health Agency of Canada
http://www.phac-aspc.gc.ca

REFERENCES:

Physical activity for type 2 diabetes. EBSCO DynaMed Plus website. Available at: https://www.dynamed.com/topics/dmp~AN~T270048/Physical-activity-for-type-2-diabetes. Accessed February 20, 2017.

Physical activity is important. American Diabetes Association website. Available at: http://www.diabetes.org/food-and-fitness/fitness/physical-activity-is-important.html. Updated December 27, 2016. Accessed February 20, 2017.

What we recommend. American Diabetes Association website. Available at: http://www.diabetes.org/food-and-fitness/fitness/types-of-activity/what-we-recommend.html. Updated May 19, 2015. Accessed February 20, 2017.

How to Manage Your Type 2 Diabetes with Diet. Available at: https://www.jenreviews.com/diabetes/ Accessed November 2018

Last reviewed December 2017 by EBSCO Medical Review Board Michael Woods, MD, FAAP  Last Updated: 12/22/2017

EBSCO Information Services is fully accredited by URAC. URAC is an independent, nonprofit health care accrediting organization dedicated to promoting health care quality through accreditation, certification and commendation.

Fall Prevention Physical Therapy

Physical Therapy for Balance & Fall Prevention

“Falls are the leading cause of injury death for Americans 65 years or older. Each year, about 35–40% of adults 65 and older fall at least once.”
— Center for Disease Control

Physical Therapy for Fall Prevention
Physical therapy fall prevention programs are tailored around each individual’s needs. The length of the program is dependent on the severity of the symptoms and the goals of each individual. Most patients will follow a gradual path of three distinct phases. After an initial evaluation to determine needs and goals of patient and we will set up treatment plan with patient input. The first phase typically includes therapeutic interventions designated to decrease symptoms and the establishment of a Home Exercise Program (HEP). We will then Continue the use of therapeutic interventions with the addition of ADL modifications, and energy conservation techniques. Finally we will continue the program until the patient’s goals are met.

The main objectives in a fall prevention program are to:

  • Increase independence with Activities of Daily Living (ADLs)
  • Increase independence with functional mobility
  • Decrease fall risk
  • Prevent future fall
  • Increase safety

Pain Relief
Our PTandMe licensed physical therapists are skilled in helping patients significantly reduce the risk of falls so that seniors can continue to age independently. If you or someone you know may benefit from a fall prevention program – call a clinic near you today and see what options are available for you! To find a PTandMe partnering location in your area click here.

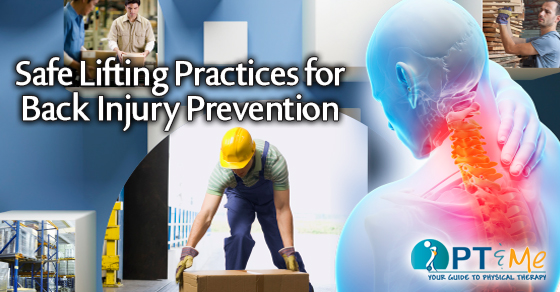
Safe Lifting Practices for Back Injury Prevention

Lifting Safety: Safe lifting practices for back injury prevention.

Whether at home or at work safe lifting practices can keep your back healthy and safe. Before lifting heavy objects decide how you will lift carry & place the item before you pick it up. Test the weight of the load by moving or tipping it. Figure out if you can break the load down by placing the contents of large containers into a number of smaller ones before moving them. Is the path clear? What is the weight of the load? How much stress will be placed upon your back? Is there traffic, a tripping hazard, a doorway to go through, or a stairway to go up or down? Avoid carrying an object that requires two hands to hold, either up or especially down a flight of stairs. Use the elevator. Plan a rest stop, if needed. Knowing what you’re doing and where you’re going will prevent you from making awkward movements while holding something heavy. Clear a path, and if lifting something with another person, make sure both of you agree on the plan.

KEY STEPS FOR SAFE LIFTING PRACTICES

Establish a Base of Support: Use a wide, balanced stance with one foot in front of the other. Make sure that you have firm footing and that your feet are a shoulders-width apart. This staggered stance gives you the stability of not falling over and being able to secure the load.

Keep Your Eyes Up: Looking slightly upward will help you maintain a better position of the spine. Keeping your eyes focused upwards helps you keep your back straight.

Get a Good Grip: With your palms and make sure you have an adequate hold on the object. Be certain you will be able to maintain a hold on the object without having to adjust your grip later. You can use gloves to help maintain an adequate grip, but don’t rely on gloves because they can desensitize the fingers and make you unable to feel the object.

Lift Gradually with Your Legs: Without using jerky motions. By using your leg strength, your chance of lower back injury is greatly reduced.

Tighten you stomach muscles: As you begin the lift and keep you head and shoulders up.

Pivot – Don’t Twist: Move your feet in the direction of the lift. This will eliminate the need to twist at the waist.

Weight: A lighter load normally means a lesser risk of injury. The weight of the object should be within the capacity of the person to handle safely.

Handling: It is easier to pull or push a load than it is to lift, put down or carry.

Keep the Load Close: Holding a 20lb object with your hands 20 inches from the body creates more compressive force on your low back than holding it 10 inches away. This is because the muscles in your back have to work to counterbalance the weight when it is further from the body. As the compressive force on your low back increases, so does the risk of muscle strains, ligament sprains and damage to the disks in the spine.

Frequency: The more times a load is handled, the more tired the muscles become, making it easier for the person to be injured.

Distance: The farther the load has to be moved, the greater the risk of injury.

Duration (TIME): Where the job involves repetitive movements, reducing the time spent on handling will help to ensure the movements are not causing unnecessary strain.

Forces Applied: Forces should be applied smoothly, evenly and close to the body. Forces exerted should be well within the capacity of the person, and the person should maintain proper posture.

Nature of the Load: Loads that are compact, stable, easy to grip, and capable of being held close to the body are much easier to handle.

Terrain: Rough ground, steep slopes, slippery and uneven floors, stairs and cluttered floors make moving a load awkward and increase the chance for injury.

Environment (Climate & Lighting): If it is too hot, too humid, too cold or the lighting is inadequate, the capacity to work safely is reduced.

Condition of the Workplace: Safe and comfortable working conditions, with adequate space to perform the task, and tools and equipment that are well-maintained, make their job safer.

Age/Gender: Young and old workers alike may be at an increased risk of injury from manual materials handling activities. Ensure abilities of employees are in line with functional job requirements.

Training: Proper training for the specific task is vital to reduce injury.

Team Lifting: If one person cannot lift or move a heavy, large or awkward object safely, organize a team lift. Team lifting reduces the risk of injury, reduces fatigue and makes the task much easier.

Raise/Lower Shelves: The best zone for lifting is between your shoulders and your waist. *Put heavier objects on shelves at waist level, lighter objects on lower or higher shelves.

Avoid Lifting from the Floor: Lifting from the floor can greatly increase your risk of injury for two reasons. Firstly, it is difficult to bring objects close to your body when picking them up from the floor, especially large objects where your knees can get in the way. Secondly, your low back must now support the weights of your upper body as you lean forward, in addition to supporting the weight of the item you are lifting. Lifting the same 20lbs from the floor more than doubles the amount of force on your low back when compared with lifting is from waist height. Even a one pound object lifted from the floor increases you risk of injury if you use a bent over posture.

Get Help When You Need It: Don’t try to lift heavy or awkward loads on your own. Even though the muscles in your upper body may be strong enough to handle the load, the muscles, ligaments and disks in your lower back may be injured because of the additional forces they have to withstand. Get help from a co-worker, and whenever possible, use a cart, hand truck or other mechanical device to move the load for you.

This content was written by Fit2WRK who has partnered with PT and Me to give a comprehensive look into the services physical and occupational therapists provide. For more information on Fit2WRK click here.

Protect Yourself from Tickborne Illnesses


They may be small, but the bite from just one infected tick can cause symptoms that range from fever and chills to severe infections. However, you can protect yourself from tickborne illnesses, such as Lyme Disease and Rocky Mountain spotted fever, by avoiding areas where ticks are present and preventing ticks from getting on your body.

AVOID TICK HABITATS
Ticks can be found in the northeastern, northwestern, mid-Atlantic, or upper north-central regions of the United States. They are most active in warmer months from April to September. However, they can be active when temperatures are above 40°F (4.4°C).
Tips for reducing your exposure to ticks include:

  • Avoid moist, shaded, wooded, or grassy areas.
  • Stay on cleared, well-traveled paths, and walk in the center of trails to avoid overgrown grass and brush.
  • Avoid sitting on the ground or on stone walls.
  • You can discourage ticks from your property if you:
  • Remove leaf litter, brush, and woodpiles from around your home and the edges of your yard.
  • Mow the grass often.
  • Discourage animals that carry ticks from coming onto your property.

PREVENT TICKS FROM GETTING ON YOUR BODY
Proper clothing can help protect you from tick bites when you enter areas that may have ticks. When spending time outdoors:

  • Wear long pants and a long-sleeved shirt. Light-colored clothing will make it easier for you to see any ticks that may get on you.
  • Tuck your shirt into your pants and tuck your pants into your socks.
  • Wear a hat. Braid or tie back long hair.
  • Wear closed toed shoes.

Insect repellant can also prevent tick bites. Repellents containing 20%-30% N,N-diethyl-meta-toluamide (DEET) can be applied to clothes and exposed skin. Repellents that have 0.5% permethrin can be applied to pants, socks, and shoes, but not to skin. Be sure to read product instructions carefully. For example:

  • Do not apply near your eyes, nose, or mouth.
  • Do not apply to children’s hands.
  • Reapply as directed.
  • Wash your skin when you return indoors.

PERFORM TICK CHECKS
After you spend time outdoors in a high-risk area:

  • Use a mirror to do a full-body tick check on yourself. You should also check any children who are in your care. Make sure to check for hidden areas, such as the hair, around the ears, under the arms, and in skin folds.
  • Examine your clothing for ticks that may attach to you after you come home.
  • Take a shower and wash your hair within 2 hours of coming indoors.
  • Put clothes worn outdoors in the dryer on high heat for 10 minutes to kill any unseen ticks.
  • If you have pets that spend time in high-risk areas, perform daily tick checks to prevent them from spreading to humans.

REMOVE TICKS FROM YOUR BODY

  • If you do find a tick, remove it by doing the following:
  • Use a pair of fine-pointed tweezers to grasp the tick by the head, as close to the skin as possible.
  • Pull directly outward. Use gentle but firm force. Do not twist the tick out. Try not to crush the tick’s body or handle it with bare fingers. This can spread the infection.
  • Wipe the site with an antiseptic to prevent infection.

KNOW THE SIGNS OF TICKBORNE ILLNESSES

Symptoms of a tickborne illness can occur weeks after exposure. Even if you have taken precautions, be sure to contact your doctor right away if you have recently spent time in a high-risk area and have fever and chills, aches and pains, and a distinctive rash.

by Cynthia M. Johnson, MA

RESOURCES:
Centers for Disease Control and Prevention
http://www.cdc.gov

Healthy Children—American Academy of Pediatrics
https://www.healthychildren.org

CANADIAN RESOURCES:
Canadian Paediatric Society
http://www.cps.ca

Health Canada
http://www.hc-sc.gc.ca

REFERENCES:

Preventing ticks on your pets. US Centers for Disease Control and Prevention website. Available at: https://www.cdc.gov/ticks/avoid/on_pets.html. Updated June 1, 2015. Accessed March 24, 2017.

Symptoms of tickborne illness. US Centers for Disease Control and Prevention website. Available at: https://www.cdc.gov/ticks/symptoms.html. Updated June 1, 2015. Accessed February 20, 2017.

Tick avoidance and removal. EBSCO DynaMed Plus website. Available at: https://www.dynamed.com/topics/dmp~AN~T901539/Tick-avoidance-and-removal. Accessed February 20, 2017.

Michael Woods, MD June 2017

Last reviewed June 2017 by Michael Woods, MD

EBSCO Information Services is fully accredited by URAC. URAC is an independent, nonprofit health care accrediting organization dedicated to promoting health care quality through accreditation, certification and commendation.

Baby Mechanics

BabyMechanics_FBsize

Proper lifting mechanics is important for everyone, especially for a new mom. Caring for a young child/infant significantly increases the strain to one’s low back. Luckily, there are steps that one can make to decrease that strain and reduce the risk of injury.

Always remember to: lift the child/infant close to you and bend through your legs versus your back.

As your baby begins to gain more independence and mobility, lower the height of his mattress to keep him safe. Be aware that the lower mattress height can increase strain on your back, so lower the mattress height as gradually as possible. When lifting your baby in or out of the crib, keep baby as close to your body as possible while keeping your back straight and bending through your legs. For older babies, help him get into a sitting position before lifting him out of the crib. Once baby can stand, lift him out of the crib from a standing position.

Just like lifting baby out of the crib, keep her as close to you as possible, bend through your legs and keep your back straight. Keep your abdominal muscles tight as you lift her up. If possible, get into a deep squat position to lower your center of gravity before picking up baby.

Avoid the “hip shift” position with baby propped on one hip while shifting your body to that side. Instead hold baby in front of you with his legs out on either side of you. If you are going to be holding baby for an extended period of time, use a baby carrier to keep your baby supported in a neutral alignment.

Tummy time isn’t just good for babies! During tummy time, get down on your stomach too. Stretching out on your stomach is good for you, and it also allows you to better interact with your baby.

During story time, be aware of your posture and always sit up straight. Place a pillow behind your back for extra support.

Use a nursing pillow under baby to help prop her up closer to you. Bring baby to you instead of leaning forward towards her to avoid strain. Placing a pillow behind your back can provide extra support and help you maintain the proper posture. If you are bottle feeding or for older babies, place a pillow under the arm that is supporting baby’s head to decrease the strain on your shoulder and neck. Although making eye contact with baby during a feeding can help strengthen your relationship with baby, it can cause strain on your neck. Be sure to bring your head to a neutral position throughout the feeding to decrease the tension on your neck.

baby car seat

When lifting a car seat, be sure to keep the car seat as close to your body as possible. Bend through your legs and keep your abdominal muscles tight as you pick up the car seat. Instead of carrying the car seat in one hand at your side, use both hands to hold and carry the car seat in front of you whenever possible.

Getting the car seat in and out of the car can be tricky. Remember to keep the car seat as close to your body as possible, keep your abdominal muscles tight and your back straight. If your car seat is placed in the middle position in your car, put one leg up into the car to protect your back while keeping the car seat close to your body.

This information was written by Metro Spine & Sports Rehabilitation, an outpatient physical therapy group with locations in the Chicago Loop and Lakeview areas. At Metro Spine & Sports Rehabilitation, their number one priority is the patient. For more information click here.
soccer injury

Returning from a Soccer Injury

Returning from Soccer Inury_FBsize

Soccer is the most played sport in the world and is the number one sport in many countries. It is a great cardiovascular workout that combines aerobic and anaerobic movements. However, due to the sudden changes in pace and the speed at which the game is played there is a high chance of a soccer injury.

Sports injury expert Dr. David Geier reveals that that the six most common soccer injuries are ankle sprains, joint fractures, anterior cruciate ligament (ACL) tear, meniscus tear, adductor strain, and hamstring strains. These injuries are due to the amount of stress a soccer player will put on their leg joints. The good news is that through physical therapy these injuries can be recovered from.

Ankle Sprains
The ankle sprain is the most common and least serious soccer injury. The most common recovery method is to put ice on the ankle to stop the swelling, strap it, and lightly exercise it through physical therapy. One effective motion exercise is to sit on a chair with the foot flat on the floor and gently move the knee from side-to-side to stop it becoming stiff. A player should be out for a maximum of six weeks.

ACL
An ACL soccer injury can leave a player out of the game for much longer. For example, an ACL tear may require surgery (making a new ligament) in order to return to the pitch. While surgery may be required, physical therapy is definitely needed to help rebuild knee strength. The exercises will include mobility and strength exercises such as knee flexion and extension, heel slides, and isometric quadriceps exercises. As the knee joint gets stronger, plyometric drills will be introduced to the therapy to see whether the knee is strong enough to play competitive sport. These exercises may include resistance band jumps, hopping exercises and box jumps.

soccer_injury

Hamstring Strains
After knee and ankle injuries the next most common injury are hamstring strains. These are often caused through a combination of sudden explosive moments and overuse. We have all seen a soccer, football, or basketball player burst forward only to suddenly stop and crumple to the ground. That is nearly always a hamstring injury. Depending on which grade of hamstring injury the player has will change the therapy needed. If it is a grade one injury then as the muscle slowly heals the player will use ice alongside resting. Function training will also be required to regain strength and flexibility. A grade two or three injury may require surgery.

Career Threatening Injuries
A career threatening injury is the biggest risk of playing soccer. However, there is hope for injured and senior soccer players. Walking Soccer, which was developed in 2011 in England, according to British newspaper The Telegraph, allows those with mobility injuries to keep playing. As the name suggests running is outlawed, which in turns takes much of the risk and pressure off of the leg joints that can be easily injured.

The new game has been endorsed by English soccer legends such as Alan Shearer, who according to journalist Dan Fitch who works for news site Betfair Soccer who preview the Champions League fixtures in Europe, is the third fastest player to score 50 goals in the English Premier League. Shearer himself is retired and told The Telegraph that after retiring he couldn’t play the sport he made his name in due to persistent injuries. Walking Soccer has allowed Shearer and other ex-pros to play without the worry of injuries or heavy contact from other players. For amateurs and professionals alike walking soccer is a godsend.

Soccer injuries can be serious and more often that not require physical therapy to recover from. Even if you have suffered a serious injury there is still hope through new sports such as Walking Soccer.

Total Knee Replacement Prehab: Move to Improve Your Outcomes

Total Knee Replacement_FBsize

Many people with arthritis favor their joints over time in an effort to relieve pain and thus become weaker in their leg muscles or lose range of motion. However, the better shape you are in before surgery the better your results will be after surgery so it is important to strengthen your leg muscles and work on your range of motion. Before surgery your physical therapist will teach you appropriate exercises to help improve strength, range of motion, and balance. They will also teach you how to walk with an appropriate assistive device such as a walker or cane in the immediate post operative recovery period. Finally, they will discuss precautions and advise you in a few short term home adaptations such as removing loose rugs to help make your recovery easier and safer.

Prehab Goals
• Develop an exercise program with your PT to help you
• Improve strength
• Improve range of motion
• Improve balance
• Gait training — Review walking with an appropriate assistive device such as a walker or cane in the immediate post operative recovery period
• Discuss precautions and review a few short term home adaptations that can help make your recovery easier and safer

walker lady

Pre Surgery Exercise Plan
Make every effort to begin these exercises as early as possible before your surgery. Only do what you are able to do without increasing your pain. It is important for you not to exacerbate your pain prior to surgery. Ice packs for 15 minutes following your exercises may be helpful to reduce any soreness in your knee.

This information was written by STAR Physical Therapy, an outpatient physical therapy group with 60 locations in Tennessee, offering more than 15 comprehensive specialty services. STAR Physical Therapy was established in 1997 with one clinic and one mission – to serve. Today, they’ve grown to offer that direct service in more than 60 clinics. While they’ve grown, one thing that has not changed is their commitment to you, their communities, and their employees. For more information click here.

More about knee replacements and physical therapy can be found here:

total knee replacement