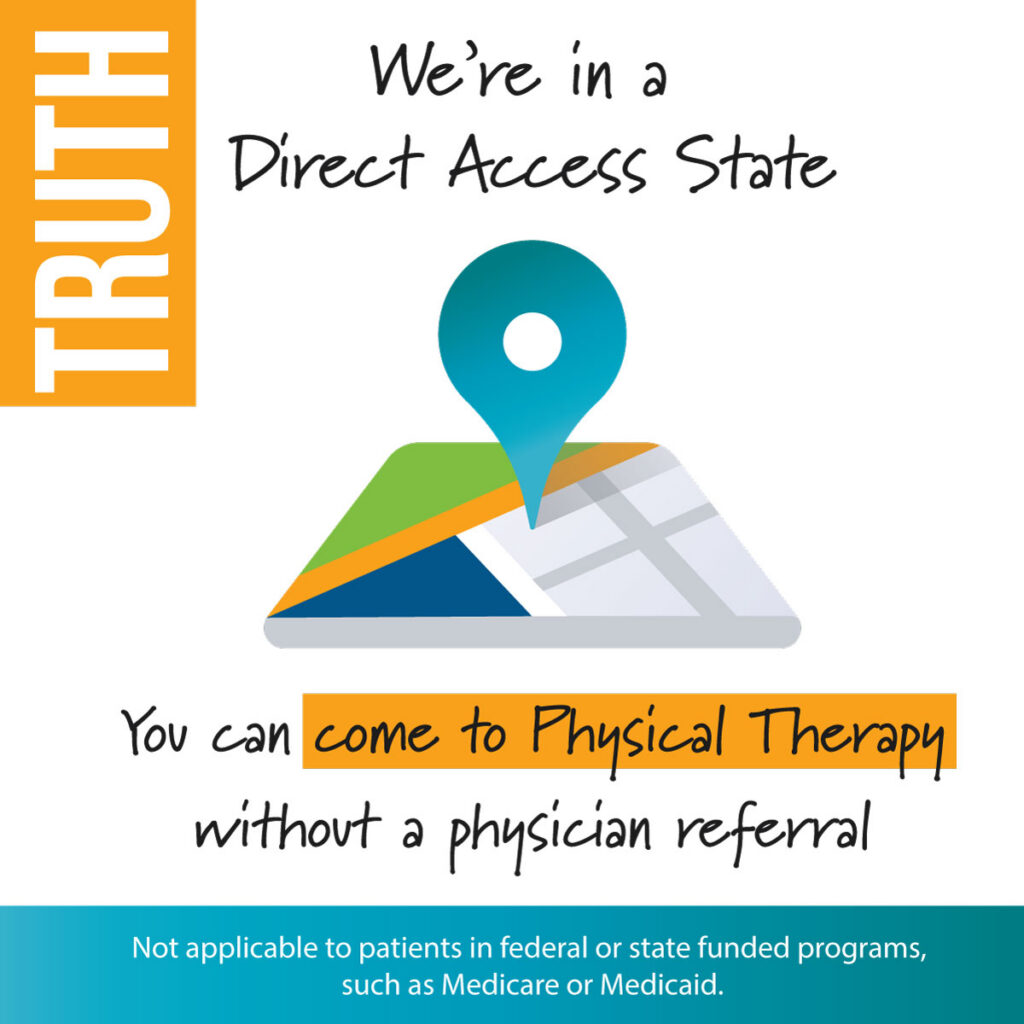


Did you know that all 50 states allow patients to be treated by a qualified physical therapist without a physician referral?
It is called Direct Access to Physical Therapy, and most of our PTandMe partnering locations are able to provide direct access to physical therapy to your community.
* Not applicable to patients in federal or state-funded programs, such as Medicare, Medicaid, or Tricare
You Have Direct Access to Licensed Physical Therapists
Quality and consistency of care are the cornerstones of our partnered clinics. Everything the clinics do is directed towards developing and fostering these behaviors. Quality means doing things that work. Licensed physical therapists design programs of care that have been proven to be effective treatment interventions. You can expect individualized, hands-on care.
An Evaluation with a PT Can Cut Down on Wait Times and Costs
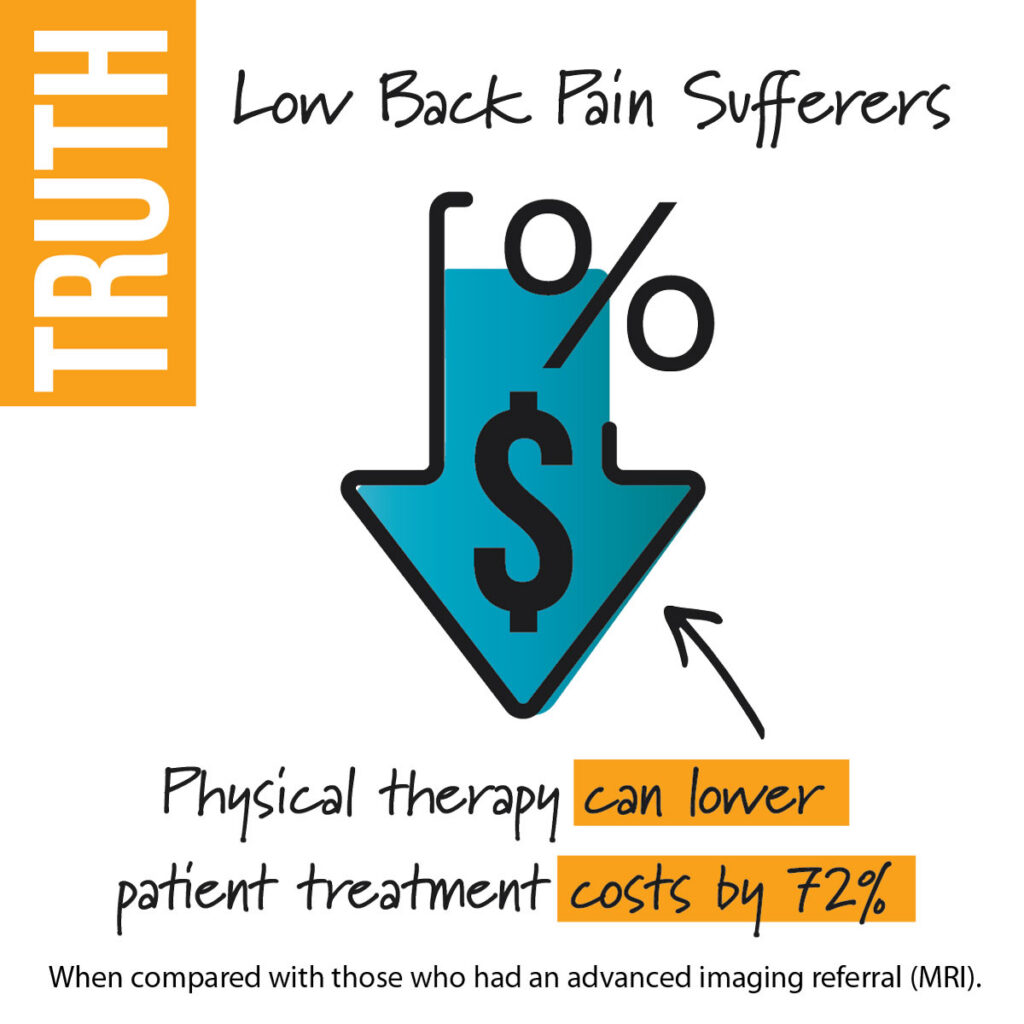
Your well being is our primary concern. Our direct access physical therapy clinics will always do what is best for you. After your initial physical therapy evaluation, your physical therapist will recommend the appropriate plan of care for you. They will not waste your time or money if physical therapy is not your best option for a full and quick recovery. In fact, According to a study published in the journal Health Services Research, using physical therapy as a first management strategy actually resulted in 72% fewer costs within the first year.
Our Physical Therapists Have Physician Relationships
Our partnered direct access physical therapy clinics have wonderful relationships with numerous physicians in and around your community. If you choose to receive physical therapy via direct access, your therapist will communicate appropriately with your physician at your discretion. If you are new to the area or you do not have a physician and need one, they will be happy to help facilitate a referral to a doctor for you.
For more information about direct access physical therapy and to see if your state participates, go here:
This article was written by STAR Physical Therapy – with over 65 locations throughout TN. For more information on STAR Physical Therapy, visit them online at www.STARpt.com
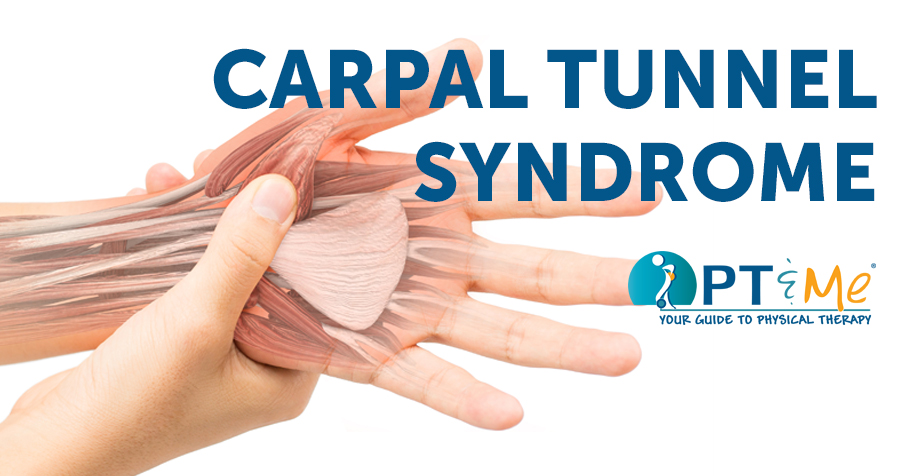
What is Carpal Tunnel Syndrome (CTS) and Why Does it Hurt So Much?
The carpal tunnel is a small space at the wrist in which the median nerve and nine tendons pass through. The median nerve travels on top of the tendons through the tunnel. The tunnel itself is made up of your wrist bones and along the top of the tunnel is a thick fibrous ligament called the transverse carpal ligament. If the tendons become swollen (tenosynovitis) or if the tunnel size itself decreases because of injury, compression to the median nerve can occur. Symptoms of Carpal Tunnel Syndrome may include: pain during pinching and gripping, a feeling of clumsiness – the inability to hold things, numbness in the fingers at night, or a radiating pain up the arm.
Common risk -factors that lead to Carpal Tunnel Pain
Repetition – Overuse can occur with light forces. Irritation of the tendon can be caused by rapid, repetitive activity without a break. Decreased blood flow to the nerves and tendons may be caused by holding or gripping an object without relaxation.
Force – The muscles of the hand and fingers are contracted when gripping or pinching. These contractions place stress on the tendons that go through the carpal tunnel. Higher forces are more likely to expose you to greater risks.
Bending – The tendons in the carpal tunnel can be irritated by bending your hand. Bending your hand up, down, or sideways may inflame the tendons in the carpal tunnel.
Vibration – Nerves are especially susceptible to vibration. Common causes of vibration of the nerves in the carpal tunnel are power tools, steering wheels, or other mechanized equipment.
Impact – Your hand is not a tool. Hitting, moving, or jerking objects may damage the structures of the wrist. Even using a hammer transmits sudden force to these delicate structures.
Hormonal Changes during Pregnancy and Peri/Menopause – Estrogen acts as an anti-inflammatory, so when levels fluctuate or drop – women are more likely to experience CTS
How to Manage Carpal Tunnel Pain at Home
Reducing risk factors
Look carefully at your equipment and tools and try to eliminate the forces that are risk factors. This can include bending, vibration, impact, and repetition.
Tool Handles – A handle should have an optimum grip span of about 2 ¼ inches.
Gripping Surface – Use rubberized coating or tubing on your gripping surface. This will lower the grip strength required to hold onto the tool.
Reduction in vibration – Place a rubber or gel material on the handles or utilize gloves with rubber inserts to reduce vibration.

Resting the Wrist
Ice – Use an ice pack on the palm and wrist area for 10 minutes after intensive hand activities. This can be followed by the wrist stretches.
Rest – Rest your hands after frequent, forceful, or repetitive activities that last 30 – 60 minutes. Try doing a different activity which is not as stressful to your wrist and hand.
Stretches that can Relieve Carpal Tunnel Pain
Adopt a nerve and tendon gliding exercise program. Do these regularly
Nerve Gliding Exercises
Tendon Gliding Exercises
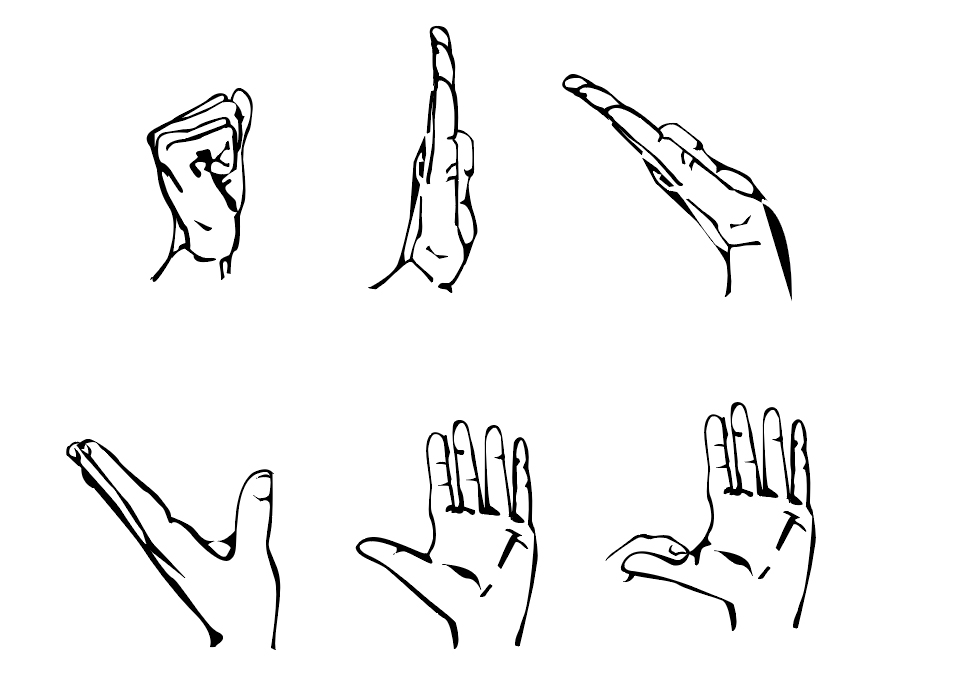
Tendon glides promote smooth movement of the tendons through the carpal tunnel. This helps improve mobility and blood flow in the wrist, helping to relieve pain. Start by sitting and resting your elbow on a flat surface and holding your hand straight up and down. For each of the poses below, you’ll return to this starting position each time. Hold each pose for a count of two and do them 10 times each, 3 times a day.
Hook: Bend the top two joints of your fingers down while keeping the thumb straight
Tabletop: Lower your fingers into a plank taking care not to bend them
Straight Fist: create an open fist, keeping your thumb up and straight
Fist: Close your hand into a fist with the thumb curling around the outside of your fingers
If your Carpal Tunnel Syndrome pain does not subside, call your physical therapist to schedule an appointment. Physical therapy may be able to reduce pain and remove the need for surgery.
Did you know that most athletic injuries can be boiled down into three main categories? Acute, Overuse, and Chronic. Physical therapists that specialize in sports medicine, help athletes experiencing pain get back in their sport. From the time of the injury through recovery and performance, the licensed physical therapists that partner with PTandMe have the know-how and experience to get rid of your pain.
1.) ACUTE: Usually a result of a single traumatic event within the last five days. Examples: fractures, sprains, dislocations, and muscle strains.
2.) OVERUSE: Subtle and occur over time, making them challenging to diagnose and treat. Examples: swimmer’s shoulder, runner/jumpers knee, Achilles tendonitis, shin splints.
3.) CHRONIC: Usually has lasted at least three months or more.
COMMON CAUSES OF INJURIES:
Improper training and technique
Incorrect equipment fitting and support
Anatomic or biomechanical issues of athlete
Catastrophic event on or off the field
OVERUSE INJURIES AND BURNOUT
Overuse/overtraining injuries and burnout are major problems for adolescent athletes. Both can occur when students participate in sports year-round with no “off-season”, or have insufficient recovery time between practices and games.
WATCH for typical burnout signs:
Pain during or after activity, or while at rest
Lack of enthusiasm for practices or games
Dip in grades
PREVENT overuse injuries and burnout with these simple tips:
Allow enough time for proper warm-up and cool-down routines
Rest 1-2 days per week or engage in another activity
Focus on strength, conditioning, or cross-training during the “off-season”
Did you know that 50% of all sports injuries to student-athletes are a result of overuse?
SPRAIN
Sprains result from overstretching or tearing of the joint capsule or ligament which attaches a bone to another bone.
STRAIN
Strains, also referred to as pulls, result from over-stretching or tearing a muscle or tendon, which attaches a muscle region to a bone.
CONTUSIONS
Contusions or bruises are an injury to tissue or bone in which the capillaries are broken and local bleeding occurs.
TEARS
Tears are a complete separation of the tissue fibers.
Physical therapy and athletics go hand in hand. In many cases, your PT may be a former athlete that experienced an injury in their youth, and as a result, found a passion for rehabilitating others. If you are experiencing pain, or have already had an injury, don’t wait to talk to your physical therapist. The faster you ask for help the faster you can get back into your sport.
For more information about physical therapy and sports medicine – try the links below:
This article about athletic injuries was provided by PTandMe physical therapy partner: The Center for Physical Rehabilitation. More information about the Center and its locations throughout Grand Rapids, MI can be found on its website at www.pt-cpr.com

Recently concerns regarding appropriate training for our adolescent athletes has surfaced. Issues such as how much, how soon, or how specialized are addressed in our commonly heard questions below.
When Can My Athlete Start Lifting Weights?
The NSCA’s position statementstates pre-adolescence (7-8 y/o) is a safe age to begin resistance training with graduated modalities and loads. Basically, if the athlete is ready for organized sports, they are ready for some kind of resistance training.
What Should I Look for in a Strength Training Program
It’s important to note that the type of programming is dependent on the athlete’s age and physical abilities.
7-10 Year Old or Beginner
Geared towards “free play”
Activities that challenge balance, coordination, and speed
10-14 Year Old or Intermediate Focus on Technical Form
Mastering body weight exercises
Introduction into resistance
14-18 Year Old or Experienced
Increase in difficulty
Maintain a focus on functional form
Higher external forces while maintaining proper technique
Signs that My Athlete is Overtraining
Ongoing decreased performance on field
Often injured or sick
Disengagement from sport and school
Mood swings
Physically tired all the time
Sleep issues
Overreactive emotional response to failure
Depression
Nutrition issues
A strength training and conditioning specialist can screen each athlete’s movements in order to determine a baseline level of movement and strength. They then develop exercises and drills that will enhance the good movement qualities while addressing any bad motor patterns that may exist. Main components that are often noticed by trained professionals are mobility(flexibility) and stability (strength) issues.
This article Written by The Center for Physical Rehabilitation at the Academy for Sports & Wellness, please visit: www.pt-cpr.com/academy
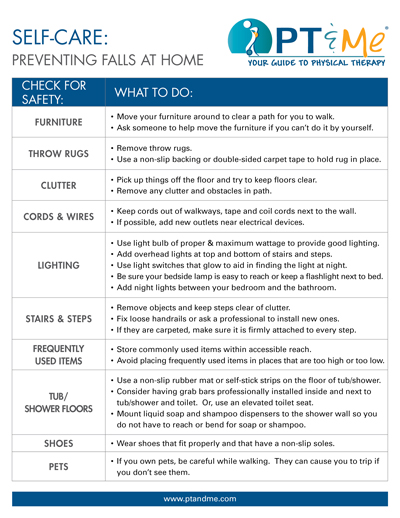
While falls can happen anywhere, more than half occur in the home. One in every three adults 65 and older fall AT HOME each year in the U.S. One of the easiest ways to help prevent a fall is to make sure that specific tripping hazards are addressed and removed. We’ve compiled a short list below to help you get started.
COMMON WARNING SIGNS FOR FALLING ARE:
Feeling pain or stiffness when you walk
Needing to walk slower or to hold on to things for support
Feeling dizzy or unsteady when you get up from your bed or chair
Feeling weak in your legs
You take more than one medication
You have problems seeing
You have had at least one fall in the past year
RISKS TO CONSIDER WHEN FALL-PROOFING YOUR HOME:
Lighting
Is the lighting adequate, especially at night?
Are stairwells well-lit?
Is there a working flashlight in case of power failure?
Can lights easily be turned on even before entering
a dark room?
Surfaces
Are there any wet surfaces that are frequently wet?
Are steps and stairs in good repair and the
appropriate rise?
Do steps have handrails in good repair?
Trip Hazards
Are there throw rugs in the walking path?
Does the family pet often sleep in walking paths?
Is the carpet in good repair without tears or fraying?
Are there extension cords or raised door sills in the walking paths?
Is there a clear path from the bed to the bathroom?
If you feel that you are at risk for falls, talk to your physical therapy provider. Most physical therapy clinics offer fall risk assessments that can help determine any areas of risk. By participating in a fall prevention program, you can reduce the likelihood of a fall and increase the ability to live independently. Fall prevention programs mainly focus on core strength, flexibility, and patient education.

For more information about balance and fall prevention click the links below:
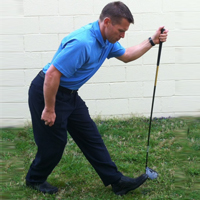
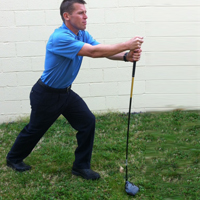
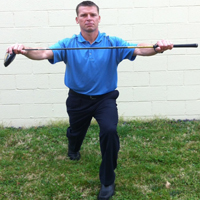
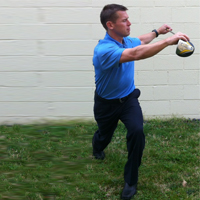
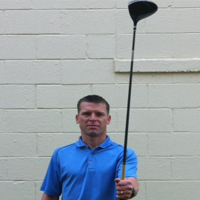
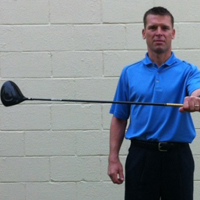
Golf requires strength, flexibility, endurance, and power to create pain-free movement and improve your game. The most common golf injury is low back pain followed by shoulder pain and knee pain. A physical therapist can assist you in improving your pain and correcting your body’s deficits. These golf stretches will make your golf game less painful and reduce those extra strokes:
Hamstring Stretch
(move from upright into stretched position 10x)
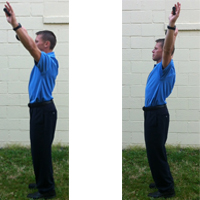
Back Extension Stretch
(hold club backwards overhead, repeat 10x)
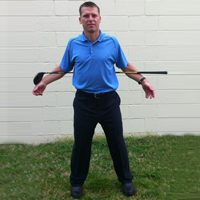
Hip/Back/Shoulder Rotation Stretch
(hold club behind back and rotate torso to each side 10x)
Calf Stretch
(move from upright into stretched position 10x)
Lumbar Spine Rotation
(hold club, plant feet as shown, rotate to each side 10x)
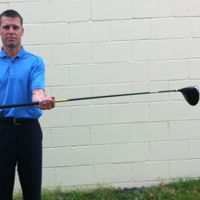
Forearm Rotation
(hold club straight up, then rotate to each side 10x)
This information was written by Mishock Physical Therapy and Associates, a privately-owned, outpatient physical therapy practice operating in southeast Pennsylvania. They actively participate in the community by providing services to schools, retirement communities, and local businesses. Their mission is to provide the most efficacious, state-of-the-art physical therapy services to relieve pain, restore function and return you to the highest quality of life possible. For more information click here.
It’s that time of year again. Time to exchange snow shovels and winter boots for gardening tools and watering cans. While the warmer weather brings on a new sense of happiness and energy, we need to remember to use proper body mechanics and follow general safety to avoid muscle aches and potentially serious injuries. The number one injury associated with gardening is low back pain. If you have experienced a recent injury or pain, we can help you recover.
Here are a few tips to make your gardening experience more enjoyable and less painful.
LIFTING:
Lifting heavy objects such as bags of soil, planters, and mulch improperly can lead to low back strains and/or sciatic pain. Other options include moving half of the soil/mulch to a separate pot before lifting the bag or planting into smaller pots that are easier to maneuver. Using a garden cart or wheelbarrow can also assist with moving heavy gardening materials. Remember to lift with your legs, avoid simultaneous lifting and twisting and keep heavier objects close to your body to avoid injury.
PLANTING:
Prepping the soil can also be a difficult and tedious task requiring prolonged forward bending and frequent changes in position. Try prepping the planting bed by using long-handled gardening tools. Once the soil is ready, plant from a kneeling position using either a kneeling stool or a cushion. Remember to avoid twisting the spine. Those with known chronic low back pain may want to consider planting into pots, flower boxes, or raised flower beds to avoid further injury.
WEEDING:
Most people dislike weeding their gardens and flower beds. Options to reduce the need to do so include using plants as ground cover or using mulch in your flower beds to minimize weed growth. If using a weed spray, look for bottles that have a sprayer hose to allow you to stand upright while treating your problem areas. Depending upon your fitness and capability levels, we have 3 ways to pull out weeds without injuring your back. No matter which option you choose, you need to: Stretch before you get started, Take breaks, and Never twist your back. Only work in the area directly in front of you.
MOWING THE LAWN:
Another task that most people find tedious. When able, use an electric start mower. The action of pulling a cord to start your mower is the most common cause of low back injuries. If you must use a pull start mower, remember to bend at your knees and maintain the natural curve of your spine while reaching for the cord. Make sure you tighten your abdominal muscles just before pulling the cord in order to support your spine. If using a push mower, remember to maintain a proper upright posture and take breaks as needed.
Remember to listen to your body. Take frequent breaks and change positions when you experience aching, cramping, or fatigue. Stay hydrated and wear sunscreen. If you do happen to experience low back pain or any other injury, remember to contact your physical therapist. They can help alleviate your symptoms and educate you on proper body mechanics.
GARDENING STRETCHES
Stretching before you start gardening can help you from experiencing pain later. Here are some stretching techniques to help get you started!
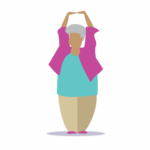
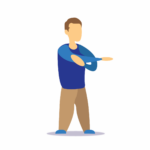
1.) Fold your hands together and turn your palms away from your body, but this time extend your arms overhead. You should feel the stretch in your upper torso and shoulders to your hand. Hold for 10 seconds and repeat eight times.
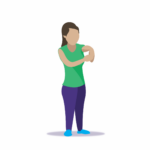
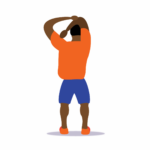
2.) Place your hand just above the back of the elbow and gently push your elbow across your chest toward the opposite shoulder. This is a stretch for the upper back and shoulder. Stretch both the right and left arms. Hold for 10 seconds and repeat eight times.
3.) Raise one arm overhead. Bend the elbow. Place the opposite hand on the bent elbow and gently push the elbow back further. This is a stretch for the triceps. Stretch both the right and left arms. Hold for 10 seconds and repeat eight times.
4.) Extend an arm in front of you, making sure the elbow is completely straight. With your palm down, take the opposite hand and bend in the wrist downward. Then turn the palm up, and stretch the wrist backward. This stretches the forearm and wrist muscles. Hold for 10 seconds and repeat eight times.
If you are experiencing pain, trust a licensed professional. Our therapists will help identify the cause of your pain and work with you to help it go away, and prevent pain and injury in the future.
The warm-up exercises were developed by professional hand therapists who are occupational and physical therapists specializing in the treatment of the hands, arms, and shoulders. These exercises and tips have been designed to supplement more commonly known gardening safety practices that concentrate only on preventing back injuries. For more information visit: www.asht.org
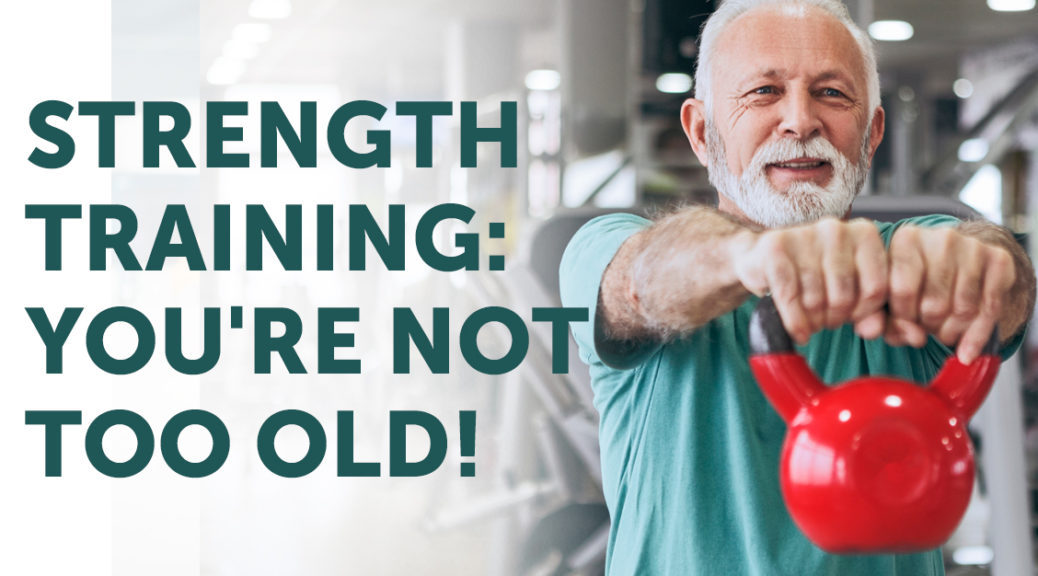
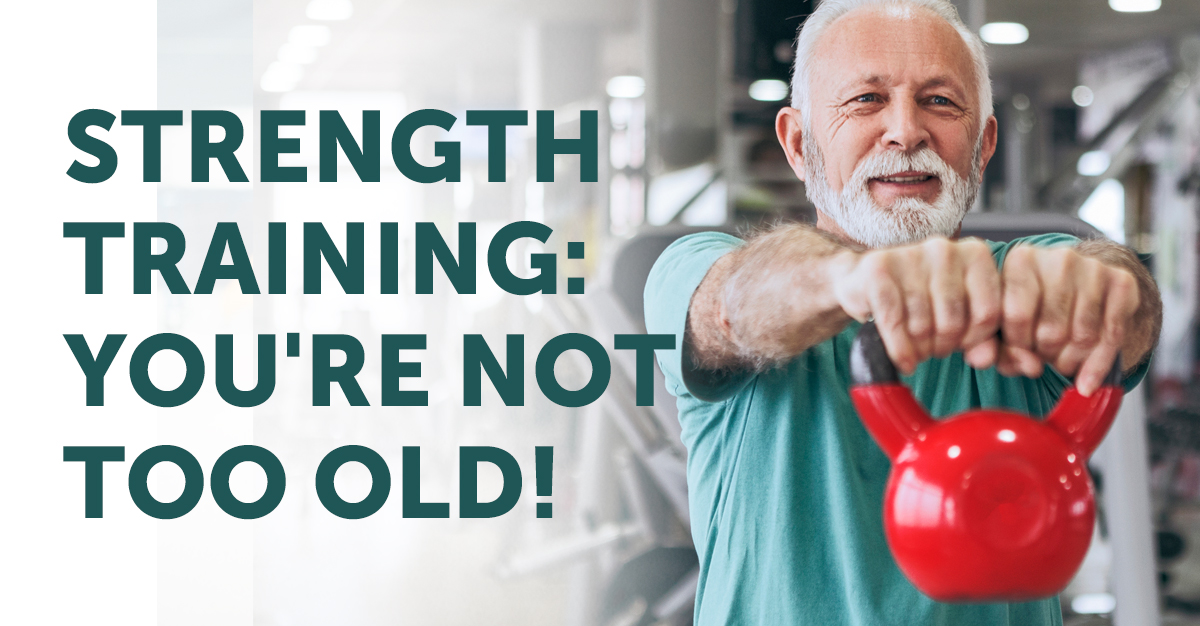
If you think you are “too old” to do strength training exercises, think again! With proper guidance and support, you can benefit from a program of regular strength-training exercises.
Sarcopenia is the loss of muscle and strength often seen in older adults. Although many questions remain about muscle loss and aging, one thing is certain: strength-training exercises can help reduce these effects. Even small changes in muscle size can make a big difference in strength, especially in people who have already lost a lot of muscle.
BENEFITS
According to the North American Spine Society, strength training can provide the following benefits in older adults:
Better balance and, consequently, reduced risk of falls
Quicker responses, which may also play a role in preventing falls
Reduced risk of osteoporosis (weakening of the bones)
Improved quality of life
Improved mental alertness
EXAMPLES OF STRENGTH-TRAINING EXERCISES
You can increase your strength by regularly using any of the following:
Weights
Strength-training equipment
A resistance band
HOW MUCH AND HOW OFTEN?
The National Institute on Aging recommends the following tips on how much and how often you should do strength-training exercises:
Exercise all of your major muscle groups at least twice a week.
Do not do strength exercises of the same muscle group 2 days in a row.
Depending on your condition, you might need to start out using as little as 1 or 2 pounds of weight, or no weight at all.
Use a minimum of weight the first week, then gradually add weight. Starting out with weights that are too heavy can cause injuries.
When doing a strength exercise, do 10-15 repetitions in a row.
Take 3 seconds to lift or push a weight into place; hold the position for 1 second, and take another 3 seconds to lower the weight. Do not let the weight drop; lowering it slowly is important.
Gradually increase the amount of weight to benefit from strength exercises. When you can do 2 sets of 10-15 repetitions, then you can increase the amount of weight on your next session.
It should feel somewhere between hard and very hard for you to lift or push the weight. If you cannot lift or push a weight 8 times in a row, then it is too heavy for you. Reduce the amount of weight. If you can lift a weight more than 15 times in a row, it is too light for you. Increase the amount of weight. Do not increase more than 5% for all upper body and 10% for lower body exercises.
SAFETY TIPS
Talk to your doctor or a physical therapist before engaging in a new exercise program.
Breathe normally while exercising. Holding your breath (known as Valsalva maneuver) while straining can cause your blood pressure to go up. This is especially true for people with cardiovascular disease.
If you have had a hip repair or replacement, check with your surgeon before doing lower body exercises.
Avoid jerking or thrusting weights into position. This can cause injuries. Use smooth, steady movements.
Avoid locking the joints in your arms and legs in a straightened position.
Breathe out as you lift or push, and breathe in as you relax.
Muscle soreness lasting up to a few days and slight fatigue are normal after muscle-building exercises, but exhaustion, sore joints, and unpleasant muscle pulling are not. The latter symptoms may mean you are overdoing it.
None of the exercises you do should cause pain. The range within which you move your arms and legs should never hurt.
Looking for a physical therapist to help start your strengthening program?
Strength Training Routine for Beginners
Strength exercises can help increase your strength when performed on a regular basis. Here are some examples from the National Institute of Aging:
Wrist Curl
This exercise strengthens the wrists.
Put your forearm on the arm of a chair. Your hand should be over the edge.
Hold the weight with your palm facing upward.
Bend your wrist up and down.
Do this 10-15 times.
Repeat with the other hand.
Do this 10-15 more times with each hand.
Side Arm Raise This exercise strengthens shoulder muscles.
Sit in an armless chair with your back supported by the back of chair.
Keep your feet flat on the floor and even with your shoulders.
Hold hand weights straight down at your sides, with palms facing inward.
Raise both arms to your side, shoulder height.
Hold the position for one second.
Slowly lower your arms to your sides. Pause.
Repeat 10-15 times.
Rest; then do another set of 10-15 repetitions.
Chair Stand This exercise strengthens muscles in your abdomen and thighs. Your goal is to do this exercise without using your hands as you become stronger.
Sit toward the front of a chair, knees bent, feet flat on the floor.
Cross your hands over your chest and lean back in a half-reclining position. Keep your back and shoulders straight throughout the exercise.
Raise your upper body forward until you are sitting upright, using your hands as little as possible (or not at all, if you can).
Extend your arms outward so they are parallel to the floor. Slowly stand up, using your hands as little as possible.
Slowly sit back down. Pause.
Repeat 10-15 times.
Rest; then do another set of 10-15 repetitions.
Arm Curl This exercise strengthens upper-arm muscles.
Stand with your feet even with your shoulders.
Keep your feet flat on the floor and even with your shoulders.
Hold your hand weights straight down at your sides, with palms facing forward.
Slowly bend one elbow, lifting weight toward your chest. (Rotate your palm to face your shoulder while lifting the weight.)
Hold this position for one second.
Slowly lower your arm to the starting position. Pause.
Repeat with the other arm.
Alternate arms until you have done 10-15 repetitions with each arm.
Rest; then do another set of 10-15 alternating repetitions.
Toe Stand The heel raise strengthens ankle and calf muscles. You can use ankle weights for this exercise if you are able.
Stand straight, feet flat on the floor, holding onto a table or chair for balance.
Slowly stand on tiptoe, as high as possible.
Hold the position for 1 second.
Slowly lower your heels all the way back down. Pause.
Do the exercise 10-15 times.
Rest; then do another set of 10-15 repetitions.
Variation: As you become stronger, do the exercise standing on 1 leg only, alternating legs for a total of 10-15 times on each leg. Rest; then do another set of 10-15 alternating repetitions.
Knee Curl Strengthens muscles in the back of the thigh. You can use ankle weights for this exercise if you are able.
Stand straight holding onto a table or chair for balance.
Slowly bend your knee as far as possible. Don’t move your upper leg at all; bend your knee only.
Hold this position for 1 second.
Slowly lower your foot all the way back down. Pause.
Repeat with your other leg.
Alternate legs until you have done 10-15 repetitions with each leg.
Rest; then do another set of 10-15 alternating repetitions.
Front Arm Raise Strengthens shoulder muscles.
Stand with your feet shoulder-width apart
Hold hand weights straight down at your sides, with palms facing backward.
Raise both arms in front of you to shoulder height. Do not turn your wrist.
Hold this position for 1 second.
Slowly lower your arms. Pause.
Repeat 10-15 times.
Rest; then do another set of 10-15 repetitions.
Leg Straightening Strengthens muscles in front of the thigh and shin. You can use ankle weights for this exercise if you are able.
Sit in a chair. Only the balls of your feet and your toes should rest on the floor. Put a rolled towel under your knees, if needed, to lift your feet. Rest your hands on your thighs or on the sides of the chair.
Slowly extend 1 leg in front of you as straight as possible.
Flex your foot to point toes toward the head.
Hold this position for 1–2 seconds.
Slowly lower your leg back down. Pause.
Repeat with your other leg.
Alternate legs until you have done 10-15 repetitions with each leg.
Rest; then do another set of 10-15 alternating repetitions.
Back Leg Raise Hip extension strengthens buttock and lower-back muscles. You can use ankle weights for this exercise if you are able.
Stand 12-18 inches from a table or chair, feet slightly apart.
Hold onto a table or chair for balance.
Slowly lift one leg straight backwards without bending your knee, pointing your toes, or bending your upper body any farther forward.
Hold this position for 1 second.
Slowly lower your leg. Pause.
Repeat with your other leg.
Alternate legs until you have done 10-15 repetitions with each leg.
Rest; then do another set of 10-15 alternating repetitions.
Side Leg Raise This strengthens muscles at the sides of your hips and thighs. Use ankle weights, if you are ready.
Stand straight, directly behind a table or chair, feet slightly apart.
Hold onto a table or chair for balance.
Slowly lift 1 leg 6-12 inches out to the side. Keep your back and both legs straight. Don’t point your toes outward; keep them facing forward.
Hold this position for 1 second.
Slowly lower your leg. Pause.
Repeat with the other leg.
Alternate legs until you have done 10-15 repetitions with each leg.
Rest; then do another set of 10-15 alternating repetitions.
This information is neither intended nor implied to be a substitute for professional medical advice. Always seek the advice of your physician or other qualified health providers prior to starting any new treatment or with questions regarding a medical condition.
Over time, we develop arthritic changes in our back due to normal wear and tear. Below is a list of low back pain exercises that can help reduce lower back pain. These exercises will help you, in time, return you to your normal activities and improve your quality of life.
Top 5 Exercises to Reduce Back Pain
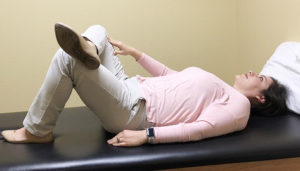
1. LOWER TRUNK ROTATION
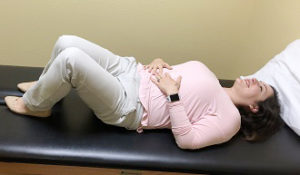
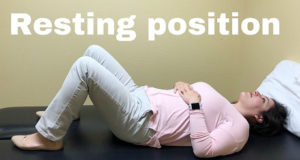
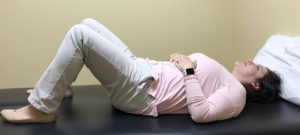
Lie on your back with your knees bent.
Keep your feet and knees together and lightly rotate your spine.
Stop the stretch when you feel your hips coming off of the table. Only rotate to approximately 45 degrees and rotate back and forth like a windshield wiper.
Repeat for 2 minutes.
2. ABDOMINAL BRACING
Lie on your back with your knees bent. Slightly elevate your hips but not high enough to where it comes off of the table. Simultaneously, squeeze your abdominal muscles down towards the table. Continue to breathe.
Hold this for 10 seconds and rest for 10 seconds. Repeat for 2 minutes.
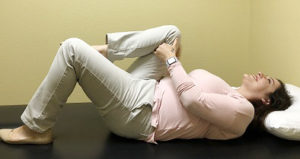
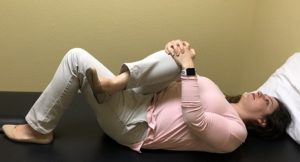
3. SINGLE KNEE TO CHEST
Bring one knee to your chest.
Hold for 5-10 seconds. Repeat alternating legs to your chest for a time of 2 minutes.
4. FIGURE 4 STRETCH
Cross one ankle over to the opposite knee and press down on the resting leg. You should feel the stretch in your hip.
Hold this stretch for 30 seconds if you can tolerate it. Repeat for 3 repetitions, then switch legs.
5. PIRIFORMIS STRETCH
Cross one ankle over to the opposite knee. Pull the resting knee across your body and up towards your chest. (You should aim for your opposite shoulder as a reference). This stretch should be felt over the crossed leg buttock.
Hold for 30 seconds if you can tolerate it. Repeat for 3 repetitions on each leg.
Written by Laura Mata, OTR/L, PT, DPT, Director at Star Physical Therapy Services – Fairfield
To learn more about Star Physical Therapy Services click here.
For more information about back pain, and physical therapy click the links below.
The word cancer is a scary one. Even though we all hope that it never becomes part of our lifetime of trials, more often than not, we know someone that has had, or is currently dealing with cancer. It is a testament to the medical community that so many women are able to wear the pink ribbon as a sign of triumph and pride, but we still mourn with those that wear it as a sign of remembrance and loss. More than once, while talking with women that have begun treatment for breast cancer, the topic of whether or not to have a mastectomy has come up. It’s not a decision taken lightly, often one with multiple concerns about what happens after surgery. Will the cancer be gone for good? Will it hurt? How long will it take to recover? A physical therapy post-mastectomy program can help address these issues.
Physical Therapy can’t answer all of those questions, but one thing a physical therapy post-mastectomy program can do is aid in the overall recovery process by focusing on regaining strength and increasing the range of motion in your shoulder and arm. Early intervention by a physical therapist can help women regain full function following mastectomy surgery, regardless of whether or not a woman has had reconstruction. Rehabilitation is always tailored to each patient’s specific needs. Not every patient experiences the same recovery, and as such physical therapists are prepared to help patients experiencing a multitude of symptoms – some have been highlighted below.
Size, location, and the type of mastectomy are important considerations when choosing a type of treatment. Exercises to maintain shoulder range of motion and arm mobility may be prescribed as early as 24 hours after surgery. These exercises are important in restoring strength and promoting good circulation. As rehabilitation progresses these exercises may be modified to meet new goals.
Physical Therapy after Surgery
After mastectomy surgery, patients may experience tightness around the surgical site. This is caused by scar tissue formation. The result can be very dense tissue under the incision, which is painful and can restrict the range of motion. The restricted range of motion puts a woman at risk for a painful condition known as frozen shoulder. Early treatment by a physical therapist can help reduce the pain and help regain functional range of motion and strength.
Numbness and/or nerve sensitivity at the surgical site can develop post-mastectomy. Manual therapy can help restore sensation and relieve nerve pain. In severe cases, a chronic condition known as post-mastectomy pain syndrome may develop. This is caused by scar tissue impinging on nerves. Physical therapy can be very effective at releasing scar tissue and reducing nerve-related pain.
Axillary node dissection can lead to a condition known as cording or axillary web syndrome. Cording presents as a moderate to painful tightening, which appears as “cords” emanating from the armpit and extending down the arm. Cording significantly restricts the range of motion and arm function. Manual therapy and therapeutic stretching help to resolve this condition quickly.
Radiation treatment after mastectomy surgery can exacerbate posture and range of motion problems, causing fibrosis and skin tightness. Manual therapy can remediate these issues and may prevent them from ever becoming a problem.
The Benefits of Exercise and Physical Therapy post-mastectomy treatment programs can differ greatly as seen above, but there are a few benefits that all patients can benefit from:
Improved shoulder range of motion
Improved shoulder strength
Improved functional mobility
Improved posture
Decreased pain at the surgical site
Decreased edema on the affected side
Improved sensation at the surgical site
Meeting with a physical therapist before surgery can help you feel more at ease and more confident in your overall recovery goals. It’s never too early to ask questions! To find a physical therapy clinic near you click here.
For more information on cancer-related physical therapy programs click here: