Tag Archives: Athletic injury

shoulder surgery

Self Care: Safe Dressing Following Shoulder Surgery / Injury

SafeDressingShoulderSurgery_FBsize

When recovering from shoulder surgery, it can be difficult to dress and undress without assistance. With the help of one of our trusted Certified Hand Therapists (CHT) they have compiled a list of tips to get dressed safely and independently while recovering.  It is highly recommended that you follow the instructions prescribed by your surgeon or attending physician.

DRESSING

Upper Body
• Bend forward at your hips and let your affected arm dangle loosely forward
• Always dress the affected arm through the sleeve of your shirt first
• Proceed to dress the unaffected arm

Lower Body
• One handed techniques to don socks: touch all fingers to your thumb, then slide the sock over your hand. Spread your fingers apart to open the sock and slide it onto the foot

Bra
• Clip the bra from the front and as low as possible to your waist. Guide the bra enclosure towards your back. Slide the strap over the affected arm and then slide

shoulder_3D

GROOMING

• Bend forward at the hips and dangle arm in order to clean and apply deodorant

These post shoulder surgery dressing tips were provided by The Hale Hand Center, with locations in Melbourne and Rockledge, FL. The Hale Hand Center offers both physical therapy and certified hand therapy services, as well as provides custom splinting. More information about The Hale Hand Center can be found on their website here.

ice hockey injuries

Common Ice Hockey Injuries

HockeyInjuries_FBsize

Ice hockey is one of the most popular sports played in North America. Physical therapy can provide specific treatment to a number of specific ice hockey injuries. Here are a few injuries that can happen during a hockey game or practice:

Common Ice Hockey Injuries

BACK INJURIES
Hockey players are at risk for low-back injuries due to the flexed (forward) posture of skating and the frequent hyperextension (backward) stress. Low-back pain and/or a pulled muscle are the most common injuries. Stretching of the hip flexors along with strengthening of the back and abdominal muscles will help avoid these injuries.

HIP INJURIES
The hip joint and groin muscle are susceptible to injury due to the mechanisms of the skating stride. Some of the most common soft tissue injuries in hockey players include a groin strain and a hip flexor strain. Off-season strengthening and dedicated stretching before and after practice are important to prevent these injuries. In addition, a direct blow to the outside of the hip can cause a hip pointer or trochanteric bursitis. Hockey pants with reinforced padding over these areas may help protect them.

KNEE INJURIES
The medial collateral ligament is the most susceptible to a sprain because of the leg position – pushing off the inside edge of the skate blade – and contact to the outside of the knee. Anterior cruciate ligament (ACL) disruption and meniscus tears (torn cartilage) can also occur but are less common in hockey that in other sports such as football, soccer and basketball.

hockey_goalie

SHOULDER INJURIES
The most common shoulder injuries in hockey are a shoulder separation and a broken collarbone. These injuries occur from direct contact of the shoulder with another player, the boards or the ice. Treatment can include a sling, rest and in serious cases surgery.

ELBOW INJURIES
The point of the elbow is a frequent area of contact, which can result in the development of bursitis. Thick and scarred bursal tissue (which feels like bone chips, but isn’t) can be a source of recurrent inflammation. The best prevention method is wearing elbow pads that will fit well and have an opening for the elbow, soft padding and a plastic outer shell.

WRIST INJURIES
A fall on the outstretched arm or contact with the boards that forces the wrist up or down, may cause a fracture. Players should try bracing themselves against the boards using their forearms instead of their hands.

PT News

This Month in PT News. Featuring articles from PTandMe partnering clinics!

1. Simple Steps to Starting a Weight-Training Program
Written by the Therapy Team at The Jackson Clinics – Middleburg, VA

One of the challenges of weight training is determining how much effort to put in for the most benefits. Read more

2. Sit Up Straight! Avoid Sitting with Bad Posture
Written by Megan Russo, PTA at The Center for Physical Rehabilitation – CPR – Grand Rapids, MI

Do you ever find yourself sitting in a slumped position while at work or driving in the car? Read more

3. Minimizing the Risk of Ski Injury
Written by the Therapy Team at The Jackson Clinics – Middleburg, VA

If winter weather has you prepared to hit the slopes, be sure to take the necessary precautions to keep yourself injury-free this season. Read more

Frisco Physical Therapy

PT & Me Clinic Stands Above the Rest

ClinicStandsAboveRest_FBsize

At PT & Me we love it when our partnering physical therapy clinics shine. We are so excited that we couldn’t help ourselves, we just had to highlight one of our award winning clinics!

FriscoPTLogo_forBlog

FRISCO PHYSICAL THERAPY – Physical Therapy Clinic – Frisco, TX
Frisco Physical Therapy was voted the BEST PHYSICAL THERAPY CLINIC in Frisco, Texas by over 32,000 readers of the Frisco Enterprise Newspaper. Clinic Director Colby Pigg, MPT graduated with honors in 1999 and has more than 18 years of experience in physical therapy. Perhaps one of the reasons Frisco Physical Therapy stands out among the crowd is the variety of services it offers to its patients. In addition to general orthopedics the licensed physical therapists in Frisco offer:

• Balance and Fall Prevention Programs
• Cancer Related Fatigue Program
• TPI Certified Golf Fitness Intructor
• Primal 7 and TRX Suspension Training
• Game-Ready Vasopneumatic Cold Compression

We are super excited for Colby and the rehab team at Frisco Physical Therapy for the honor they received by their community. We are certainly looking forward to all of the great things to come. More information about Frisco PT can be found at: www.friscopt.com

winter safety tips

Winter Safety Tips for Children

winter safety tips for Children PTandMe
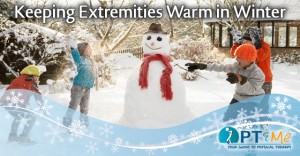
When the temperature drops and snow is on the ground, your children can still benefit from some outdoor physical activity. All it takes is a little extra planning to stay safe.

Layer Up!
Infants and children lose heat more quickly due to their size. As a result, they are more likely to suffer from low body temperature, also known as hypothermia. Dressing in layers is a good way to provide your child with added warmth during the winter months. Your child should wear 1 more layer than an adult would wear. Choose fabrics that wick moisture to help pull sweat away from your child’s skin and keep them warm.

Here are some other winter stafety tips to help keep your child safe in the cold:
• Mittens are warmer, but gloves allow your child to use their fingers more. Consider having your child wear mittens over a pair of light gloves.
• Keep your child’s feet warm and dry with 2 pairs of socks.
• Avoid long scarves and drawstrings or ties, which could become a choking hazard. Consider neck warmers or turtleneck garments.
• Choose hats and hoods that do not obstruct your child’s vision.
• Keep a dry set of clothing at school in the event your child’s clothes become wet.
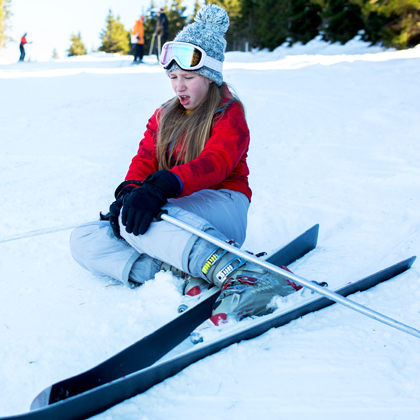
Winter Sport Safety
Winter safety tips for sports such as skiing, skating, snowboarding, and sledding require adult supervision and added safety measures. To help keep your child safe:
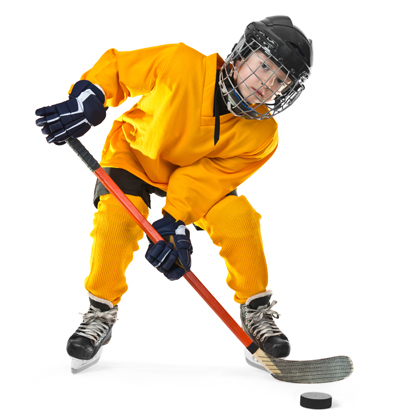
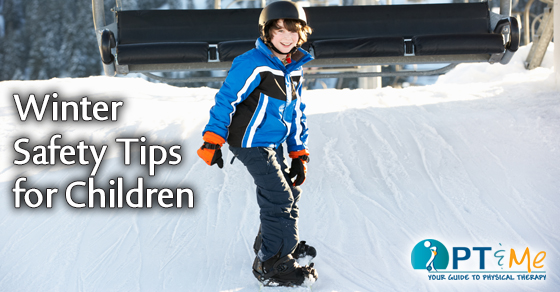
• Make sure your child wears a helmet and other protective gear such as wrist guards for snowboarding and a mouth guard for ice hockey.
• Teach your child to be aware of and avoid hazards when sledding such as cars, trees, and ponds.
• Do not allow your child to skate on surfaces until you are sure the water is frozen solid.
• Do not allow your child to wear headphones while playing. Headphones will block traffic or grooming machine sounds.
• Encourage your child to keep moving when outdoors to help generate body heat.

Bring your child inside at the first sign of frostnip—skin that is red, numb, and tingly. Soak your child’s skin in warm water until the symptoms go away. Do not rub the skin. If symptoms do not improve, call your child’s doctor. If your child’s skin becomes white, hard, and swollen, your child may have frostbite. The skin may also burn, tingle, or become numb. If you think your child has frostbite, bring your child inside and put your child in dry clothes. Do not rub the skin, rubbing can cause more damage. Call for medical help right away.

hockey_player

Don’t Skip the Sunscreen
It is possible for your child to get a sunburn in the winter since sunlight reflects off of the snow and ice. Your child should use a sunscreen with an SPF of at least 30. Apply it to your child 20 minutes before going outside and reapply it every 2 hours.

Fuel Up for Fun
Dehydration can contribute to hypothermia. Encourage your child to drink plenty of fluids, especially during vigorous physical activities. Your child will also need to fuel up to generate body heat needed for outdoor play. Provide your child with plenty of healthy snacks such as trail mix, fruit and bread.

When to Play
Freezing temperatures and wind are risk factors for hypothermia and frostbite. Avoid severe cold. Keep an eye on weather forecasts and plan outdoor activities for warmer days without snow or rain.

Following these winter safety tips will allow you and your child to safely enjoy the beauty of winter.

by Cynthia M. Johnson, MA

RESOURCES:
Family Doctor—American Academy of Family Physicians
http://familydoctor.org

Healthy Children—American Academy of Pediatrics
http://www.healthychildren.org

CANADIAN RESOURCES:
Canadian Paediatric Society
http://www.cps.ca

Health Canada
http://www.hc-sc.gc.ca

REFERENCES:

Chillin’ with winter safety. Healthy Children—American Academy of Pediatrics website. Available at: http://www.healthychildren.org/English/safety-prevention/at-play/Pages/Chillin-With-Winter-Safety.aspx. Updated January 19, 2016. Accessed February 11, 2016.

Frostbite in children. Lucile Packard Children’s Hospital Stanford website. Available at: http://www.stanfordchildrens.org/en/topic/default?id=frostbite-in-children-90-P02820. Accessed February 11, 2016.

Keeping kids safe in the cold. American Academy of Pediatrics website. Available at: http://www2.aap.org/sections/schoolhealth/ECarchivenovember11.html. Accessed February 11, 2016.

Sunscreen FAQs. American Academy of Dermatology website. Available at: https://www.aad.org/media-resources/stats-and-facts/prevention-and-care/sunscreens. Accessed February 11, 2016.

Last reviewed February 2016 by Michael Woods, MD Last Updated:10/20/2014

EBSCO Information Services is fully accredited by URAC. URAC is an independent, nonprofit health care accrediting organization dedicated to promoting health care quality through accreditation, certification and commendation.

For more winter safety tips to keep you out of harm’s way this season check the articles below!

Staying Warm in Winter PTandMe  snow shoveling safety PTandMe  

How to Exercise at the gym

Exercising Do’s and Don’ts

In the fourth installment of our “At The Gym” series we examine how to exercise at the gym from start to finish. If you have any sudden significant increase in pain, swelling, or discoloration while performing or following exercise, discontinue immediately and contact your physician or therapist at your next therapy session.

How to Exercise at the gym

MILITARY SHOULDER PRESS
* How to exercise at the gym top tip: It is generally not recommended to do this exercise due to undo stress and strain at the shoulder joint.
If you do choose to do a military press, avoid bringing the bar behind the head and make sure that the elbows don’t pass 90⁰ at the bottom of the repetition.

START POSITION
• Seated with back against the seat (if available), with feet flat on the ground.
• Barbell held above head with elbows fully extended and wide grip to facilitate 90⁰ bend at the elbows at the bottom of the rep.

ENDING POSITION
• Bring barbell down until your elbows are bent at 90⁰ with the barbell in front of your face.

DON’T
• Lift feet off the ground.
• Lift off the seat.
• Arch your back.
• Bring barbell down to chest.

MACHINE CHEST PRESS

START POSITION
• Seated with back against the seat and feet flat on the ground.
• Arms out to your side and elbows flexed at 90⁰ but not coming back past your body (This picture shows the arms back a little too far with the angle at the elbows being a little too deep. Most chest press machines are built so that you have to start in this position which can compromise the shoulder if lifting heavy. If adjustable start in a position a little more forward than this).

ENDING POSITION
• Back against the seat.
• Elbows fully extended.

DON’T
• Lift feet off the ground.
• Lift off the seat.
• Bring bent elbows past your body.

CHEST PRESS

START POSITION
• Lay flat on bench with feet flat on the ground.
• Arms out to your side at 90⁰ with elbows flexed at 90⁰.
• Palms facing lower extremities.

ENDING POSITION
• Elbows fully extended.

DON’T
• Allow elbows to come down past bench height or 90⁰ bend.
• Left feet off the ground.
• Arch your back.

CHEST FLY

START POSITION
• Lay flat on bench with feet flat on the ground.
• Dumbbells touching each other with palms facing each other with elbows slightly bent.

ENDING POSITION
• Arms out at your side at 90⁰ with elbows flexed at about 120⁰.

DON’T
• Lift feet off the ground.
• Arch your back.
• Allow elbows to come down past bench height.

This information was written by STAR Therapy Services, an outpatient physical therapy group with six locations in Houston, Texas. At Star Houston Therapy Services, their number one priority is the patient. They strive to provide individualized treatment with hands-on, compassionate care. They perform comprehensive evaluations and encourage patient input for treatment planning and goal setting. For more information click here.

Knowing how to exercise at the gym, can build confidence and reduce the likelihood of injury. View the complete Exercising Do’s and Don’ts series below:


exercising do's and dont's

PT News

This Month in PT News. Featuring articles from PTandMe partnering clinics!


2. Coping with a Mysterious Pain Syndrome
Written by the Therapy Team at the Jackson Clinics – Middleburg, VA

As its name suggests, complex regional pain syndrome (CRPS) is a complicated and painful condition. Approximately 80,000 Americans are diagnosed with CRPS each year, usually in the arm, hand, leg or foot. Read more

3. Is Something Better than Nothing? 
Written by Erin Clason at the Center for Physical Rehabilitation – Grand Rapids, MI

When it comes to strength training, the answer is a resounding “Yes!” Most of us are aware of the benefits of strength training in areas like everyday physical function, bone rebuilding, self-confidence, fat reduction, and elevated metabolism. Read more

at the gym

At the Gym: Exercising Do’s and Dont’s

AtTheGym#2_FBsize

In the second installment of our “At The Gym” exercise series we examine the proper ways to exercise at the gym from start to finish. If you have any sudden significant increase in pain, swelling, or discoloration while performing or following exercise, discontinue immediately and contact your therapist at your next therapy session.

Plus Push Up 1

PLUS PUSH-UP

START POSITION
• Get on elbows and knees.
• Knees bent
• Straight or neutral back done by drawing the stomach in and the buttocks down.

ENDING POSITION
Push elbows into mat while trying to increase the space between the shoulder blades (round out your back between the shoulders).DON’T

DON’T
• Drop the head.
• Raise the buttocks or let the low back excessively curve inward.

Plus Push Up 2

PLUS PUSH-UP: STAGE 2

START POSITION
Push-up position

ENDING POSITION
• Push hands into mat while trying to increase the space between shoulder blades.
• Rounded upper back appearance.

DON’T
• Drop the head.
• Raise the buttocks or let the low back excessively curve inward.

Scapular Depression

SCAPULAR DEPRESSION

START POSITION
• Seated with shoulder blades drawn downward (don’t shrug shoulders).
• Hands hold just outside of the curvature of the bar to comfort.
• Knees bent underneath knee pad and feet on the floor.
• Keep your back straight with a slight posterior lean from the hips.

ENDING POSITION
Bring bar to chest with elbows bent.

DON’T
• Lift feet off the ground.
• Rock at the waist.
• Elevate or let shoulders pull forward.
• Hyperextend the low back as you pull in.

Empty Can 1

EMPTY CAN

START POSITION
Standing with hands at your side and thumbs pointing downward with feet shoulder width apart.

ENDING POSITION
Arms raised to about 60⁰ with thumbs facing down and slightly to your side.

DON’T
• Swing body back and forth.
• Shrug shoulders.
• Lift above 60⁰.

Full Can
FULL CAN

START POSITION
Standing with hands in front of you with thumbs pointing upward and feet shoulder width apart.

ENDING POSITION
Arms raised to 90 – 120⁰ with thumbs facing up.

DON’T
• Swing body back and forth.
• Shrug shoulders.
• Lift above 120⁰.

This information was written by STAR Therapy Services, an outpatient physical therapy group with six locations in Houston, Texas. At Star Houston Therapy Services, their number one priority is the patient. They strive to provide individualized treatment with hands-on, compassionate care. They perform comprehensive evaluations and encourage patient input for treatment planning and goal setting. For more information click here.

View the complete Exercising Do’s and Don’ts series below:


exercising do's and dont's

what to expect from physical therapy

What to Expect from Physical Therapy

What_to_Expect_from_PT_FBsize

PHYSICAL THERAPY IS INTENDED TO MAKE CHANGES WITHIN YOUR BODY

We will accomplish this in several different ways. First, through the use of manual therapies, such as massage and mobilization of the joints. The goals of change are to:

  • Stretch short tissues to make them longer.
  • Strengthen weak tissues to make them stronger.
  • Improve and correct bad/abnormal biomechanics and asymmetries to alleviate pain and take the stress off the body.

THERE ARE SEVERAL THINGS THAT WE EXPECT DURING THE PHYSICAL THERAPY PROCESS, ESPECIALLY IN THE EARLY STAGES OF PT

  • You can expect that you will be sore after the first visit, and most likely the first 2 – 3 weeks until their body gets adapted to PT. Your body is just not used to doing the things that we are going to ask it to do, so there will be a period of adjustment.
  • The pain WILL move. As we make changes to your tissues and mechanics, the stresses on your body will change, thus altering where you will feel the pain or your symptoms.
  • The pain WILL change in terms of intensity, meaning that your pain is expected to fluctuate along the 10 point scale, starting between your high and low levels and changing based on your position, activity, and stress on the body.
  • The pain may also change in terms of the quality of pain. The pain may be: sharp, dull, achy, throbbing, burning, tingling, numbing.
  • It is important to know that all of the aforementioned statements are completely normal. There is nothing that you will experience that will surprise us. Everything that you experience will be normal. Even if what you feel is not normal to you, it is normal for your condition and what your body is experiencing.
  • Physical therapy is not an overnight miracle. Improvement takes time. It is important to understand that no one gets better every day from day one until they leave. Everyone will have good and bad days. In the beginning, you will have more bad days than good. As time progresses, this ratio should flip-flop and you should be having more good days than bad.

If you are looking for a physical therapist, we have you covered with over 500 locations nationwide!

physical therapy near me


This article was written by Life Fitness Physical Therapy, an outpatient physical therapy group with fourteen locations in the surrounding Baltimore, Maryland area. Life Fitness Physical Therapy is focused on improving the quality of life for their patients. They strive to provide individualized, evidence-based care that meets every patient’s unique needs. Their objective for each patient is to restore their function, achieve their goals and have them resume an active lifestyle as quickly as possible. For more information click here.

exercise at the gym

At the Gym: Exercising Do’s and Don’ts

AtTheGym#1_FBsize

In this new monthly series we examine the proper ways to exercise at the gym from start to finish. If you have any sudden significant increase in pain, swelling, or discoloration while performing or following exercise, discontinue immediately and contact your therapist at your next therapy session.

Scapular Strengthening

SCAPULAR STRENGTHENING

START POSITION
• Lay face down on the edge of the bench with arm hanging downward
• Rolled towel under forehead for support

ENDING POSITION
Arm raised straight to your side no higher than the torso with palms facing down

DON’T
• Arch your back when lifting dumbbell
• Lay with face turned sideways
• Raise the dumbbell too high

External Rotation Side Lying

EXTERNAL ROTATION – SIDE LYING

START POSITION
• Side lying with elbow at 90⁰ bend
• Support the head and rolled towel under arm holding dumbbell

ENDING POSITION
Side lying with external rotation at the shoulder until you feel an anatomical stop at the shoulder (about 45⁰); keep elbow bent

DON’T
• Create rotation at the torso
• Don’t raise the arm from the towel

External Rotation Prone

EXTERNAL ROTATION – PRONE

START POSITION
• Lay face down with head facing to the side
• Forearm hanging off table with elbow bent to 90⁰
• Bicep is on the bench and supported by a towel

ENDING POSITION
About 45⁰ of external rotation

DON’T
• Externally rotate past 45⁰
• Raise arm from the towel

D2 Flexion

D2 FLEXION

START POSITION
• Standing with feet shoulder width apart
• Hold handle with arm crossing body to opposite side
• Palm facing body.

ENDING POSITION
• Arm raised slightly above the shoulder (about 120⁰ which is slightly higher than shown) with thumb facing upward
• Creating a “disco” motion

DON’T
• Let thumb face sideways or downward at end of exercise
• Lean backwards or sideways to assist in exercise
• Shrug shoulders

This information about how to exercise at the gym was written by STAR Therapy Services, an outpatient physical therapy group with six locations in Houston, Texas. At Star Houston Therapy Services, their number one priority is the patient. They strive to provide individualized treatment with hands-on, compassionate care. They perform comprehensive evaluations and encourage patient input for treatment planning and goal setting. For more information click here.

View the complete Exercising Do’s and Don’ts series below:


exercising do's and dont's