Tag Archives: Posture

Lifting Safety Tips PTandMe

Avoid Back Pain with These 8 Back Safety Tips

Lifting Back Safety Tips PTandMe

During the holidays, back injuries become more prevalent as people maneuver themselves up and down ladders and stairways while carrying or lifting heavy objects. A little bit of lifting safety can go a long way to keeping your holiday season bright.

physical therapy near me

1. SIZE UP THE LOAD

Check to ensure the load is stable and balanced.

2. PLAN THE JOB

Consider all possibilities. Is the path clear? What is the weight of the load? How much stress will be placed on your back? Is there traffic, a tripping hazard, a doorway to go through, or a stairway to go up or down? Avoid carrying an object that requires two hands to hold, either up or especially down, a flight of stairs.

3. ESTABLISH A BASE OF SUPPORT

Use a wide, balanced stance with one foot in front of the other. Make sure you have firm footing and your feet are shoulder-width apart. This staggered stance gives you the stability of not falling over and being able to secure the load.

4. BEND YOUR KNEES, KEEP YOUR HEELS OFF OF THE FLOOR AND GET AS CLOSE TO THE OBJECT AS POSSIBLE.

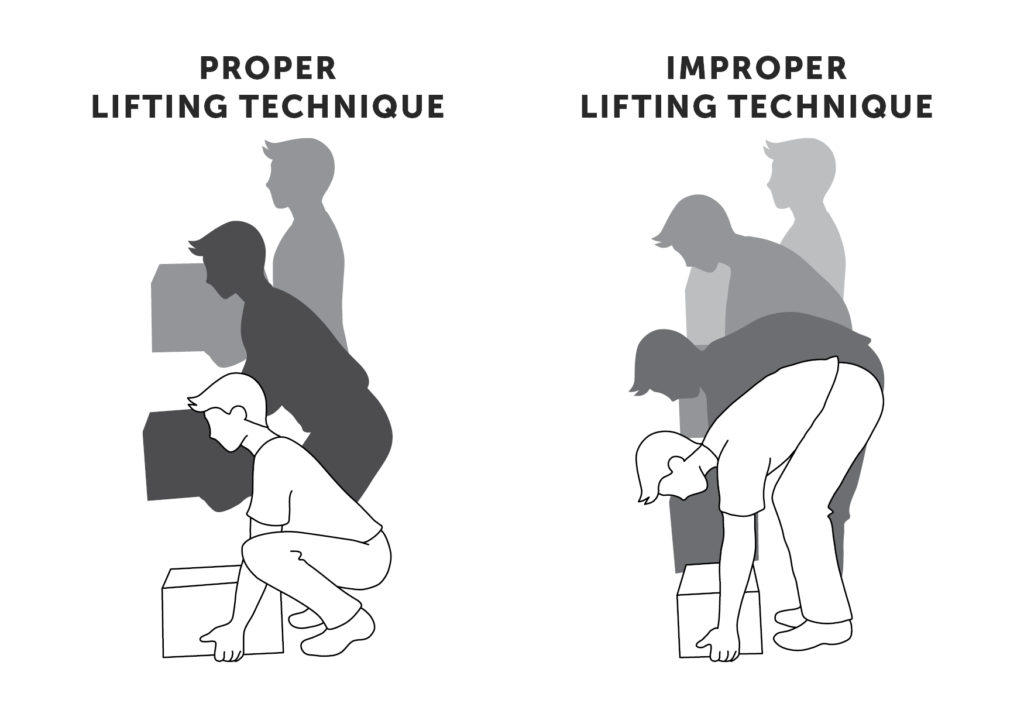
Always lift with your legs and not your back.

Proper Lifting Technique PTandMe

5. BE CERTAIN YOU WILL BE ABLE TO MAINTAIN A HOLD ON THE OBJECT WITHOUT HAVING TO ADJUST YOUR GRIP LATER.

You can use gloves to help maintain an adequate grip, but don’t rely on gloves because they can de-sensitize the fingers making you unable to feel the object.

6. LIFT GRADUALLY

Lift gradually with your legs without using jerky motions.

7. KEEP THE LOAD CLOSE TO PREVENT ARCHING YOUR LOWER BACK.

As you begin the lift, tighten your stomach muscles, and keep your head and shoulders up. The closer the load is to your spine, the less force will be placed on your back.

8. PIVOT

Don’t twist. Move your feet in the direction of the lift. This will eliminate the need to twist at the waist.

Whether at home or at work safe lifting practices can keep your back healthy and safe. Before lifting heavy objects decide how you will lift carry & place the item before you pick it up. If you are experiencing persistent pain, please contact us. We want to help you to be at your best this holiday season.

Physical Therapy Appointment

gardening ergonomics

Gardening Ergonomics

gardening ergonomics

It’s that time of year again. Time to exchange snow shovels and winter boots for gardening tools and watering cans. While the warmer weather brings on a new sense of happiness and energy, we need to remember to use proper body mechanics and follow general safety to avoid muscle aches and potentially serious injuries. The number one injury associated with gardening is low back pain. If you have experienced a recent injury or pain, we can help you recover.

Physical Therapy Appointment

Here are a few tips to make your gardening experience more enjoyable and less painful.

LIFTING:

Lifting heavy objects such as bags of soil, planters, and mulch improperly can lead to low back strains and/or sciatic pain. Other options include moving half of the soil/mulch to a separate pot before lifting the bag or planting into smaller pots that are easier to maneuver. Using a garden cart or wheelbarrow can also assist with moving heavy gardening materials. Remember to lift with your legs, avoid simultaneous lifting and twisting and keep heavier objects close to your body to avoid injury.

PLANTING:

Prepping the soil can also be a difficult and tedious task requiring prolonged forward bending and frequent changes in position. Try prepping the planting bed by using long-handled gardening tools. Once the soil is ready, plant from a kneeling position using either a kneeling stool or a cushion. Remember to avoid twisting the spine. Those with known chronic low back pain may want to consider planting into pots, flower boxes, or raised flower beds to avoid further injury.

WEEDING:

Most people dislike weeding their gardens and flower beds. Options to reduce the need to do so include using plants as ground cover or using mulch in your flower beds to minimize weed growth. If using a weed spray, look for bottles that have a sprayer hose to allow you to stand upright while treating your problem areas.

MOWING THE LAWN:

Another task that most people find tedious. When able, use an electric start mower. The action of pulling a cord to start your mower is the most common cause of low back injuries. If you must use a pull start mower, remember to bend at your knees and maintain the natural curve of your spine while reaching for the cord. Make sure you tighten your abdominal muscles just before pulling the cord in order to support your spine. If using a push mower, remember to maintain a proper upright posture and take breaks as needed.

Remember to listen to your body. Take frequent breaks and change positions when you experience aching, cramping, or fatigue. Stay hydrated and wear sunscreen. If you do happen to experience low back pain or any other injury, remember to contact your physical therapist. They can help alleviate your symptoms and educate you on proper body mechanics.

gardening

GARDENING STRETCHES

Stretching before you start gardening can help you from experiencing pain later. Here are some stretching techniques to help get you started!

Gardening Stretches

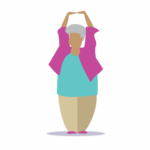
1.) Fold your hands together and turn your palms away from your body, but this time extend your arms overhead. You should feel the stretch in your upper torso and shoulders to your hand. Hold for 10 seconds and repeat eight times.

gardening stretches

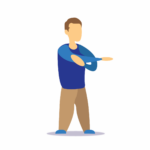
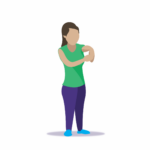
2.) Place your hand just above the back of the elbow and gently push your elbow across your chest toward the opposite shoulder. This is a stretch for the upper back and shoulder. Stretch both the right and left arms. Hold for 10 seconds and repeat eight times.

gardening stretches

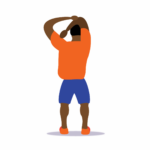
3.) Raise one arm overhead. Bend the elbow. Place the opposite hand on the bent elbow and gently push the elbow back further. This is a stretch for the triceps. Stretch both the right and left arms. Hold for 10 seconds and repeat eight times.

gardening stretches

4.) Extend an arm in front of you, making sure the elbow is completely straight. With your palm down, take the opposite hand and bend in the wrist downward. Then turn the palm up, and stretch the wrist backward. This stretches the forearm and wrist muscles. Hold for 10 seconds and repeat eight times.

If you are experiencing pain, trust a licensed professional. Our therapists will help identify the cause of your pain and work with you to help it go away, and prevent pain and injury in the future.

physical therapy near me

The warm-up exercises were developed by professional hand therapists who are occupational and physical therapists specializing in the treatment of the hands, arms, and shoulders. These exercises and tips have been designed to supplement more commonly known gardening safety practices that concentrate only on preventing back injuries.
For more information visit: www.asht.org

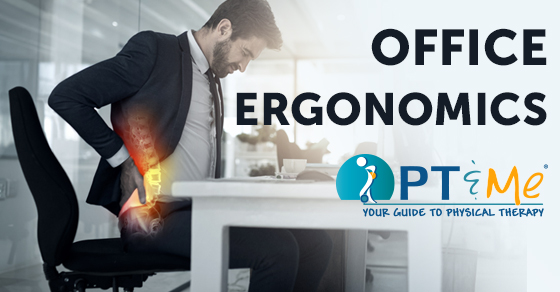
office ergonomics

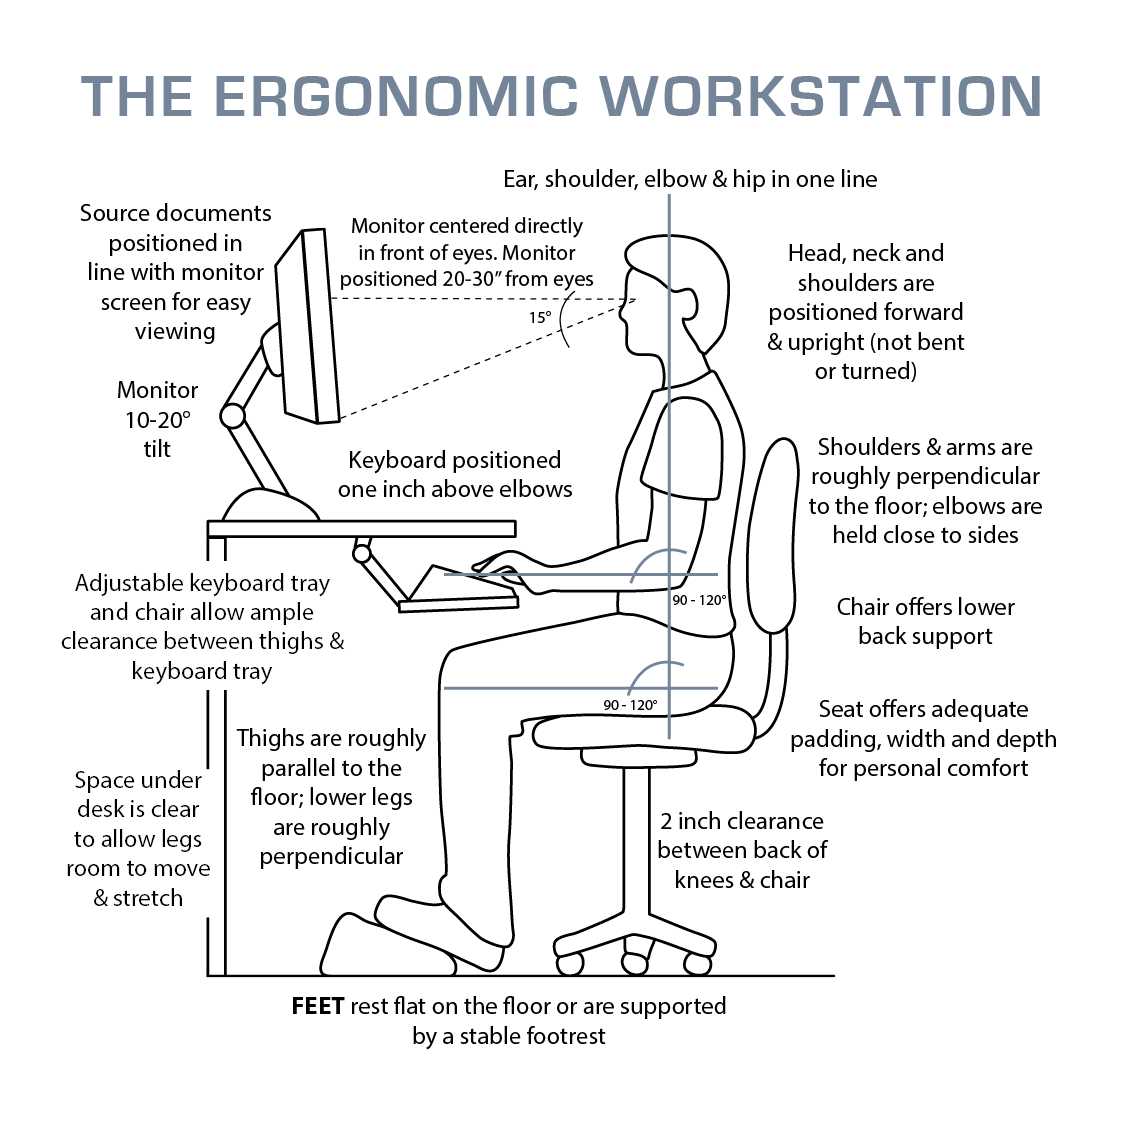
The Ergonomic Workstation

The Ergonomically correct workstation; Ergonomic workstation set up

Physical Therapy Appointment

Having an ergonomic workstation means that your desk and the things on it are arranged in such a way, that they prevent injury and are well within reach and use. An ergonomic workstation also promotes good posture. Posture is the position in which you hold your body upright against gravity while standing, sitting, or lying down. An ergonomically designed workstation promotes good posture and helps to:

  • Keep bones and joints in the correct alignment so that muscles are being used properly.
  • Help decrease the abnormal wearing of joint surfaces that could result in arthritis.
  • Decrease the stress on the ligaments holding the joints of the spine together.
  • Prevent the spine from becoming fixed in abnormal positions.
  • Counter fatigue because muscles are being used more efficiently, allowing the body to use less energy.
  • Prevent strain or overuse problems.
  • Avert backache and muscular pain.

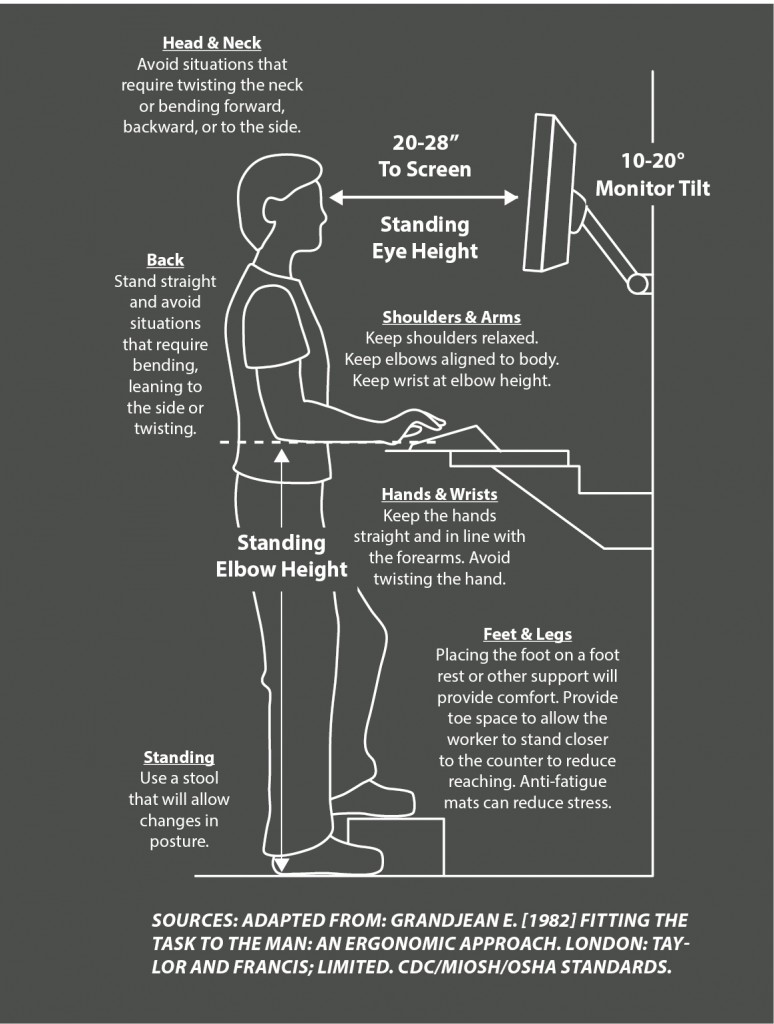
Proper ergonomics plays an instrumental role in how effectively you accomplish work and will help prevent suffering from work-related injuries due to strain and overuse. In the diagram below you will find both sitting and standing workstation recommendations to achieve a proper ergonomic workstation.

seated ergonomic workstation: Ergonomic workstation set up

SITTING: Body position guidelines

  • Lower back supported by a lumbar curve
  • Bottom & Thighs distributed pressure
  • ARMS minimal bend at the wrist
  • The area behind the knee not touching the seat
  • Feet flat on the floor or on a footrest
  • Wrists and hands do not rest on sharp or hard edges
  • The telephone should be used with your head upright (not bent) and your shoulders relaxed (not elevated)


Standing Ergonomics: Ergonomic workstation set up

STANDING: Working Guidelines

  • Precision Work – above elbow height
  • Light Work – just below elbow height
  • Heavy Work – 4-6 inches below elbow height


Setting Up Your Ergonomic Workstation

Video Provided by North Lake Physical Therapy

Physical and occupational therapists have experience working with patients to improve posture and ergonomics. Some clinics have therapists that go into the workplace and arrange a patient’s workplace, making it ergonomically efficient. For more information or to find a therapist near you

physical therapy near me

Physical Therapy for Golfer's Elbow

Golfer’s Elbow

Physical Therapy for Golfer's Elbow (Medial Epicondylitis Pain)

Golfer’s Elbow

Golfer’s Elbow, medically known as medial epicondylitis,  is a painful condition where the tendons that attach to the inside of the elbow become inflamed due to repetitive use of the hand, wrist, forearm, and elbow. Golfer’s elbow often occurs with repetitive activities such as swinging a golf club or tennis racket, work or leisure activities requiring twisting and gripping such as shoveling, gardening, and swinging a hammer. Golfer’s elbow can also appear in other sports-related activities such as throwing and swimming. Golfer’s Elbow (Medial epicondylitis) is most commonly seen in men over the age of 35 but can be seen in any population. If these symptoms sound familiar, then going to physical therapy for golfer’s elbow may be just what you need.

Physical Therapy Appointment

What is causing your elbow pain?

Golfer’s Elbow (Medial epicondylitis) affects the group of muscles that are responsible for bending the wrist, fingers, and thumb and that rotate the wrist and forearm. The tendons that connect those muscles to the medial epicondyle (bump on inside of elbow). Tendons are made up of collagen fibers that are lined up next to each other. The repetitive forces pull on those tendons creating pain and tenderness described as Golfer’s Elbow. Without treatment, those tendons can eventually pull away from the bone. Acute injuries to your elbow can create an inflammatory response which can cause redness, warmth, and stiffness in your elbow.

Golfer’s Elbow (Medial epicondylitis) is most often caused by an abnormal arrangement of collagen fibers. This condition is called tendinosis. During tendinosis, the body doesn’t create inflammatory cells as it does during an acute injury. Instead, fibroblasts are created which help make up scar tissue to fill in the spaces between the collagen fibers. This increase in scar tissue can lead to increased pain and weakness in the tissues. Physical and hand therapy is the most common nonsurgical treatment for Golfer’s Elbow (medial epicondylitis). Your therapist will perform an evaluation where he/she will ask you several questions about your condition, pain level, and other symptoms you may be experiencing. He/she will perform motion and strength testing on your entire upper extremity. Your therapist will also palpate your arm to determine which tendon(s) may be inflamed. He/she will use special tests designed to deferentially diagnose your condition from others that may have similar presentations to Golfer’s Elbow, such as Cubital Tunnel Syndrome.

golf ball on tee

What to Expect from Physical Therapy for Golfer’s Elbow

  • Pain Management: this can include Mechanical Diagnosis & Therapy, ice, ice massage, moist heat, electrical stimulation, and ultrasound.
  • Range-of-Motion Exercises: stretches and mobility exercises to help maintain proper movement in your elbow, forearm, wrist, and hand.
  • Strengthening Exercises: progressive resistive exercises to help build strength in your arm, elbow, forearm, wrist, and hand. These can include weights, medicine balls, and/or resistance bands. This will also include your Home Exercise Program.
  • Manual Therapy: used to ensure full, pain-free movement is achieved and can include joint mobilizations, manual muscle stretches, and soft tissue massage.
  • Neuromuscular Re-education (Functional Training): used to help you return to your prior level of function for both home and work activities. This will include retraining proper movement patterns with necessary modifications based on the current level of function and patient limitations.
  • Patient Education: used to help retrain patients on proper postural control during everyday activities including dressing, self-care, work, and sports activities. This can include helping return a patient to their specific sport, such as making adjustments to their golf swing or throwing technique.

Once you’ve completed physical therapy for Golfer’s Elbow you’ll want to do everything you can to prevent this from reoccurring. This can occur by maintaining proper awareness of your risk for injury during your daily movements. Key things to keep in mind:

1. Maintain proper form during all repetitive movements both at work and at home.
2. Continue your Home Exercise Program in order to maintain proper strength in your shoulder, elbow, forearm, wrist, and hand.
3. Use proper posture and body mechanics with lifting or carrying to avoid any undue stress on your joints and tendons.

This information was written by Plymouth Physical Therapy Specialists, an outpatient physical and hand therapy group with fourteen locations in the surrounding Plymouth, Michigan area. At Plymouth Physical Therapy Specialists, they are committed to using evidence-based treatments in their practice. This means that their therapists utilize the most current and clinically relevant treatments in their approach to rehabilitation. For more information click here.

physical therapy near me

posture causes neck pain

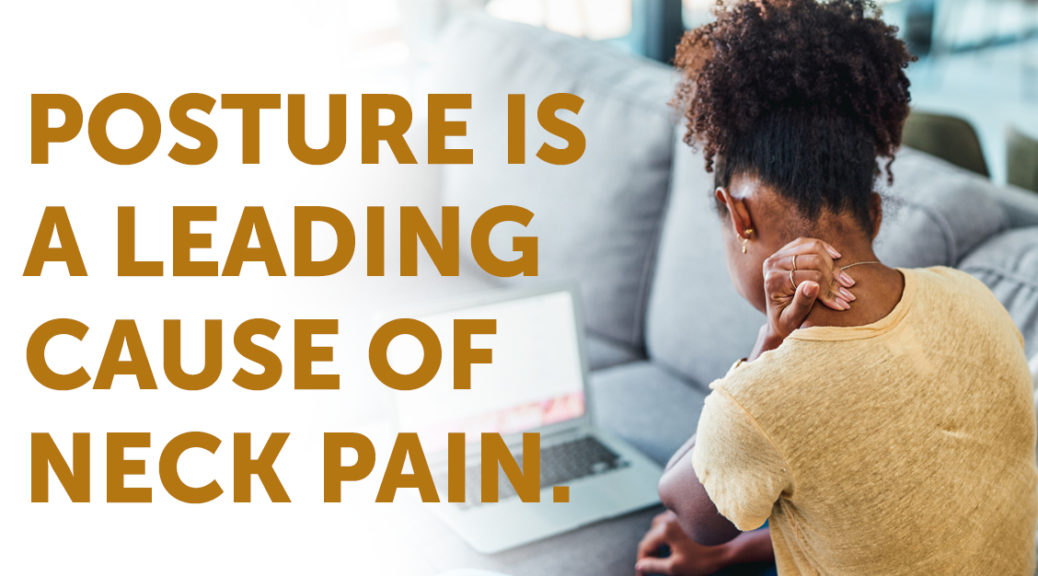
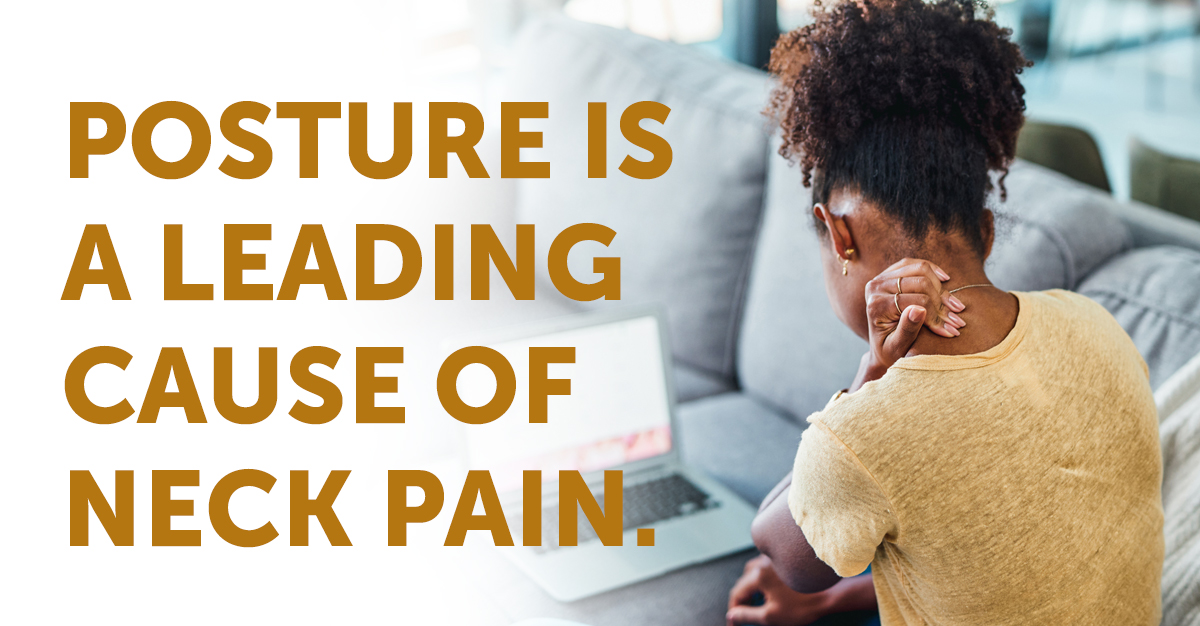
Posture is a leading cause of Neck Pain.

posture causes neck pain

Neck pain is a common problem among adults and with the help of smartphones and tablets, is becoming more frequent among young adults.  Studies have shown that the incidence of neck pain is increasing making it second only to low back pain in worker’s compensation costs.  Seventy percent of adults will experience this form of pain in their lifetime and over fifty percent of adults have experienced it in the last six months.  Symptoms of cervical dysfunction may include dizziness and headaches as well. It may be a result of trauma, stress, poor posture, static or repetitive movements.

Physical therapy can be effective in treating many types of neck pain.  The combination of modalities, manual therapy, and exercise, as well as postural and ergonomic correction, is proven to provide the best long-term results. It’s also important to look at the whole body for postural issues as well as movement disorders that could cause increased stress on the neck. Chronic pain may be from altered patterns of muscle activation with upper extremity use, resulting in the increased use of the accessory muscles.  The increased use of these muscles along with the decreased use of the neck flexors can lead to decreased ability for neck stabilization which can result in pain, headaches or dizziness.

Physical therapists can design a specific program to restore alignment and muscular stabilization, resulting in decreased pain. Range of motion and posture can be improved with cervical and scapular strengthening exercises, which are an integral part of any physical therapy program for the neck. However, no physical therapy program for neck pain is complete without patient education. This includes a home exercise program along with the postural and ergonomic correction. This is specific to each patient and also encompasses all aspects of life including sleeping, work, and recreation.

See if your posture may be contributing to your neck pain.

Posture IQ Quiz

1. When you’re sitting at the computer are you:

A. Leaning into the computer with your head closest to the screen?

B. Sitting upright with your back to the office chair?

2. Is your keyboard:

A. Positioned in the middle of the desk (forcing you into a reach)?

B. Directly in front of you at the edge of your desk?

3. Is your computer screen:

A. At an angle or tilted

B. At eye level, directly in front of you

4. When driving, can you feel your head against the headrest?

A. No, I’m leaned forward looking out the windshield

B. Yes, and I use the lumbar support feature in my car


If you answered A to 2 or more questions, you’re most likely going to suffer from posture-related symptoms throughout your life.
If you answered B to most questions, you’ve got an excellent posture IQ and will save yourself years of potential back, neck, and shoulder pain.
(Quiz provided by Life Fitness Physical Therapy  – Ellicott City, MD)

physical therapy near me

More information you may find helpful:

text neck   office ergonomics

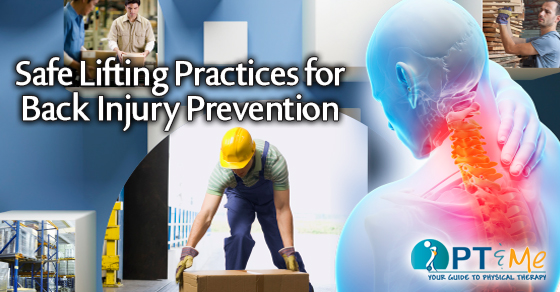
Safe Lifting Practices for Back Injury Prevention

Lifting Safety: Safe lifting practices for back injury prevention.

Whether at home or at work safe lifting practices can keep your back healthy and safe. Before lifting heavy objects decide how you will lift carry & place the item before you pick it up. Test the weight of the load by moving or tipping it. Figure out if you can break the load down by placing the contents of large containers into a number of smaller ones before moving them. Is the path clear? What is the weight of the load? How much stress will be placed upon your back? Is there traffic, a tripping hazard, a doorway to go through, or a stairway to go up or down? Avoid carrying an object that requires two hands to hold, either up or especially down a flight of stairs. Use the elevator. Plan a rest stop, if needed. Knowing what you’re doing and where you’re going will prevent you from making awkward movements while holding something heavy. Clear a path, and if lifting something with another person, make sure both of you agree on the plan.

KEY STEPS FOR SAFE LIFTING PRACTICES

Establish a Base of Support: Use a wide, balanced stance with one foot in front of the other. Make sure that you have firm footing and that your feet are a shoulders-width apart. This staggered stance gives you the stability of not falling over and being able to secure the load.

Keep Your Eyes Up: Looking slightly upward will help you maintain a better position of the spine. Keeping your eyes focused upwards helps you keep your back straight.

Get a Good Grip: With your palms and make sure you have an adequate hold on the object. Be certain you will be able to maintain a hold on the object without having to adjust your grip later. You can use gloves to help maintain an adequate grip, but don’t rely on gloves because they can desensitize the fingers and make you unable to feel the object.

Lift Gradually with Your Legs: Without using jerky motions. By using your leg strength, your chance of lower back injury is greatly reduced.

Tighten you stomach muscles: As you begin the lift and keep you head and shoulders up.

Pivot – Don’t Twist: Move your feet in the direction of the lift. This will eliminate the need to twist at the waist.

Weight: A lighter load normally means a lesser risk of injury. The weight of the object should be within the capacity of the person to handle safely.

Handling: It is easier to pull or push a load than it is to lift, put down or carry.

Keep the Load Close: Holding a 20lb object with your hands 20 inches from the body creates more compressive force on your low back than holding it 10 inches away. This is because the muscles in your back have to work to counterbalance the weight when it is further from the body. As the compressive force on your low back increases, so does the risk of muscle strains, ligament sprains and damage to the disks in the spine.

Frequency: The more times a load is handled, the more tired the muscles become, making it easier for the person to be injured.

Distance: The farther the load has to be moved, the greater the risk of injury.

Duration (TIME): Where the job involves repetitive movements, reducing the time spent on handling will help to ensure the movements are not causing unnecessary strain.

Forces Applied: Forces should be applied smoothly, evenly and close to the body. Forces exerted should be well within the capacity of the person, and the person should maintain proper posture.

Nature of the Load: Loads that are compact, stable, easy to grip, and capable of being held close to the body are much easier to handle.

Terrain: Rough ground, steep slopes, slippery and uneven floors, stairs and cluttered floors make moving a load awkward and increase the chance for injury.

Environment (Climate & Lighting): If it is too hot, too humid, too cold or the lighting is inadequate, the capacity to work safely is reduced.

Condition of the Workplace: Safe and comfortable working conditions, with adequate space to perform the task, and tools and equipment that are well-maintained, make their job safer.

Age/Gender: Young and old workers alike may be at an increased risk of injury from manual materials handling activities. Ensure abilities of employees are in line with functional job requirements.

Training: Proper training for the specific task is vital to reduce injury.

Team Lifting: If one person cannot lift or move a heavy, large or awkward object safely, organize a team lift. Team lifting reduces the risk of injury, reduces fatigue and makes the task much easier.

Raise/Lower Shelves: The best zone for lifting is between your shoulders and your waist. *Put heavier objects on shelves at waist level, lighter objects on lower or higher shelves.

Avoid Lifting from the Floor: Lifting from the floor can greatly increase your risk of injury for two reasons. Firstly, it is difficult to bring objects close to your body when picking them up from the floor, especially large objects where your knees can get in the way. Secondly, your low back must now support the weights of your upper body as you lean forward, in addition to supporting the weight of the item you are lifting. Lifting the same 20lbs from the floor more than doubles the amount of force on your low back when compared with lifting is from waist height. Even a one pound object lifted from the floor increases you risk of injury if you use a bent over posture.

Get Help When You Need It: Don’t try to lift heavy or awkward loads on your own. Even though the muscles in your upper body may be strong enough to handle the load, the muscles, ligaments and disks in your lower back may be injured because of the additional forces they have to withstand. Get help from a co-worker, and whenever possible, use a cart, hand truck or other mechanical device to move the load for you.

This content was written by Fit2WRK who has partnered with PT and Me to give a comprehensive look into the services physical and occupational therapists provide. For more information on Fit2WRK click here.
crossfit

The Skinny on CrossFit

If you find going to a new gym nerve-wracking, joining a CrossFit gym might be downright terrifying. Walking into the warehouse-like gym and seeing people flipping tires while loud music pumps out of the stereo system and primal grunts and screams reverberate off the walls can be intimidating. Just take a deep breath, slip on your sneakers, grab your water bottle, and get ready to change your life completely.

Created by Gary Glassman, CrossFit is a high-intensity strength and conditioning program. It uses functional movements and varied workouts to help people lose weight, build muscle, and live healthier lives. While every CrossFit trainer is certified and able to adapt workouts to your needs, it is important that you consult your physician about any pre-existing conditions before beginning a new workout regime.

If you are nervous about going to your first CrossFit class, you can rest easy knowing it probably will not be very intense. Before you can participate in the daily workouts, you need to complete the Foundation Training. This is where you will learn the proper form and technique for the nine fundamental movements. Once you feel comfortable with these movements you can join the masses.

You first week at a Crossfit gym (typically called a “Box”) will be like your first week at a new school. There will be new friends to make, lots of questions to ask, and new skills to learn. You won’t be doing advanced moves in the beginning but you will still be working hard and will find yourself sore and tired by the end of the week.

Each class consists of a 15-minute warm-up, followed by 15 minutes of skill work. This is a great opportunity to improve on a move you are struggling with, or tackle an exercise you are nervous about in the Workout of the Day (WOD). After the skill work segment, you will move on to the WOD. The amount of time to complete a workout varies depending on the objective. Sometimes you will be racing against the clock, while other times you will be aiming for a timed personal best. A cool-down will round out your workout.

10 Components of CrossFit

Doing CrossFit is a full mind and body experience. There are 10 specific elements of physical fitness you will practice during each workout. Your overall fitness level will be determined based on your competency in all these domains.

  • Cardiovascular and Respiratory
  • Stamina
  • Strength
  • Flexibility
  • Power
  • Speed
  • Coordination
  • Agility
  • Balance
  •  Accuracy


Building Blocks of CrossFit
There are nine foundational movements every new CrossFit member must understand and master to ensure they get the most out of their workout and avoid injury. The three basic movements are: Squats, Presses, and Lifts. These movements increase in difficulty from Level 1 to Level 3. Once an athlete is comfortable with the form and technique associated with an exercise, they can progress to the next level.

Squats
The first movement you will learn when you join a CrossFit gym is an air squat. This basic movement is the foundation for the next two levels of squats. Squats are excellent lower-body exercises that engage your hamstrings, glutes, and quadriceps. As you progress through the three levels of squats, you will also begin to engage your upper body and core, making the squat a full-body workout.

Level 1 – Air Squat:

  • Stand with your knees shoulder-width apart and your toes angled out at approximately 10 degrees.
  • Keep your back, shoulders, and core tight.
  • Extend your arms out in front of you.
  • Press your hamstrings back and down.
  • As you lower yourself to the ground, press your knees out.
  • At the lowest point of the movement, your hips should be lower than the crease in your knees.
  • Press up through your hamstrings and glutes to return to the starting position.
  • Rest your hands at your side.

Level 2 – Front Squat:

  • Begin in the same stance as for an air squat.
  • Hold a bar in front rack position. (Rack position: Rest the bar on your shoulders across your chest. Your elbows should be up and your triceps parallel to the floor. Loosely grip the bar at slightly wider than shoulder width, with palms facing the ceiling.)
  • Once you are comfortable holding the bar, complete the same downward movement executed in an air squat.

Level 3 – Overhead Squat:

  • Begin in the same stance as for an air squat.
  • Hold a bar over your head with your palms facing forward.
  • Elbows should be locked and your wrist and forearms aligned (no bend or flexion).
  • Complete the same downward movement executed in an air squat.
  • Keep your chest up and eyes forward during this movement. If you feel like you are leaning too far forward you might be compromising the exercise. Reduce your weight and continue.

Presses
Presses are fantastic for targeting and toning your upper body. They will engage your arms, shoulders, back, and, depending on what level you are on, your legs. As with squats, there are three levels of press.

Level 1 – Shoulder Press:

  • Stand with your feet hip-width apart and eyes looking forward.
  • Rest the bar across the front of your shoulders, gripping it slightly wider than shoulder width.
  • Use a hook grip to secure your hands around the bar. (Hook Grip: Cross your middle finger and index finger over your thumb.)
  • Press the bar upwards.
  • As the bar moves straight up, only your head should move back to allow the bar to travel in front of your face.
  • At the top of the movement your arms should be fully extended above your head with elbows locked.
  • Follow the same line to lower the bar back to the starting position.

Level 2 – Push Press:

  • Hold the bar in the same position as for a shoulder press.
  • Keep your torso upright and your core engaged, and slightly lower your body by bending your knees.
  • Explosively straighten your knees and use the momentum in the movement to press the bar above your head.
  • Arms should be fully extended with locked elbows at the top of the movement.
  • Lower the bar back to starting position.

Level 3 – Push Jerk:

  • Hold the bar in the same position as for a shoulder press.
  • Lower your body into a quarter-squat position.
  • Perform a vertical jump.
  • When you are in the air, press the bar above your head.
  • Land with your feet in the exact same spot they took off from and with a slight bend in your knees.
  • Finish the movement by fully extending your hips and knees.
  • Return the bar to your shoulders.

Lifts
The three progressive lifts in CrossFit engage your entire body. These full body movements allow you to make the most out of any workout. If you are short on time, incorporate these exercises into your routine to torch calories and burn muscle.

Level 1 – Deadlift:

  • Place the bar in front of you and stand with your feet hip-width apart.
  • Bend forward at the hips, bending your knees slightly, and grip the bar at a point that is wider than hip-width.
  • The bar should be in contact with your shins and your shoulders should be slightly ahead of it.
  • Keep a flat back as you lower your glutes and pull up on the bar (arms should not bend).
  • Straighten your back and legs while lifting the bar in a vertical line up your body.
  • When the bar passes your knees, fully extend your hips forward.

Level 2 – Sumo Deadlift High Pull:

  • Use a wide stance for this movement.
  • With your hands narrowly apart (about two fist-widths), grip the barbell in front of you with your palms facing down.
  • Keep your arms straight and chest up while you slightly bend your knees into a quarter-squat.
  • Explosively stand up and shrug your shoulders, pulling the bar up in a vertical line.
  • By the time your hips are fully extended, your elbows should be above the bar pointing up and your hands should be aligned with your shoulders.
  • Slowly lower the bar back to the ground by reversing this movement to complete the repetition.

Level 3 – Medicine Ball Clean:

  • Swap out the barbell for a medicine ball.
  • Squat down over the ball.
  • Keep your chest up and gaze ahead.
  • Keep your arms straight and grab the ball on opposite sides.
  • Explode up, shrug your shoulders, and slip your body under the ball so that it lands in front of your face.
  • Catch the ball at the bottom of a front squat with your hips below your knee joints.
  • Complete the movement by standing up with your arms remaining bent, and the ball in front of your face.

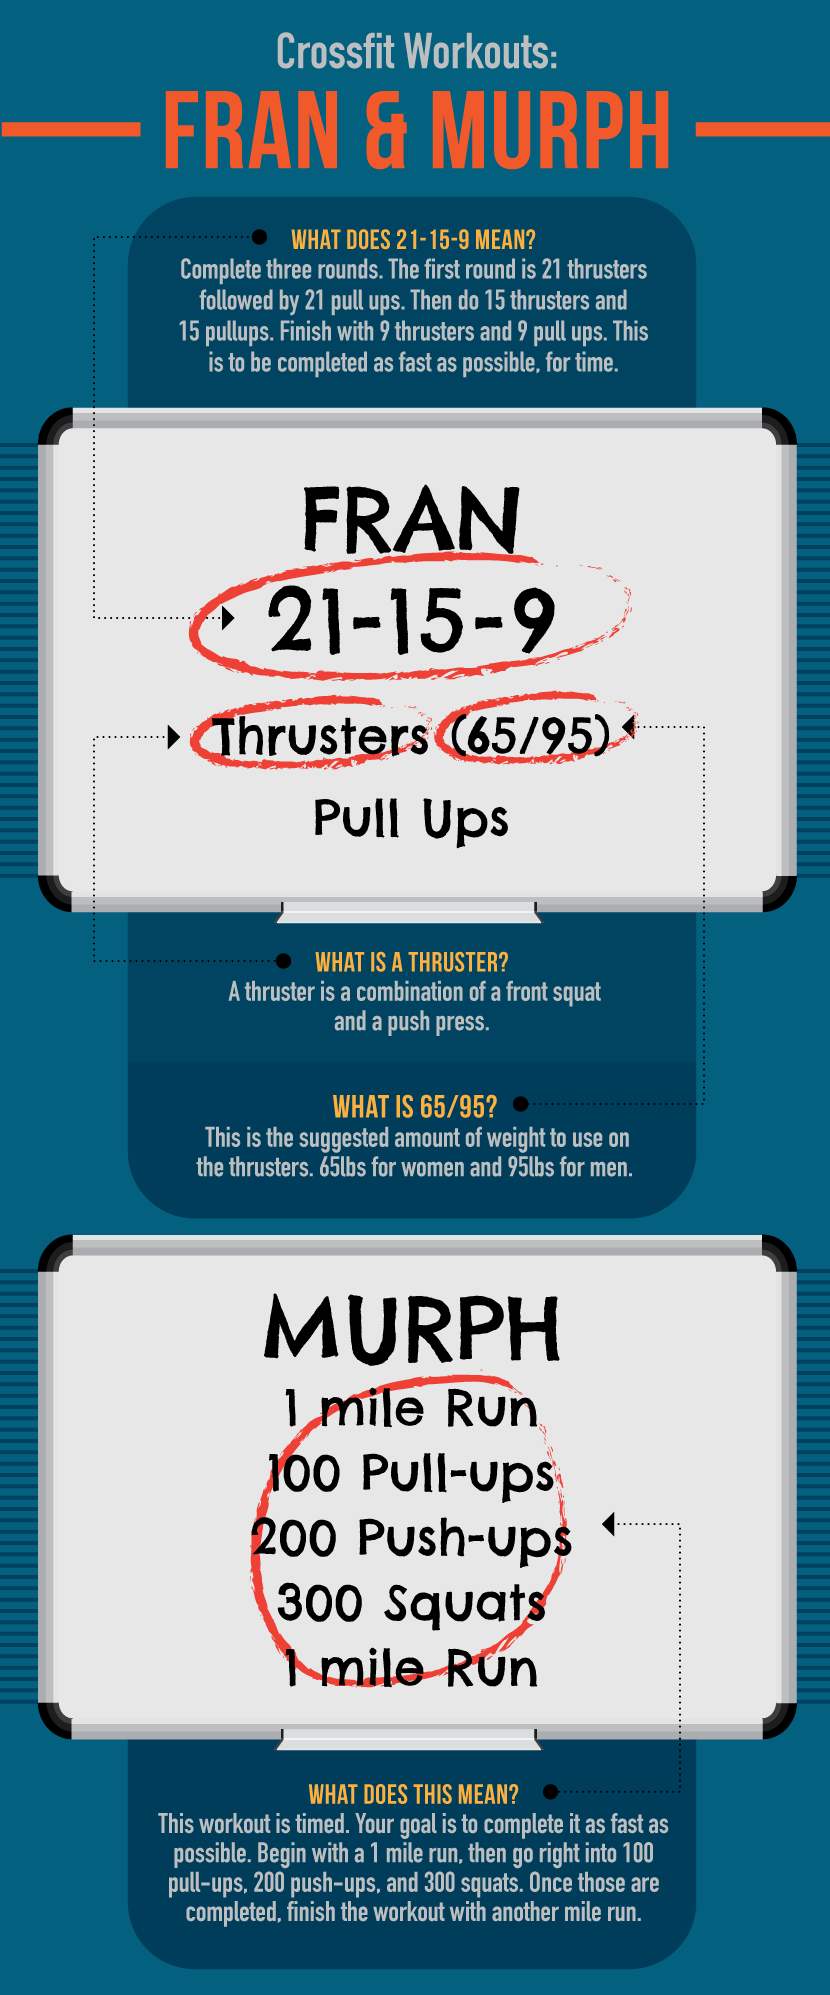
WOD are you Talking About?
It’s no secret that CrossFit has a lingo of its own. If you’ve ever heard someone talking about CrossFit, you might wonder what language they are speaking and why they hate their friends Josh and Nancy so much. While they might be talking about a person, it is more likely your CrossFit friends are discussing a tough workout they just did. Each WOD is given a name. WODs are usually named after women (in the same way storms are, because they are so intense they leave you feeling like you were hit by a hurricane) or after fallen war heroes. Here are two notorious WODs that people love to trash.

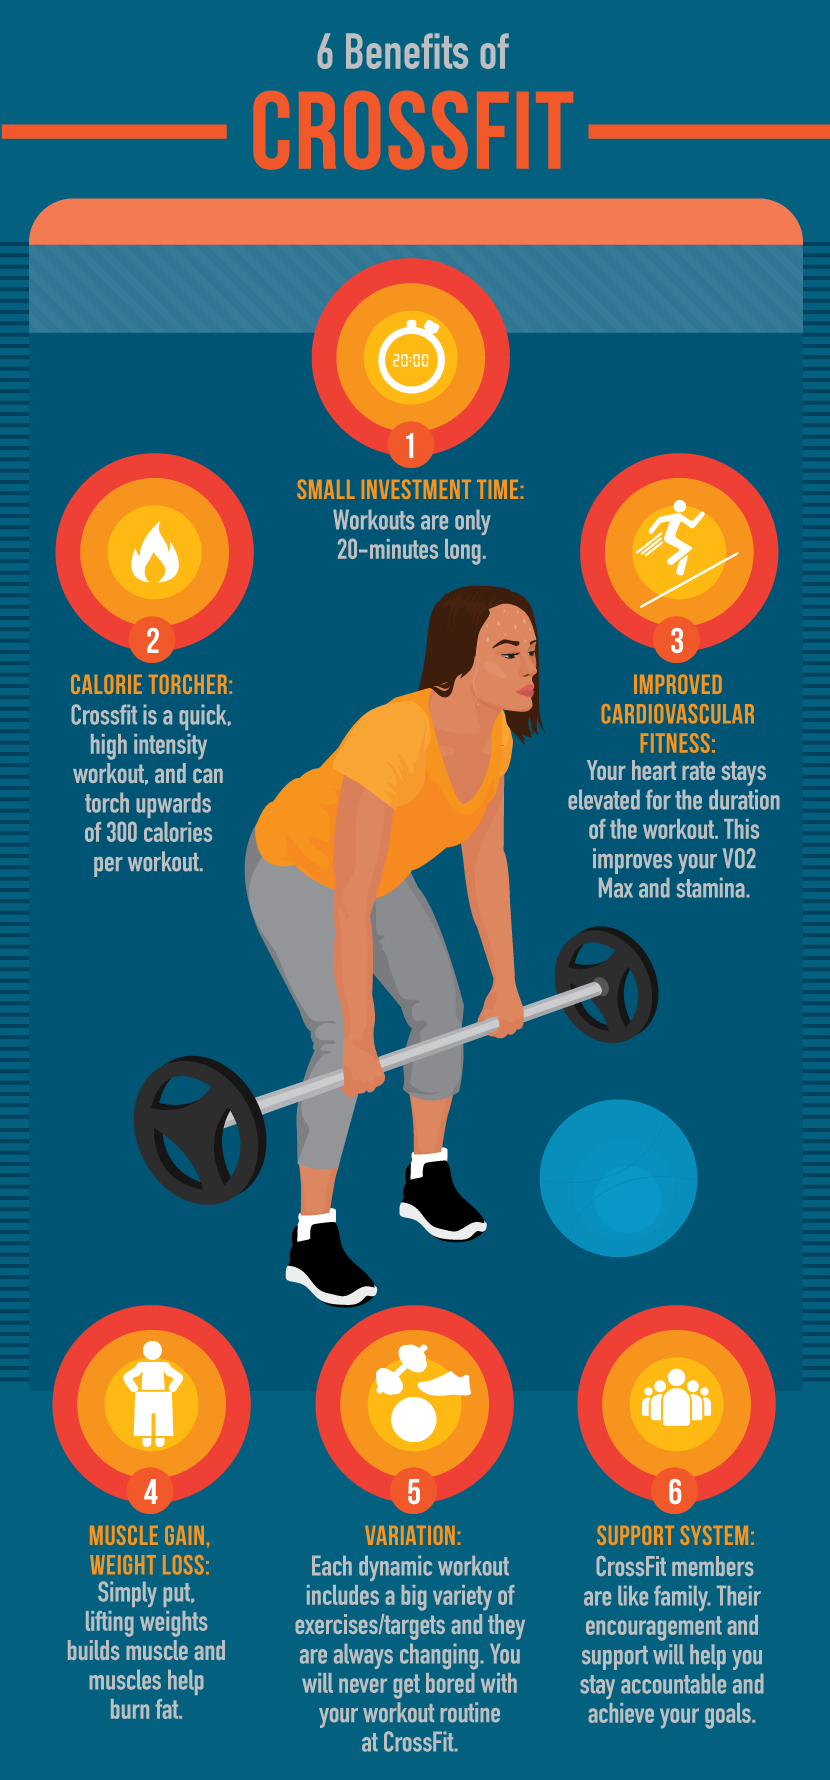
Six Benefits of CrossFit
CrossFit is a tough workout, you can’t deny that. But, if you are willing to take a shot and get your sweat on, you will reap the rewards. Here are just a few of the many benefits CrossFit will have on your health and life.

The best thing to do if you are considering joining a CrossFit gym is to stop by and check one out. They have certified coaches on site who will be more than willing to answer your questions and put your fears to rest. Who knows, you could be the next breakout star at the CrossFit games!

hand therapy week PTandMe

ASHT: Hand Therapy Awareness Week

hand therapy week PTandMe

Prevent hand and wrist injuries while cooking. Professional hand therapists promote wrist and hand health in the kitchen.

USE THE RIGHT TOOL FOR THE JOB
Use easy-to-grip versions of tools like spoons, knives and bottle/can openers to decrease the stress on your hands and use scissors to open bags (or packages) instead of your thumbs.

SIT OR STAND UP STRAIGHT
Correct posture is important because the nerves that operate your fingers start in neck. During activities which require you to be looking down at what you are doing, like chopping vegetables, take a moment to stand up straight, turn your head side to side/up and down, and stretch your arms over your head.

SLIDE, DO NOT LIFT
When working in the oven, always slide the shelf out so you can get a good, safe grasp of the panhandles.

KEEP YOUR SHOULDERS DOWN
Your arms should be at your sides and the counters you work on should be waist high. Many kitchen counters are too high for the average person. As a result, you may be forced to raise the shoulder you are using to cut the food and lean to the opposite side of your body when preparing food. This causes increased stress on the neck, shoulder and arm muscles and nerves.

TMJ Pain

Physical Therapy Helps With TMJ Pain

TMJ Pain

Physical Therapy can help those suffering with pain associated with the facial region, head, and/or neck, including those struggling with Temporomandibular (TMJ) disorders.

The temporomandibular joint or TMJ, is a complex joint located in front of each ear. It is responsible for allowing mouth opening and closing. When the TMJ is not working correctly, you may experience jaw pain, clicking, popping, or locking of the joint. You may also experience headaches, neck pain, sinus pain, dizziness, and ear ringing or pain. TMJ pain or Temporomandibular Dysfunction (TMD) is not strictly limited to the jaw, jaw, it can also be influenced by activities, positioning, or alignment of the head and neck.

COMMON CAUSES

  • Excessive grinding or clenching of teeth
  • Joint stiffness
  • TMJ Disorders
  • Poor Posture or Ergonomics
  • Other neck conditions including pain and headache
  • Stress and muscle tension

TMJ Pain

PHYSICAL THERAPY TREATMENT FOR TMJ
Physical therapy treatment includes an in depth evaluation of the structures of the cervical spine, jaw joints and head. Treatment could include manual therapy techniques for the spine, jaw and soft tissues, exercise for the jaw and neck, and modalities. Evaluation focuses on the relationship of the muscles, joints and nerves of the jaw, head, neck and face and how they relate to each other. Manual therapy may be used to improve range of motion and mobility of the jaw and neck. Exercise is designed to restore the proper balance of the spine and head to take unnecessary stress off of sensitive tissues and to support the body so it can perform the activities of daily living efficiently and comfortably. Modalities will decrease the short-term discomfort and joint irritation. We will look at how you interact with your environment to see if there are activates you preform that put increase stress on your body which could cause increased pain. Most importantly, in addition to these techniques, the patient is provided with a home exercise program to aid in symptom reduction. Each treatment plan is based on a patient’s individual needs and the therapist, patient, and referring practitioner work as a team to reach the patients goals.

This information was written by Rehab Associates of Central Virginia, an outpatient physical therapy group with 13 locations in Central Virginia. Their physical therapists have advanced degrees in specialty orthopedic care from head to toe. From musculoskeletal headaches to lower back pain to heel pain syndrome, they can help take away your pain and help you return to normal activity. For more information click here.

Baby Mechanics

BabyMechanics_FBsize

Proper lifting mechanics is important for everyone, especially for a new mom. Caring for a young child/infant significantly increases the strain to one’s low back. Luckily, there are steps that one can make to decrease that strain and reduce the risk of injury.

Always remember to: lift the child/infant close to you and bend through your legs versus your back.

As your baby begins to gain more independence and mobility, lower the height of his mattress to keep him safe. Be aware that the lower mattress height can increase strain on your back, so lower the mattress height as gradually as possible. When lifting your baby in or out of the crib, keep baby as close to your body as possible while keeping your back straight and bending through your legs. For older babies, help him get into a sitting position before lifting him out of the crib. Once baby can stand, lift him out of the crib from a standing position.

Just like lifting baby out of the crib, keep her as close to you as possible, bend through your legs and keep your back straight. Keep your abdominal muscles tight as you lift her up. If possible, get into a deep squat position to lower your center of gravity before picking up baby.

Avoid the “hip shift” position with baby propped on one hip while shifting your body to that side. Instead hold baby in front of you with his legs out on either side of you. If you are going to be holding baby for an extended period of time, use a baby carrier to keep your baby supported in a neutral alignment.

Tummy time isn’t just good for babies! During tummy time, get down on your stomach too. Stretching out on your stomach is good for you, and it also allows you to better interact with your baby.

During story time, be aware of your posture and always sit up straight. Place a pillow behind your back for extra support.

Use a nursing pillow under baby to help prop her up closer to you. Bring baby to you instead of leaning forward towards her to avoid strain. Placing a pillow behind your back can provide extra support and help you maintain the proper posture. If you are bottle feeding or for older babies, place a pillow under the arm that is supporting baby’s head to decrease the strain on your shoulder and neck. Although making eye contact with baby during a feeding can help strengthen your relationship with baby, it can cause strain on your neck. Be sure to bring your head to a neutral position throughout the feeding to decrease the tension on your neck.

baby car seat

When lifting a car seat, be sure to keep the car seat as close to your body as possible. Bend through your legs and keep your abdominal muscles tight as you pick up the car seat. Instead of carrying the car seat in one hand at your side, use both hands to hold and carry the car seat in front of you whenever possible.

Getting the car seat in and out of the car can be tricky. Remember to keep the car seat as close to your body as possible, keep your abdominal muscles tight and your back straight. If your car seat is placed in the middle position in your car, put one leg up into the car to protect your back while keeping the car seat close to your body.

This information was written by Metro Spine & Sports Rehabilitation, an outpatient physical therapy group with locations in the Chicago Loop and Lakeview areas. At Metro Spine & Sports Rehabilitation, their number one priority is the patient. For more information click here.