Tag Archives: Posture

repetitive strain injury

Repetitive Strain Injury (RSI)

Repetitive strain injury shoulder: Repetitive strain injury (RSI),Prevention tips for strain and injury in the workplace.

The Following are Seen as Causes of Repetitive Strain Injury:

  • The overuse of muscles in our hands, wrists, arms, shoulders, neck and back
  • The area is affected by repeated actions, which are usually performed on a daily basis over a long period
  • The repetitive actions are done in a cold place
  • Forceful movements are involved
  • Workstations are poorly organized
  • Equipment is badly designed
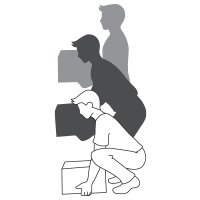
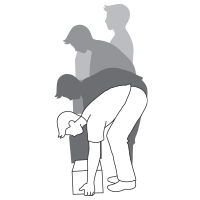
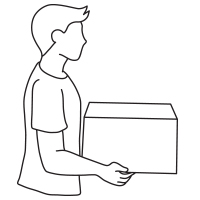
  • The individual commonly adopts an awkward posture
  • There are not enough rest breaks

RSI

Prevention 101: Nine Easy Ways to Reduce Your Risk of Developing Repetitive Strain Injury:

  • TAKE BREAKS when using your computer. Every hour or so, get up and walk around, get a drink of water, stretch whatever muscles are tight, and look out the window at a far off object (to rest your eyes).
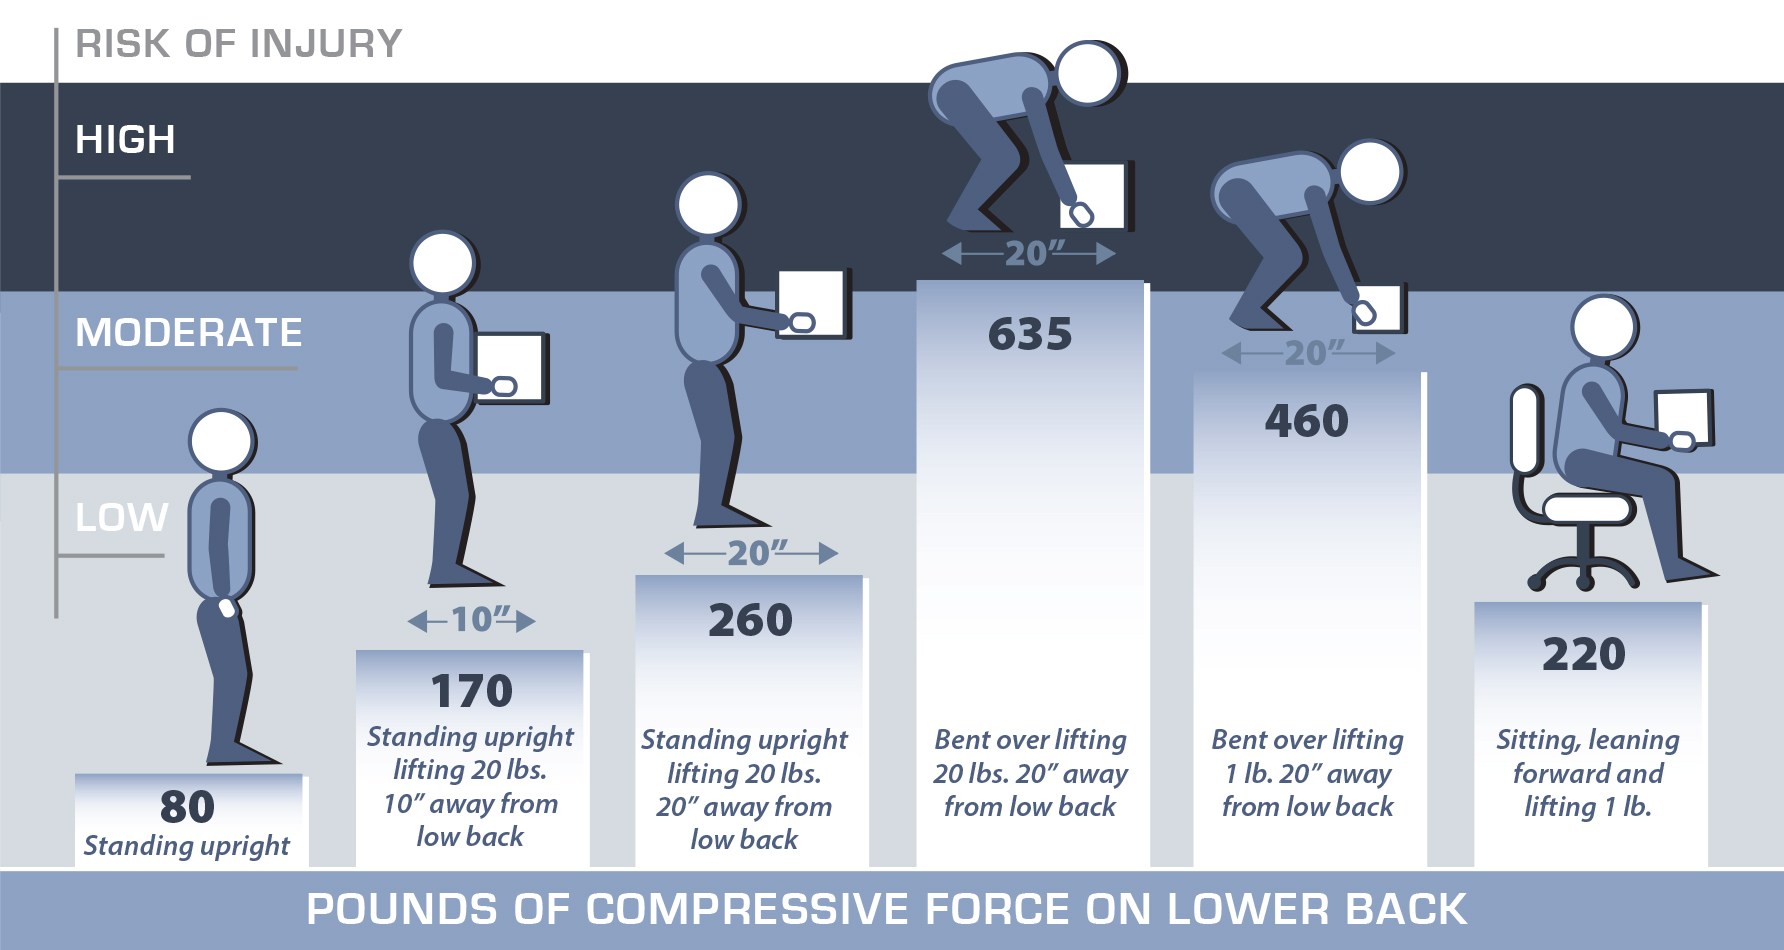
  • Use good posture. If you can’t hold good posture, it probably means it’s time for you to take a break from typing. If you are perpetually struggling to maintain good posture, you probably need to adjust your workstation or chair, or develop some of the support muscles necessary for good posture.
  • Use an ergonomically-optimized workstation to reduce strain on your body.
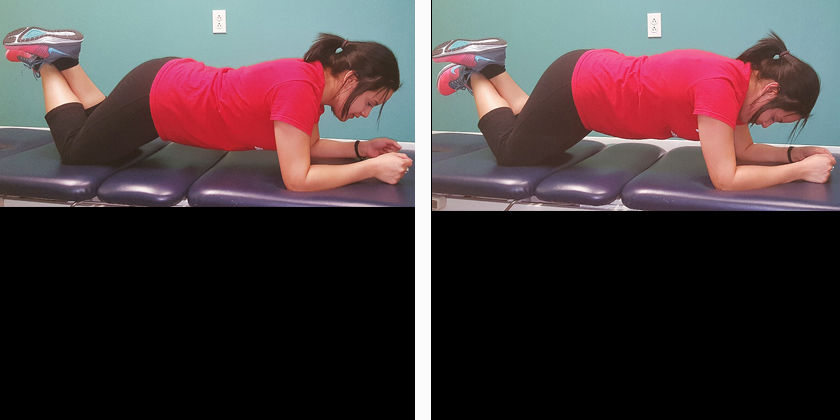
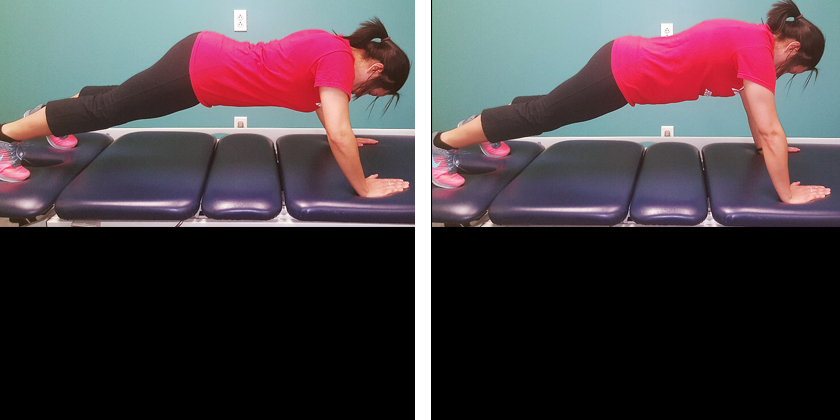
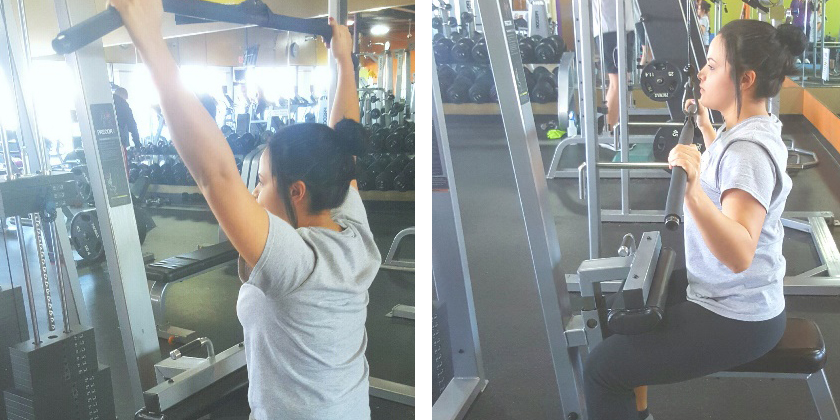
  • Exercise regularly. Include strengthening, stretching, and aerobic exercises. Yoga and pilates may also be helpful.
  • Only use the computer as much as you have to. Don’t email people when you could walk down the hall or pick up the phone and talk to them. It’s not only better for your hands – it’s friendlier. Think before you type to avoid unnecessary editing.
  • Don’t stretch for the hard-to-reach keys, e.g. BACKSPACE, ENTER, SHIFT, and CONTROL… basically everything but the letters. Instead, move your entire hand so that you may press the desired key with ease. This is crucial when you are programming or typing something where non-letter keys are used extensively.
  • Let your hands float above the keyboard when you type, and move your entire arm when moving your mouse or typing hard-to-reach keys, keeping the wrist joint straight at all times. This lets the big muscles in your arm, shoulder, and back do most of the work, instead of the smaller, weaker, and more vulnerable muscles in your hand and wrist. If you find it difficult to do this, then your shoulder and back muscles are probably too weak. It is OK, and in fact a good idea, to rest your elbows/wrists when you are not typing.
  • Use two hands to type combination key strokes, such as those involving the SHIFT and CONTROL keys.
  • When writing, avoid gripping the writing utensil tightly. Someone should be able to easily pull the writing utensil out of your hand when you are writing. If your pen or pencil requires you to press too hard, get a new one (my favorite is Dr. Grip Gel Ink).

Article provided by Fit2WRK. The information noted above is a summary of one of the components of Fit2WRK.

bike fit

Does Your Bike Fit?

DoesYourBikeFit_FBsize

There is a misconception that only competitive cyclists benefit from bike fittings. The truth is that anyone that rides a bike on a consistent basis should ride a bike that fits them properly. Granted, competitive cyclists are looking for every advantage with respect to power and performance. However, fitness and recreational riders can gain the same benefits while also improving comfort and reducing the risk of on-the-bike injuries. Often, a few basic changes to a bike can make a significant difference with respect to comfort, power, endurance and overall performance. In this blog we briefly examine some of the key areas that must be considered to ensure a proper bike fit.

THINGS TO LOOK FOR

Frame Size
Obviously, not all frames are created equal. Frame geometry can vary dramatically depending on material, the manufacturer and overall design. Head tube angles, seat tube angles, top tube length, wheel base, etc. are all factors which contribute to how a bike handles and rides. This is where test riding a bike will pay dividends. For example, having a steep head angle may sound like a good idea to achieve a responsive ride. However, you may find it a bit unnerving on a steep, fast descent or even when you try to take your hands off the bar to eat or drink. With regard to mountain bikes, different suspension and wheel size options also affect the way a bike handles and rides. All are personal preferences that should match your intended use.

For general fit, most manufacturers will have measurements that you can take on yourself to help you decide which frame size will likely be best for you. However, you may also fall within the acceptable range for two different frame sizes. In that case, there is no substitute for going to a shop that carries the bikes and riding them both. In all likelihood, you will quickly feel the difference and easily decide which will work best for you. If you are leaning toward the larger of the two sizes, make sure to check the stand over height before laying your cash on the counter. Keep in mind that your primary concern with respect to frame size is the fit from the waist down. Reach is obviously important as well. However, most upper body adjustment can be achieved by varying bars or stem length/angle assuming the length of the top tube is appropriate.

Crank Arm Length
This is one area where people seem to be content to accept a length simply because that particular crank arm is what they have been told is standard or best. The truth is that many bikes come equipped with crank arms that are too long for the prospective rider. Even when told they should have a shorter crank arm, some feel that if they can push it, they will be a stronger, more powerful rider. This can be a foolish mindset as this can result in knee and/or back problems. Of course, there are also occasions where the crank arms may not be long enough. In this instance, the rider is likely giving away potential power and performance. When deciding on an appropriate crank arm length, we are usually talking about millimeters of difference. However, there are specifications for crank arm length typically based on inseam length and/or seat height.

Cleat Alignment
Pedal choice as well as cleat adjustment are vital components of bike fit. Proper cleat alignment is the starting point for overall fit and essentially aligns the position of the foot in relation to the spindle of the pedal and the crank arm. It can also be one of the most difficult aspects of fit to get accurately established. This is true primarily because it is hard to align your cleat when it is mounted to your shoe which is on your foot and clipped into the pedal. Furthermore, most modern pedal/cleat combinations allow for considerable adjustment with respect to float, rotation, fore and aft, and side-to-side. Equally important is the shoe. People often buy soft cycling shoes that are comfortable on and off the bike. Although these shoes may be more comfortable for walking, you are giving up considerable force production and performance on the bike. Furthermore, on long bike rides, these softer shoes can result in “hot spots” and foot fatigue. Cycling shoes don’t need to be uncomfortable. However, when you are riding a bike, wear the shoe that is made for the job.

Seat Adjustment
This is another area that results in much debate. Do you go higher for better force generation or lower for better control on descents? Once again, improper seat height can result in pain or injury. It can also significantly limit your performance. For most riders, seat height and saddle setback (fore/aft positioning) is crucial for comfort and performance. This is the area where the biggest abuse of the law of averages has befallen bike fit. Seat adjustment is often based on averages and equations. Unfortunately, this is rarely the correct position. Much better than averages are measured angles with the rider on the bike which results in a more exacting fit.

Stem Length/Bar Height
Fitting stem length and bar height should be based on alignment, posture, comfort and performance. These factors can have a great effect on your back, neck, shoulders and wrists.

You may be saying to yourself, “Then tell me how my bike should be set up.” The fact is that an accurate fit cannot be done without looking at the individual on their bike. Many bike fits are based on measurements such as inseam, reach, trunk length, etc. which are then plugged into a variety of equations. Adjustments to the bike are then made according to the resulting numbers. The problem is that these equations often vary and are based on averages. Most of us aren’t average. We all have differing body composition and physique. Strength, flexibility, experience and orthopedic issues all play into proper bike fit. Proper fit must be done with the rider on the bike looking at specific measures and alignments.

Ultimately, a good bike fit is well worth the money and can go a long way toward improving comfort on the bike, improving your performance, and reducing the risk of injury. There are obviously many approaches and “schools of thought” when it comes to bike fit. The point here is that the most accurate fits are accomplished by evaluating you on your bike. Remember, depending on your effort and ability, cycling can be a very intense form of exercise. However, that doesn’t mean you have to hurt. If you have pain on the bike, something is typically wrong. More often than not, the problem can be addressed by improving fit. The bottom line is that you want to be sure the bike you ride is fit specifically to you. You should never be forced to fit yourself to the bike.

Written by Michael Choate, MSPT, USA Cycling Certified Coach at North Lake Physical Therapy & Rehabilitation in Portland, Oregon.

North Lake Physical Therapy & Rehabilitation clinics use progressive techniques and technologies to stay on the forefront in their field. OTheir staff is committed to providing patients with advanced healing techniques. To learn more about them click here.

reduce back pain

No Turning Back: Reduce Back Pain with These Spine-Stabilizing Exercises

NoTurningBack_FBsize

We take so many things about our bodies for granted. They feel good, we go about our daily activities and we never think about the complex mechanisms at place. That is until something goes wrong. Take your back: it serves as stabilizer, flexor, movement and relaxor too. But unfortunately, back pain troubles many of us — about 8 in 10 people in their lifetime will experience back pain. But you don’t have to rely on pills to relieve symptoms or even countless trips to a doctor. Exercises offer a proactive approach to reduce back pain, and this graphic can help with ideas.

reduce-back-pain-with-these-spine-stabilizing-exercises-web-1

PT News

This Month in PT News. Featuring articles from PTandMe partnering clinics!

1. Simple Steps to Starting a Weight-Training Program
Written by the Therapy Team at The Jackson Clinics – Middleburg, VA

One of the challenges of weight training is determining how much effort to put in for the most benefits. Read more

2. Sit Up Straight! Avoid Sitting with Bad Posture
Written by Megan Russo, PTA at The Center for Physical Rehabilitation – CPR – Grand Rapids, MI

Do you ever find yourself sitting in a slumped position while at work or driving in the car? Read more

3. Minimizing the Risk of Ski Injury
Written by the Therapy Team at The Jackson Clinics – Middleburg, VA

If winter weather has you prepared to hit the slopes, be sure to take the necessary precautions to keep yourself injury-free this season. Read more

Increased Risk Zones

Work Related Stress & Increased Risk Zones: Part 1 of 2

INCREASED RISK ZONES
All Risks Increase with Duration, Frequency and Magnitude.

• Excessive Force

• Repetition of Activity (Can irritate tendons and increase pressure on nerves)

• Awkward Posture (Can compress nerves and irritate tendons)

• Sustained Static Posture (Can restrict blood flow and damage muscles)

• Unsupported Positions

• Motion (Increased speed or acceleration when bending / twisting, can increase the amount of force exerted on the body)

• Compression (Grasping sharp edges like tool handles, can concentrate force on small areas of the body, reducing blood flow and nerve transmission, and damaging tendons and tendon sheaths)

• Inadequate Recovery Time (Overtime, lack of breaks, & failure to vary tasks)

• Vibration of Tools (From vibrating tools, can decrease blood flow, damage nerves, and contribute to muscle fatigue)

• Whole Body Vibration (From driving trucks or operating subways, can affect skeletal muscles and cause low-back pain)

• Effects of Temperature (Cold temperatures can adversely affect a worker’s coordination and manual dexterity while Heat stroke can be very serious as when the body becomes unable to control its temperature, it rises rapidly, the sweating mechanism fails, and the body is unable to cool down.)

• Environment (Slip/Fall hazard-Uneven Floor Surfaces)

• Material Handling Guidelines:
Weight Loading over 50lbs
Lift Speed greater than 5/minute
Vertical Lift Exceeds 3ft
Carry over 1 minute
Sustained Push/Pull over 30 seconds
Static reach holding tasks over 1 minute

Part two of our Work Related Stress & Increased Risk Zones can be found here

work related stress

Sources:
1) Ergonomics: The Study of Work, U.S. Department of Labor, Occupational Safety and Health Administration, OSHA 3125, 2000 (Revised)
2) T. R. Waters, “Manual Materials Handling”, in: Physical and Biological Hazards of the Workplace 2nd. Edited by P. Wald and G. Stave. New York: John Wiley and Sons, 2002.
3) Ergonomics and Musculoskeletal Disorders, Centers for Disease Control and Prevention/ National Institute for Occupational Safety and Health (NIOSH) © Fit2WRK 2015 R.Gagne

How to Exercise at the gym

Exercising Do’s and Don’ts

In the fourth installment of our “At The Gym” series we examine how to exercise at the gym from start to finish. If you have any sudden significant increase in pain, swelling, or discoloration while performing or following exercise, discontinue immediately and contact your physician or therapist at your next therapy session.

How to Exercise at the gym

MILITARY SHOULDER PRESS
* How to exercise at the gym top tip: It is generally not recommended to do this exercise due to undo stress and strain at the shoulder joint.
If you do choose to do a military press, avoid bringing the bar behind the head and make sure that the elbows don’t pass 90⁰ at the bottom of the repetition.

START POSITION
• Seated with back against the seat (if available), with feet flat on the ground.
• Barbell held above head with elbows fully extended and wide grip to facilitate 90⁰ bend at the elbows at the bottom of the rep.

ENDING POSITION
• Bring barbell down until your elbows are bent at 90⁰ with the barbell in front of your face.

DON’T
• Lift feet off the ground.
• Lift off the seat.
• Arch your back.
• Bring barbell down to chest.

MACHINE CHEST PRESS

START POSITION
• Seated with back against the seat and feet flat on the ground.
• Arms out to your side and elbows flexed at 90⁰ but not coming back past your body (This picture shows the arms back a little too far with the angle at the elbows being a little too deep. Most chest press machines are built so that you have to start in this position which can compromise the shoulder if lifting heavy. If adjustable start in a position a little more forward than this).

ENDING POSITION
• Back against the seat.
• Elbows fully extended.

DON’T
• Lift feet off the ground.
• Lift off the seat.
• Bring bent elbows past your body.

CHEST PRESS

START POSITION
• Lay flat on bench with feet flat on the ground.
• Arms out to your side at 90⁰ with elbows flexed at 90⁰.
• Palms facing lower extremities.

ENDING POSITION
• Elbows fully extended.

DON’T
• Allow elbows to come down past bench height or 90⁰ bend.
• Left feet off the ground.
• Arch your back.

CHEST FLY

START POSITION
• Lay flat on bench with feet flat on the ground.
• Dumbbells touching each other with palms facing each other with elbows slightly bent.

ENDING POSITION
• Arms out at your side at 90⁰ with elbows flexed at about 120⁰.

DON’T
• Lift feet off the ground.
• Arch your back.
• Allow elbows to come down past bench height.

This information was written by STAR Therapy Services, an outpatient physical therapy group with six locations in Houston, Texas. At Star Houston Therapy Services, their number one priority is the patient. They strive to provide individualized treatment with hands-on, compassionate care. They perform comprehensive evaluations and encourage patient input for treatment planning and goal setting. For more information click here.

Knowing how to exercise at the gym, can build confidence and reduce the likelihood of injury. View the complete Exercising Do’s and Don’ts series below:


exercising do's and dont's

exercise at the gym

Exercising Do’s and Dont’s

AtTheGym#3_FBsize

In the third installment of our gym series we examine the proper ways to exercise at the gym from start to finish. If you have any sudden significant increase in pain, swelling, or discoloration while performing or following exercise, discontinue immediately and contact your therapist at your next therapy session.

SCAPULAR RETRACTION / ROW

START POSITION
• Standing or seated with back in neutral with feet shoulder width apart.
• Squeeze shoulder blades together.
• Elbows slightly bent and forearms parallel to the floor.

ENDING POSITION
• Elbows at 90⁰ flexion.
• Shoulders pulled back.
• Hands at your sides at shoulder width and forearms parallel to the floor.

DON’T
• Swing body back and forth.
• Let the weight pull you forward between repetitions (keep the shoulders back).
• Shrug.

exercise at the gym

ANTERIOR DELTOID – FRONTAL RAISE

START POSITION
• Standing with spine in neutral position with feet shoulder width apart.
• Palms facing down.

ENDING POSITION
• Arm raised to 90⁰ directly in front of you.
• Elbow in full extension.

DON’T
• Raise arm past 90 degrees.
• Swing body back and forth.
• Rotate wrist.
• Shrug shoulders.

exercise at the gym

LATERAL DELTOID – LATERAL RAISES

START POSITION
• Standing with spine in neutral position with feet shoulder width apart.
• Elbows bent at 90 degrees.

ENDING POSITION
• Arms raised to 90 degrees at your side.
• Palms facing down.

DON’T
• Raise arms past 90 degrees.
• Swing body back and forth.
• Shrug shoulders.

exercise at the gym

BENCH PRESS

START POSITION
• Lay flat on bench with both feet flat on the ground.
• Place a rolled towed in the center of the chest.
• Arms extended with wide grip to facilitate 90 degree bend at the elbow at the bottom of repetition.

ENDING POSITION
• Lower slowly until the bar touches the towel
• Elbows should not pass the height of the bench bending to about 90 degrees.

DON’T
• Lift feet off the ground.
• Arch your back.
• Bounce bar off your chest (barbell should only touch the towel lightly).

This information about exercise at the gym was written by STAR Therapy Services, an outpatient physical therapy group with six locations in Houston, Texas. At Star Houston Therapy Services, their number one priority is the patient. They strive to provide individualized treatment with hands-on, compassionate care. They perform comprehensive evaluations and encourage patient input for treatment planning and goal setting. For more information click here.

View the complete Exercising Do’s and Don’ts series below:


exercising do's and dont's

Safe Lifting Practices

Safe Lifting Practices: Back Injury Prevention

SafeLiftingPractices_FBsize

Whether you are getting ready for a move, or need to lift things at work, it’s important to use safe lifting practices. Don’t end up with a hurt back – use these tips to keep yourself injury free.

• ESTABLISH A BASE OF SUPPORT: Use a wide, balanced stance with one foot in front of the other. Make sure that you have firm footing and that your feet are a shoulders-width apart. This staggered stance gives you the stability of not falling over and being able to secure the load.•

• KEEP YOUR EYES UP: Looking slightly upward will help you maintain a better position of the spine. Keeping your eyes focused upwards helps you keep your back straight.

• GET A GOOD GRIP: with your palms and make sure you have an adequate hold on the object. Be certain you will be able to maintain a hold on the object without having to adjust your grip later. You can use gloves to help maintain an adequate grip, but don’t rely on gloves because they can desensitize the fingers and make you unable to feel the object.

• LIFT GRADUALLY WITH YOUR LEGS: without using jerky motions. By using your leg strength, your chance of lower back injury is greatly reduced.

• TIGHTEN YOU STOMACH MUSCLES: as you begin the lift and keep you head and shoulders up.

• PIVOT  DON’T TWIST: Move your feet in the direction of the lift. This will eliminate the need to twist at the waist.

• WEIGHT: A lighter load normally means a lesser risk of injury. The weight of the object should be within the capacity of the person to handle safely.

• HANDLING: It is easier to pull or push a load than it is to lift, put down or carry.

• KEEP THE LOAD CLOSE: Holding a 20 lb. object with your hands 20 inches from the body creates more compressive force on your low back than holding it 10 inches away. This is because the muscles in your back have to work to counterbalance the weight when it is further from the body. As the compressive force on your low back increases, so does the risk of muscle strains, ligament sprains and damage to the disks in the spine.

• FREQUENCY: The more times a load is handled, the more tired the muscles become, making it easier for the person to be injured.

• DISTANCE: The farther the load has to be moved, the greater the risk of injury.

• DURATION TIME: Where the job involves repetitive movements, reducing the time spent on handling will help to ensure the movements are not causing unnecessary strain.

• FORCES APPLIED: Forces should be applied smoothly, evenly and close to the body. Forces exerted should be well within the capacity of the person, and the person should maintain proper posture.

• NATURE OF THE LOAD: Loads that are compact, stable, easy to grip, and capable of being held close to the body are much easier to handle.

• TERRAIN: Rough ground, steep slopes, slippery and uneven floors, stairs and cluttered floors make moving a load awkward and increase the chance for injury.

• ENVIRONMENT (CLIMATE & LIGHTING): If it is too hot, too humid, too cold or the lighting is inadequate, the capacity to work safely is reduced.

• CONDITION OF THE WORKPLACE: Safe and comfortable working conditions, with adequate space to perform the task, and tools and equipment that are well-maintained, make their job safer.

• AGE/GENDER: Young and old workers alike may be at an increased risk of injury from manual materials handling activities. Ensure abilities of employees are in line with functional job requirements.

• TRAINING: Proper training for the specific task is vital to reduce injury.

• TEAM LIFTING: If one person cannot lift or move a heavy, large or awkward object safely, organize a team lift. Team lifting reduces the risk of injury, reduces fatigue and makes the task much easier.

• RAISE/LOWER SHELVES: The best zone for lifting is between your shoulders and your waist. Put heavier objects on shelves at waist level, lighter objects on lower or higher shelves.

• AVOID LIFTING FROM THE FLOOR: Lifting from the floor can greatly increase your risk of injury for two reasons. Firstly, it is difficult to bring objects close to your body when picking them up from the floor, especially large objects where your knees can get in the way. Secondly, your low back must now support the weights of your upper body as you lean forward, in addition to supporting the weight of the item you are lifting. Lifting the same 20lbs from the floor more than doubles the amount of force on your low back when compared with lifting is from waist height. Even a one pound object lifted from the floor increases you risk of injury if you use a bent over posture.

• GET HELP WHEN YOU NEED IT: Don’t try to lift heavy or awkward loads on your own. Even though the muscles in your upper body may be strong enough to handle the load, the muscles, ligaments and disks in your lower back may be injured because of the additional forces they have to withstand. Get help from a co-worker, and whenever possible, use a cart, hand truck or other mechanical device to move the load for you.

PROPER LIFTING TECHNIQUE

proper lifting

IMPROPER LIFTING TECHNIQUE

improper lifting

POSTURE

Posture diagram

GOOD POSTURE

good posture

BAD POSTURE

bad posture

at the gym

At the Gym: Exercising Do’s and Dont’s

AtTheGym#2_FBsize

In the second installment of our “At The Gym” exercise series we examine the proper ways to exercise at the gym from start to finish. If you have any sudden significant increase in pain, swelling, or discoloration while performing or following exercise, discontinue immediately and contact your therapist at your next therapy session.

Plus Push Up 1

PLUS PUSH-UP

START POSITION
• Get on elbows and knees.
• Knees bent
• Straight or neutral back done by drawing the stomach in and the buttocks down.

ENDING POSITION
Push elbows into mat while trying to increase the space between the shoulder blades (round out your back between the shoulders).DON’T

DON’T
• Drop the head.
• Raise the buttocks or let the low back excessively curve inward.

Plus Push Up 2

PLUS PUSH-UP: STAGE 2

START POSITION
Push-up position

ENDING POSITION
• Push hands into mat while trying to increase the space between shoulder blades.
• Rounded upper back appearance.

DON’T
• Drop the head.
• Raise the buttocks or let the low back excessively curve inward.

Scapular Depression

SCAPULAR DEPRESSION

START POSITION
• Seated with shoulder blades drawn downward (don’t shrug shoulders).
• Hands hold just outside of the curvature of the bar to comfort.
• Knees bent underneath knee pad and feet on the floor.
• Keep your back straight with a slight posterior lean from the hips.

ENDING POSITION
Bring bar to chest with elbows bent.

DON’T
• Lift feet off the ground.
• Rock at the waist.
• Elevate or let shoulders pull forward.
• Hyperextend the low back as you pull in.

Empty Can 1

EMPTY CAN

START POSITION
Standing with hands at your side and thumbs pointing downward with feet shoulder width apart.

ENDING POSITION
Arms raised to about 60⁰ with thumbs facing down and slightly to your side.

DON’T
• Swing body back and forth.
• Shrug shoulders.
• Lift above 60⁰.

Full Can
FULL CAN

START POSITION
Standing with hands in front of you with thumbs pointing upward and feet shoulder width apart.

ENDING POSITION
Arms raised to 90 – 120⁰ with thumbs facing up.

DON’T
• Swing body back and forth.
• Shrug shoulders.
• Lift above 120⁰.

This information was written by STAR Therapy Services, an outpatient physical therapy group with six locations in Houston, Texas. At Star Houston Therapy Services, their number one priority is the patient. They strive to provide individualized treatment with hands-on, compassionate care. They perform comprehensive evaluations and encourage patient input for treatment planning and goal setting. For more information click here.

View the complete Exercising Do’s and Don’ts series below:


exercising do's and dont's

what to expect from physical therapy

What to Expect from Physical Therapy

What_to_Expect_from_PT_FBsize

PHYSICAL THERAPY IS INTENDED TO MAKE CHANGES WITHIN YOUR BODY

We will accomplish this in several different ways. First, through the use of manual therapies, such as massage and mobilization of the joints. The goals of change are to:

  • Stretch short tissues to make them longer.
  • Strengthen weak tissues to make them stronger.
  • Improve and correct bad/abnormal biomechanics and asymmetries to alleviate pain and take the stress off the body.

THERE ARE SEVERAL THINGS THAT WE EXPECT DURING THE PHYSICAL THERAPY PROCESS, ESPECIALLY IN THE EARLY STAGES OF PT

  • You can expect that you will be sore after the first visit, and most likely the first 2 – 3 weeks until their body gets adapted to PT. Your body is just not used to doing the things that we are going to ask it to do, so there will be a period of adjustment.
  • The pain WILL move. As we make changes to your tissues and mechanics, the stresses on your body will change, thus altering where you will feel the pain or your symptoms.
  • The pain WILL change in terms of intensity, meaning that your pain is expected to fluctuate along the 10 point scale, starting between your high and low levels and changing based on your position, activity, and stress on the body.
  • The pain may also change in terms of the quality of pain. The pain may be: sharp, dull, achy, throbbing, burning, tingling, numbing.
  • It is important to know that all of the aforementioned statements are completely normal. There is nothing that you will experience that will surprise us. Everything that you experience will be normal. Even if what you feel is not normal to you, it is normal for your condition and what your body is experiencing.
  • Physical therapy is not an overnight miracle. Improvement takes time. It is important to understand that no one gets better every day from day one until they leave. Everyone will have good and bad days. In the beginning, you will have more bad days than good. As time progresses, this ratio should flip-flop and you should be having more good days than bad.

If you are looking for a physical therapist, we have you covered with over 500 locations nationwide!

physical therapy near me


This article was written by Life Fitness Physical Therapy, an outpatient physical therapy group with fourteen locations in the surrounding Baltimore, Maryland area. Life Fitness Physical Therapy is focused on improving the quality of life for their patients. They strive to provide individualized, evidence-based care that meets every patient’s unique needs. Their objective for each patient is to restore their function, achieve their goals and have them resume an active lifestyle as quickly as possible. For more information click here.