Tag Archives: Injury Prevention

How to Exercise at the gym

Exercising Do’s and Don’ts

In the fourth installment of our “At The Gym” series we examine how to exercise at the gym from start to finish. If you have any sudden significant increase in pain, swelling, or discoloration while performing or following exercise, discontinue immediately and contact your physician or therapist at your next therapy session.

How to Exercise at the gym

MILITARY SHOULDER PRESS
* How to exercise at the gym top tip: It is generally not recommended to do this exercise due to undo stress and strain at the shoulder joint.
If you do choose to do a military press, avoid bringing the bar behind the head and make sure that the elbows don’t pass 90⁰ at the bottom of the repetition.

START POSITION
• Seated with back against the seat (if available), with feet flat on the ground.
• Barbell held above head with elbows fully extended and wide grip to facilitate 90⁰ bend at the elbows at the bottom of the rep.

ENDING POSITION
• Bring barbell down until your elbows are bent at 90⁰ with the barbell in front of your face.

DON’T
• Lift feet off the ground.
• Lift off the seat.
• Arch your back.
• Bring barbell down to chest.

MACHINE CHEST PRESS

START POSITION
• Seated with back against the seat and feet flat on the ground.
• Arms out to your side and elbows flexed at 90⁰ but not coming back past your body (This picture shows the arms back a little too far with the angle at the elbows being a little too deep. Most chest press machines are built so that you have to start in this position which can compromise the shoulder if lifting heavy. If adjustable start in a position a little more forward than this).

ENDING POSITION
• Back against the seat.
• Elbows fully extended.

DON’T
• Lift feet off the ground.
• Lift off the seat.
• Bring bent elbows past your body.

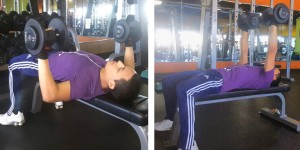
CHEST PRESS

START POSITION
• Lay flat on bench with feet flat on the ground.
• Arms out to your side at 90⁰ with elbows flexed at 90⁰.
• Palms facing lower extremities.

ENDING POSITION
• Elbows fully extended.

DON’T
• Allow elbows to come down past bench height or 90⁰ bend.
• Left feet off the ground.
• Arch your back.

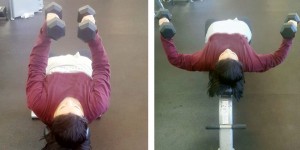
CHEST FLY

START POSITION
• Lay flat on bench with feet flat on the ground.
• Dumbbells touching each other with palms facing each other with elbows slightly bent.

ENDING POSITION
• Arms out at your side at 90⁰ with elbows flexed at about 120⁰.

DON’T
• Lift feet off the ground.
• Arch your back.
• Allow elbows to come down past bench height.

This information was written by STAR Therapy Services, an outpatient physical therapy group with six locations in Houston, Texas. At Star Houston Therapy Services, their number one priority is the patient. They strive to provide individualized treatment with hands-on, compassionate care. They perform comprehensive evaluations and encourage patient input for treatment planning and goal setting. For more information click here.

Knowing how to exercise at the gym, can build confidence and reduce the likelihood of injury. View the complete Exercising Do’s and Don’ts series below:



exercising do's and dont's

PT News

This Month in PT News. Featuring articles from PTandMe partnering clinics!

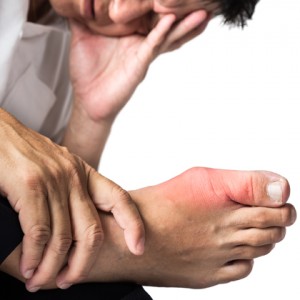
2. Kick the Pain of Gout
Written by the Therapy Team at the Jackson Clinics – Middleburg, VA

In this age of gyms on every corner and fitness-focused reality television shows and entire networks, it’s easy to think of a high-impact workout as a panacea for all kinds of physical ailments. Read more

3. Four Ways to Make Holiday Travel Pain Free 
Written by Therapy Team at Momentum Physical Therapy – San Antonio, TX

‘Tis the season for holiday travel. The hustle and bustle is unavoidable with people moving through airports, piling into traffic, and some even traveling by bus to reach their destination. Read more

postoperative physical therapy

Postoperative Physical Therapy

Postopertive physical therapy after surgery

Postoperative physical therapy after a Total Hip Replacement is essential to your recovery. Your physical therapist will follow your physician’s protocol and will focus on range of motion exercises, progressive strengthening exercises, gait training, balance training, and activity specific training to meet your specific needs. Modalities such as ice and e-stim may be used to help reduce discomfort and swelling. It is very important to complete your home exercise program as directed by your physical therapist and physician.

RANGE OF MOTION EXERCISES
Swelling and pain can make you move your knee less. Your physical therapist can teach you safe and effective exercises to restore the range of motion to your knee so that you can perform your daily activities.

STRENGTHENING EXERCISES
Weakness of the muscles of the thigh and lower leg is typical after surgery. Your physical therapist can determine the best strengthening exercises for you with the goal of no longer needing a cane or walker to walk.

post op

BALANCE TRAINING
Specialized training exercises can help your muscles “learn” to adapt to changes in your world such as uneven or rocky ground. When you are able to put your full weight on your knee without pain, your physical therapist may add agility exercises so that you can safely and quickly change directions or make quick stops or starts. They may use a balance board that will challenge your balance and knee control. These exercises will be safe and fun.

GAIT TRAINING
Your physical therapist will work with you in retraining your gait following your surgery using appropriate assistive devices such as a walker or cane. They will make sure that you will be able to safely and confidently go up and down stairs, negotiate curbs, and inclines, etc.

ACTIVITY SPECIFIC TRAINING
Depending on the requirements or your job or the type of recreational activities you enjoy, your physical therapist will tailor your program so that you can meet your specific demands.

This article about postoperative physical therapy was written by STAR Physical Therapy, an outpatient physical therapy group with over sixty locations in Tennessee. Established in 1997 with one clinic and one mission – to serve. Today, they have grown to offer that direct service in more than 60 clinics, and while they’ve grown, one thing that has not changed is their commitment to you, their communities, and their employees. For more information click here.

exercise at the gym

Exercising Do’s and Dont’s

AtTheGym#3_FBsize

In the third installment of our gym series we examine the proper ways to exercise at the gym from start to finish. If you have any sudden significant increase in pain, swelling, or discoloration while performing or following exercise, discontinue immediately and contact your therapist at your next therapy session.

SCAPULAR RETRACTION / ROW

START POSITION
• Standing or seated with back in neutral with feet shoulder width apart.
• Squeeze shoulder blades together.
• Elbows slightly bent and forearms parallel to the floor.

ENDING POSITION
• Elbows at 90⁰ flexion.
• Shoulders pulled back.
• Hands at your sides at shoulder width and forearms parallel to the floor.

DON’T
• Swing body back and forth.
• Let the weight pull you forward between repetitions (keep the shoulders back).
• Shrug.

exercise at the gym

ANTERIOR DELTOID – FRONTAL RAISE

START POSITION
• Standing with spine in neutral position with feet shoulder width apart.
• Palms facing down.

ENDING POSITION
• Arm raised to 90⁰ directly in front of you.
• Elbow in full extension.

DON’T
• Raise arm past 90 degrees.
• Swing body back and forth.
• Rotate wrist.
• Shrug shoulders.

exercise at the gym

LATERAL DELTOID – LATERAL RAISES

START POSITION
• Standing with spine in neutral position with feet shoulder width apart.
• Elbows bent at 90 degrees.

ENDING POSITION
• Arms raised to 90 degrees at your side.
• Palms facing down.

DON’T
• Raise arms past 90 degrees.
• Swing body back and forth.
• Shrug shoulders.

exercise at the gym

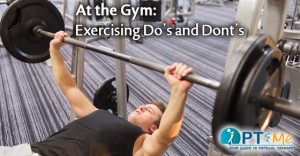
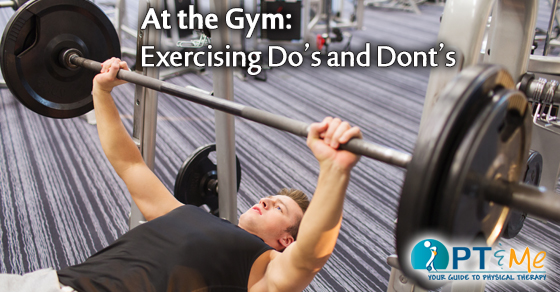
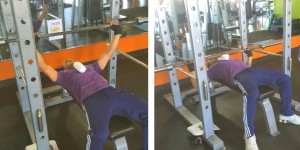
BENCH PRESS

START POSITION
• Lay flat on bench with both feet flat on the ground.
• Place a rolled towed in the center of the chest.
• Arms extended with wide grip to facilitate 90 degree bend at the elbow at the bottom of repetition.

ENDING POSITION
• Lower slowly until the bar touches the towel
• Elbows should not pass the height of the bench bending to about 90 degrees.

DON’T
• Lift feet off the ground.
• Arch your back.
• Bounce bar off your chest (barbell should only touch the towel lightly).

This information about exercise at the gym was written by STAR Therapy Services, an outpatient physical therapy group with six locations in Houston, Texas. At Star Houston Therapy Services, their number one priority is the patient. They strive to provide individualized treatment with hands-on, compassionate care. They perform comprehensive evaluations and encourage patient input for treatment planning and goal setting. For more information click here.

View the complete Exercising Do’s and Don’ts series below:


exercising do's and dont's

Safe Lifting Practices

Safe Lifting Practices: Back Injury Prevention

SafeLiftingPractices_FBsize

Whether you are getting ready for a move, or need to lift things at work, it’s important to use safe lifting practices. Don’t end up with a hurt back – use these tips to keep yourself injury free.

• ESTABLISH A BASE OF SUPPORT: Use a wide, balanced stance with one foot in front of the other. Make sure that you have firm footing and that your feet are a shoulders-width apart. This staggered stance gives you the stability of not falling over and being able to secure the load.•

• KEEP YOUR EYES UP: Looking slightly upward will help you maintain a better position of the spine. Keeping your eyes focused upwards helps you keep your back straight.

• GET A GOOD GRIP: with your palms and make sure you have an adequate hold on the object. Be certain you will be able to maintain a hold on the object without having to adjust your grip later. You can use gloves to help maintain an adequate grip, but don’t rely on gloves because they can desensitize the fingers and make you unable to feel the object.

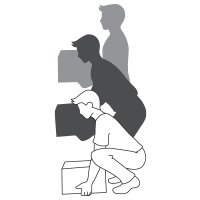
• LIFT GRADUALLY WITH YOUR LEGS: without using jerky motions. By using your leg strength, your chance of lower back injury is greatly reduced.

• TIGHTEN YOU STOMACH MUSCLES: as you begin the lift and keep you head and shoulders up.

• PIVOT  DON’T TWIST: Move your feet in the direction of the lift. This will eliminate the need to twist at the waist.

• WEIGHT: A lighter load normally means a lesser risk of injury. The weight of the object should be within the capacity of the person to handle safely.

• HANDLING: It is easier to pull or push a load than it is to lift, put down or carry.

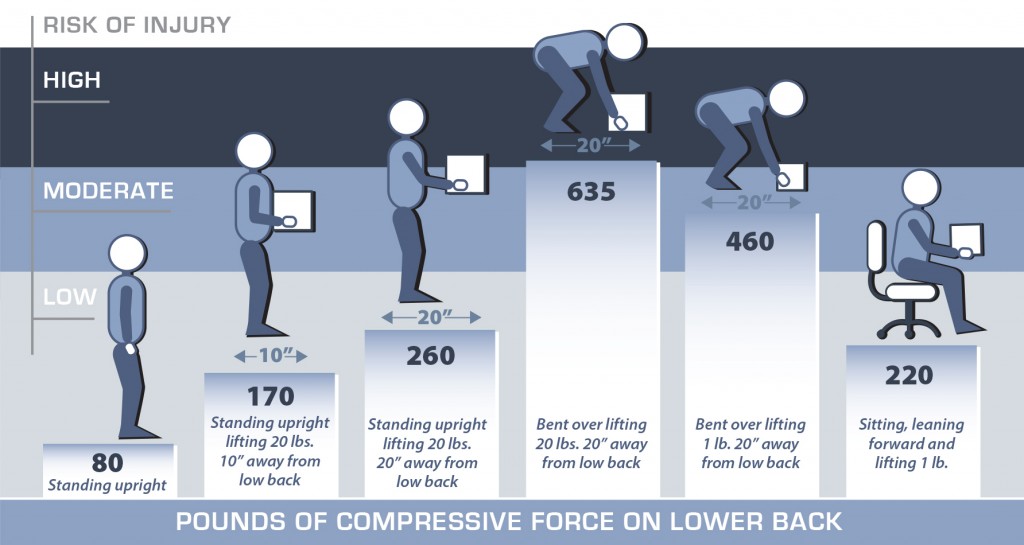
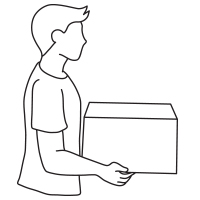
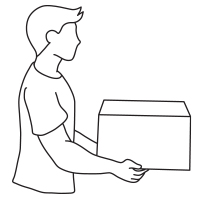
• KEEP THE LOAD CLOSE: Holding a 20 lb. object with your hands 20 inches from the body creates more compressive force on your low back than holding it 10 inches away. This is because the muscles in your back have to work to counterbalance the weight when it is further from the body. As the compressive force on your low back increases, so does the risk of muscle strains, ligament sprains and damage to the disks in the spine.

• FREQUENCY: The more times a load is handled, the more tired the muscles become, making it easier for the person to be injured.

• DISTANCE: The farther the load has to be moved, the greater the risk of injury.

• DURATION TIME: Where the job involves repetitive movements, reducing the time spent on handling will help to ensure the movements are not causing unnecessary strain.

• FORCES APPLIED: Forces should be applied smoothly, evenly and close to the body. Forces exerted should be well within the capacity of the person, and the person should maintain proper posture.

• NATURE OF THE LOAD: Loads that are compact, stable, easy to grip, and capable of being held close to the body are much easier to handle.

• TERRAIN: Rough ground, steep slopes, slippery and uneven floors, stairs and cluttered floors make moving a load awkward and increase the chance for injury.

• ENVIRONMENT (CLIMATE & LIGHTING): If it is too hot, too humid, too cold or the lighting is inadequate, the capacity to work safely is reduced.

• CONDITION OF THE WORKPLACE: Safe and comfortable working conditions, with adequate space to perform the task, and tools and equipment that are well-maintained, make their job safer.

• AGE/GENDER: Young and old workers alike may be at an increased risk of injury from manual materials handling activities. Ensure abilities of employees are in line with functional job requirements.

• TRAINING: Proper training for the specific task is vital to reduce injury.

• TEAM LIFTING: If one person cannot lift or move a heavy, large or awkward object safely, organize a team lift. Team lifting reduces the risk of injury, reduces fatigue and makes the task much easier.

• RAISE/LOWER SHELVES: The best zone for lifting is between your shoulders and your waist. Put heavier objects on shelves at waist level, lighter objects on lower or higher shelves.

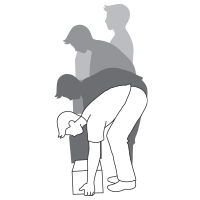
• AVOID LIFTING FROM THE FLOOR: Lifting from the floor can greatly increase your risk of injury for two reasons. Firstly, it is difficult to bring objects close to your body when picking them up from the floor, especially large objects where your knees can get in the way. Secondly, your low back must now support the weights of your upper body as you lean forward, in addition to supporting the weight of the item you are lifting. Lifting the same 20lbs from the floor more than doubles the amount of force on your low back when compared with lifting is from waist height. Even a one pound object lifted from the floor increases you risk of injury if you use a bent over posture.

• GET HELP WHEN YOU NEED IT: Don’t try to lift heavy or awkward loads on your own. Even though the muscles in your upper body may be strong enough to handle the load, the muscles, ligaments and disks in your lower back may be injured because of the additional forces they have to withstand. Get help from a co-worker, and whenever possible, use a cart, hand truck or other mechanical device to move the load for you.

PROPER LIFTING TECHNIQUE

proper lifting

IMPROPER LIFTING TECHNIQUE

improper lifting

POSTURE

Posture diagram

GOOD POSTURE

good posture

BAD POSTURE

bad posture

Taking Care of Your Scar

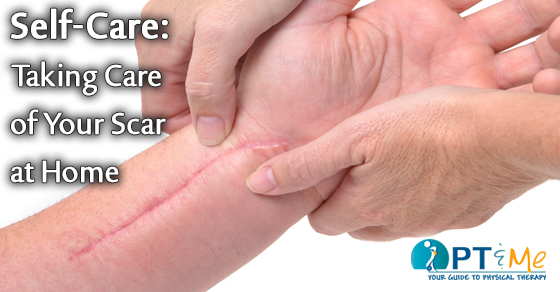
Self-Care: Taking Care of Your Scar at Home

ScarCare_FBsize

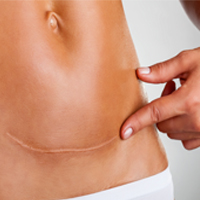
Taking care of your scar well is an important aspect of your recovery from surgery. You must follow your surgeon’s order faithfully.This includes keeping it dry and covered as long as your doctor tells you it is necessary. If your scar becomes excessively red or painful, notify your doctor or therapist.

scar

When you doctor tells you it is safe, you will need to start treating your scar at home. This is important because excessive scarring can lead to restricted movement and pain. The best approach to controlling your scar formation is to use your hands to free up skin around your scar. Rubbing Vitamin E oil or cocoa butter into your hands before massaging will also help your skin heal.

This information about taking care of your scar was written by Plymouth Physical Therapy Specialists, an outpatient physical therapy group with fourteen locations in the surrounding Plymouth, Michigan area. At Plymouth Physical Therapy Specialists, they are committed to using evidence-based treatments in their practice. This means that their therapists utilize the most current and clinically relevant treatments in their approach to rehabilitation. For more information click here.

McKenzie Method

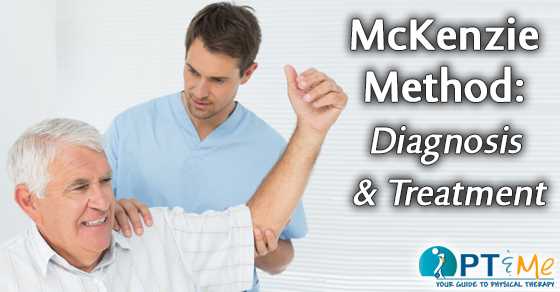
McKenzie Method: Diagnosis & Treatment

McKenzieMethod_FBsize

MECHANICAL DIAGNOSIS PHASE:
This system is based on the symptomatic and mechanical responses of patients to various repeated movements or static loading forces(that is a mechanical evaluation). It allows the classification of patients into broad, rather than tissue-specific, categories and thus leads to the formulation of treatment. Rather than seeking to make a diagnosis, which is the identification of a disease by the means of its signs and symptoms, The McKenzie system concentrates on syndrome identification. A syndrome is a characteristic group of symptoms and pattern responses characteristic of a particular problem. The system is now widely used to classify and treat patients with mechanical disorders.

PHYSICAL EXAMINATION PHASE:
• Explanation of problem to patient and reason for required exercise program
• Time scale
• The appropriate loading strategy, or strategies needed to manage the condition demonstrated to and practiced by the patient.
• The repetitions and regularity of exercise program explained to patient
• The expected pain response explained to patient

knee stretch

ASSESMENT PHASE:
• Symptomatic diagnosis
• Mechanical Diagnosis

PATIENT MANAGEMENT PHASE:
• Patient education component of management
• Information about the problem itself
• What patients can do to help themselves
• Information about tests, diagnosis and interventions
• Active Mechanical Therapy component:
• The specific exercises should be demonstrated to the patients, they should practice these, the expected pain response should be explained, as well as any warnings against lasting aggravation of their condition and as necessary progressions and alterations should be given.

This information was written by Hamilton Physical Therapy Services, L.P., an outpatient physical therapy group with five locations in Mercer County, New Jersey since 1978. Their modern state-of-the-art facilities are equipped to offer patients an excellent opportunity to reach their optimal functional abilities. Managed and operated by physical therapists mandates that patient care is our number one priority. For more information click here.

at the gym

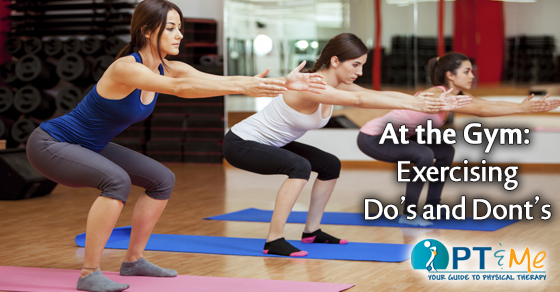
At the Gym: Exercising Do’s and Dont’s

AtTheGym#2_FBsize

In the second installment of our “At The Gym” exercise series we examine the proper ways to exercise at the gym from start to finish. If you have any sudden significant increase in pain, swelling, or discoloration while performing or following exercise, discontinue immediately and contact your therapist at your next therapy session.

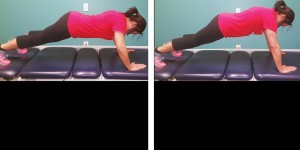
Plus Push Up 1

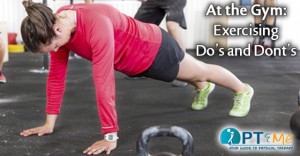
PLUS PUSH-UP

START POSITION
• Get on elbows and knees.
• Knees bent
• Straight or neutral back done by drawing the stomach in and the buttocks down.

ENDING POSITION
Push elbows into mat while trying to increase the space between the shoulder blades (round out your back between the shoulders).DON’T

DON’T
• Drop the head.
• Raise the buttocks or let the low back excessively curve inward.

Plus Push Up 2

PLUS PUSH-UP: STAGE 2

START POSITION
Push-up position

ENDING POSITION
• Push hands into mat while trying to increase the space between shoulder blades.
• Rounded upper back appearance.

DON’T
• Drop the head.
• Raise the buttocks or let the low back excessively curve inward.

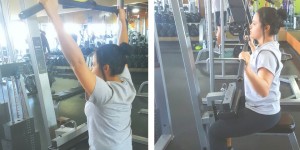
Scapular Depression

SCAPULAR DEPRESSION

START POSITION
• Seated with shoulder blades drawn downward (don’t shrug shoulders).
• Hands hold just outside of the curvature of the bar to comfort.
• Knees bent underneath knee pad and feet on the floor.
• Keep your back straight with a slight posterior lean from the hips.

ENDING POSITION
Bring bar to chest with elbows bent.

DON’T
• Lift feet off the ground.
• Rock at the waist.
• Elevate or let shoulders pull forward.
• Hyperextend the low back as you pull in.

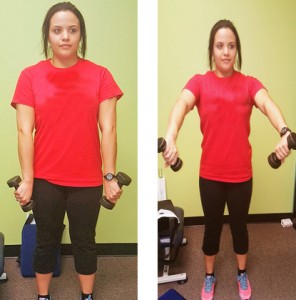
Empty Can 1

EMPTY CAN

START POSITION
Standing with hands at your side and thumbs pointing downward with feet shoulder width apart.

ENDING POSITION
Arms raised to about 60⁰ with thumbs facing down and slightly to your side.

DON’T
• Swing body back and forth.
• Shrug shoulders.
• Lift above 60⁰.

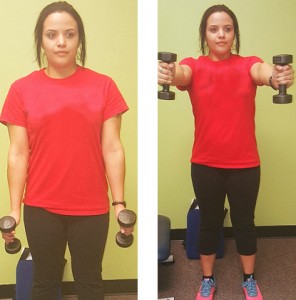
Full Can
FULL CAN

START POSITION
Standing with hands in front of you with thumbs pointing upward and feet shoulder width apart.

ENDING POSITION
Arms raised to 90 – 120⁰ with thumbs facing up.

DON’T
• Swing body back and forth.
• Shrug shoulders.
• Lift above 120⁰.

This information was written by STAR Therapy Services, an outpatient physical therapy group with six locations in Houston, Texas. At Star Houston Therapy Services, their number one priority is the patient. They strive to provide individualized treatment with hands-on, compassionate care. They perform comprehensive evaluations and encourage patient input for treatment planning and goal setting. For more information click here.

View the complete Exercising Do’s and Don’ts series below:


exercising do's and dont's

October 2016 Events

EVENTS_10-2016_FBsize

Check out our Physical Therapy Monthly Events Calendar! Focusing on events from PTandMe.com participating physical and occupational therapy clinics. Read more to find out what’s happening in your community in October 2016!

GEORGIA PHYSICAL THERAPY EVENTS

FOLKSTON, GA
DATE: October 21st 2016, 5:00PM – 7:00PM
20 Year Anniversary Cookout
CLINIC: Advance Rehabilitation Physical Therapy – Folkston
Advance Rehab is celebrating its 20 year anniversary in Folkston, Georgia with a cookout and live music by local artist Justen Harden
For more information about Advance Rehabilitation Physical Therapy, visit them online at http://www.advancerehab.com.

IDAHO PHYSICAL THERAPY EVENTS

BOISE, ID
DATE: October 18th – 15th 2016
2016 NPI Annual Fall Conference
CLINIC: Intermountain Physical Therapy & Hand Rehabilitation – Boise
Intermountain will have a booth at this year’s event. Stop on by and see how physical therapy brings patients back to their full potential! For more information about Intermountain Physical Therapy & Hand Rehabilitation, visit them online at http://www.intermountainpt.com.

MICHIGAN PHYSICAL THERAPY EVENTS

MONROE, MI
DATE: October 4th 2016, 3:00PM – 6:00PM
Monroe Open House
CLINIC: Advanced Physical Therapy – Monroe
Advanced Physical Therapy’s Monroe clinic is celebrating their relocation with an open house! Join us for snacks, drinks and check out the new digs. We’d love to have you as we get to know our new neighbors and friends! First 100 guests will receive a free gift. For more information about Advanced Physical Therapy, visit them online at http://advphysicaltherapy.com.

NEW JERSEY PHYSICAL THERAPY EVENTS

BORDENTOWN, NJ
DATE: October 17th 2016, 4:30PM – 8:00PM
Work Comp Seminar at Villa Mannino Restaurant
CLINIC: Hamilton Physical Therapy Services, L.P.
Attention all work comp case managers and adjusters! Join Hamilton Physical Therapy and Princeton Brain & Spine Care as they talk about the Evaluation and Rehabilitation of Concussions in the injured workers.

AGENDA:
4:30 pm – 5:30 pm — Registration & Vendor Exhibit
5:30 pm – 5:45 pm — Opening Remarks
5:45 pm – 7:30 pm — Clinical Presentation
7:30 pm – 8:00 pm — Q&A Session

For more information contact Jaime Caceres at Hamilton Physical Therapy Services in Hamilton, New Jersey at (609) 585-2333. Also, visit Hamilton Physical Therapy Services online at http://www.hamiltonphysicaltherapy.org.

TENNESSEE PHYSICAL THERAPY EVENTS

NASHVILLE, TN
DATE: October 15th 2016, 8:00AM – 11:00PM
2016 – 2017 Heart Walk at Vanderbilt University Sport Field
CLINIC: STAR Physical Therapy
Help STAR Physical Therapy reach their goal to raise $5,000 for the American Heart Association. You can help us by donating to our team ($20 donations receive a custom t-shirt) or join the STAR Physical Therapy Heart Walk Team and join us at the event! For more information about STAR Physical Therapy, visit them online at http://www.starpt.com.

TEXAS PHYSICAL THERAPY EVENTS

CLEVELAND, TX
DATE: October 15th 2016, 9:00AM
Walk with a Doc for Hardhats & Little Heads
CLINIC: Cleveland Physical & Occupational Therapy
Cleveland Physical & Occupational Therapy is participating in this year’s Walk With A Doc at the Cleveland High School Track! Bring your friends and family to enjoy a day of fun! Participants will walk on the track with national award winning doctor Dr. Sulaiman, explore vendor booths, receive health and community information as well as meet local fireman and police officers all while getting healthy! Special appearances by Reggie Airman Dixon, Maurice Termite Watkins, and Reggie Johnson. Children will be provided with free bikes, helmets, t-shirts, water bottles, goodie bags and more as part of the Hard Helmets for Little Heads initiative while supplies last. All materials will be distributed on a first come, first served basis. For more information, please contact Kimberly Hughes at (281) 592.2224 – ext. 206 or at khughes@hcset.com. You can also visit the official event website here: http://walkwithadoc.org/our-locations/cleveland-texas/. For more information about Cleveland Physical & Occupational Therapy, visit them online at http://www.clevelandpt.com.

WISCONSIN PHYSICAL THERAPY EVENTS

JEFFERSON, WI
DATE: October 10th 2016, 5:30PM – 6:30PM
JUMP: Great Apple Crunch Fun Run
CLINIC: Sport & Spine Physical Therapy – Jefferson
Sport & Spine Physical Therapy in Jefferson, Wisconsin invites Jefferson community members of all ages to join us in our 4th annual one mile FUN RUN/WALK! Participation ribbons for all children
There will also be refreshments. In the event of inclement weather, it will be canceled with no make-up date. For more information contact Jo Christianson at christiansonj@tds.net.
Also, please visit Sport & Spine Physical Therapy online at http://sportandspineclinic.com.

MERRILL, WI
DATE: October 8th 2016, 8:00AM – 1:00PM
2016 Leaf Pile Run 6th Annual 5k Run/Walk & 1k Kids Run
CLINICS: Sport & Spine Physical Therapy & Merrill Physical Therapy
Please join Sport & Spine Physical Therapy, Merrill Physical Therapy and other WVAM members for a fun and festive fall run, to help support Wisconsin Valley Athletic Medicine by participating in the 2016 Leaf Pile Annual Event. All 5k and 1k participants receive a complimentary wristband for same day entry to Helene’s Hilltop Orchard to enjoy a hayride, corn maze, cow train, and the play area. Complimentary beverages from Red Eye Brewing Co. and root beer from Central Beer Distributors. Need more info? Contact Andy at Sport & Spine Clinic at adavis@usphclinic.com or call (715) 693-7727. For more information about Merrill Physical Therapy, visit them online at http://www.merrillpt.com.

exercise at the gym

At the Gym: Exercising Do’s and Don’ts

AtTheGym#1_FBsize

In this new monthly series we examine the proper ways to exercise at the gym from start to finish. If you have any sudden significant increase in pain, swelling, or discoloration while performing or following exercise, discontinue immediately and contact your therapist at your next therapy session.

Scapular Strengthening

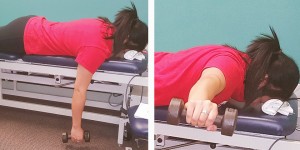
SCAPULAR STRENGTHENING

START POSITION
• Lay face down on the edge of the bench with arm hanging downward
• Rolled towel under forehead for support

ENDING POSITION
Arm raised straight to your side no higher than the torso with palms facing down

DON’T
• Arch your back when lifting dumbbell
• Lay with face turned sideways
• Raise the dumbbell too high

External Rotation Side Lying

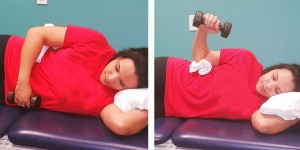
EXTERNAL ROTATION – SIDE LYING

START POSITION
• Side lying with elbow at 90⁰ bend
• Support the head and rolled towel under arm holding dumbbell

ENDING POSITION
Side lying with external rotation at the shoulder until you feel an anatomical stop at the shoulder (about 45⁰); keep elbow bent

DON’T
• Create rotation at the torso
• Don’t raise the arm from the towel

External Rotation Prone

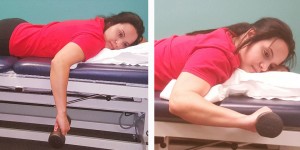
EXTERNAL ROTATION – PRONE

START POSITION
• Lay face down with head facing to the side
• Forearm hanging off table with elbow bent to 90⁰
• Bicep is on the bench and supported by a towel

ENDING POSITION
About 45⁰ of external rotation

DON’T
• Externally rotate past 45⁰
• Raise arm from the towel

D2 Flexion

D2 FLEXION

START POSITION
• Standing with feet shoulder width apart
• Hold handle with arm crossing body to opposite side
• Palm facing body.

ENDING POSITION
• Arm raised slightly above the shoulder (about 120⁰ which is slightly higher than shown) with thumb facing upward
• Creating a “disco” motion

DON’T
• Let thumb face sideways or downward at end of exercise
• Lean backwards or sideways to assist in exercise
• Shrug shoulders

This information about how to exercise at the gym was written by STAR Therapy Services, an outpatient physical therapy group with six locations in Houston, Texas. At Star Houston Therapy Services, their number one priority is the patient. They strive to provide individualized treatment with hands-on, compassionate care. They perform comprehensive evaluations and encourage patient input for treatment planning and goal setting. For more information click here.

View the complete Exercising Do’s and Don’ts series below:


exercising do's and dont's