Tag Archives: Back Pain

Low Back pain exercises

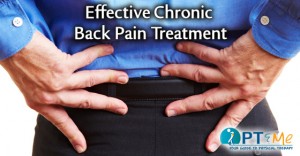
Top 5 Low Back Pain Exercises to Reduce Back Pain

Exercises to reduce back pain

How to Reduce Low Back Pain

Over time, we develop arthritic changes in our back due to normal wear and tear. Below is a list of low back pain exercises that can help reduce lower back pain. These exercises will help you, in time, return you to your normal activities and improve your quality of life.

Top 5 Exercises to Reduce Back Pain

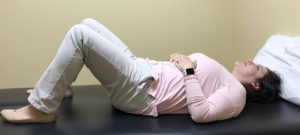
1. LOWER TRUNK ROTATION

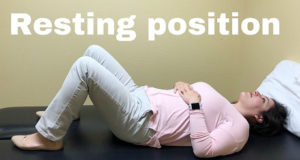
Lie on your back with your knees bent.
Keep your feet and knees together and lightly rotate your spine.
Stop the stretch when you feel your hips coming off of the table. Only rotate to approximately 45 degrees and rotate back and forth like a windshield wiper.
Repeat for 2 minutes.
What are some Physical therapy exercises for lower back pain: The top 5 low back pain exercises.

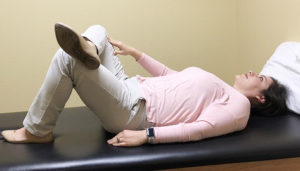
2. ABDOMINAL BRACING

Lie on your back with your knees bent. Slightly elevate your hips but not high enough to where it comes off of the table. Simultaneously, squeeze your abdominal muscles down towards the table. Continue to breathe.

Hold this for 10 seconds and rest for 10 seconds. Repeat for 2 minutes.

What are some Physical therapy exercises for lower back pain: The top 5 low back pain exercises.

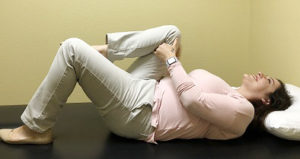
3. SINGLE KNEE TO CHEST

Bring one knee to your chest.

Hold for 5-10 seconds. Repeat alternating legs to your chest for a time of 2 minutes.
What are some Physical therapy exercises for lower back pain: The top 5 low back pain exercises.

4. FIGURE 4 STRETCH

Cross one ankle over to the opposite knee and press down on the resting leg. You should feel the stretch in your hip.

Hold this stretch for 30 seconds if you can tolerate it. Repeat for 3 repetitions, then switch legs.
What are some Physical therapy exercises for lower back pain: The top 5 low back pain exercises.

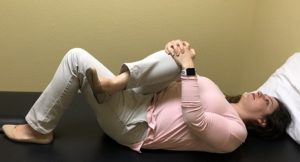
5. PIRIFORMIS STRETCH

Cross one ankle over to the opposite knee. Pull the resting knee across your body and up towards your chest. (You should aim for your opposite shoulder as a reference). This stretch should be felt over the crossed leg buttock.

Hold for 30 seconds if you can tolerate it. Repeat for 3 repetitions on each leg.
What are some Physical therapy exercises for lower back pain: The top 5 low back pain exercises.

Written by Laura Mata, OTR/L, PT, DPT, Director at Star Physical Therapy Services – Fairfield
To learn more about Star Physical Therapy Services click here.


For more information about back pain, and physical therapy click the links below.

beware bed rest for back pain  chronic back pain  low back pain relief

Lifting Safety Tips PTandMe

Avoid Back Pain with These 8 Back Safety Tips

Lifting Back Safety Tips PTandMe

During the holidays, back injuries become more prevalent as people maneuver themselves up and down ladders and stairways while carrying or lifting heavy objects. A little bit of lifting safety can go a long way to keeping your holiday season bright.

1. SIZE UP THE LOAD

Check to ensure the load is stable and balanced.

2. PLAN THE JOB

Consider all possibilities. Is the path clear? What is the weight of the load? How much stress will be placed on your back? Is there traffic, a tripping hazard, a doorway to go through, or a stairway to go up or down? Avoid carrying an object that requires two hands to hold, either up or especially down, a flight of stairs.

3. ESTABLISH A BASE OF SUPPORT

Use a wide, balanced stance with one foot in front of the other. Make sure you have firm footing and that your feet are a shoulder-width apart. This staggered stance gives you the stability of not falling over and being able to secure the load.

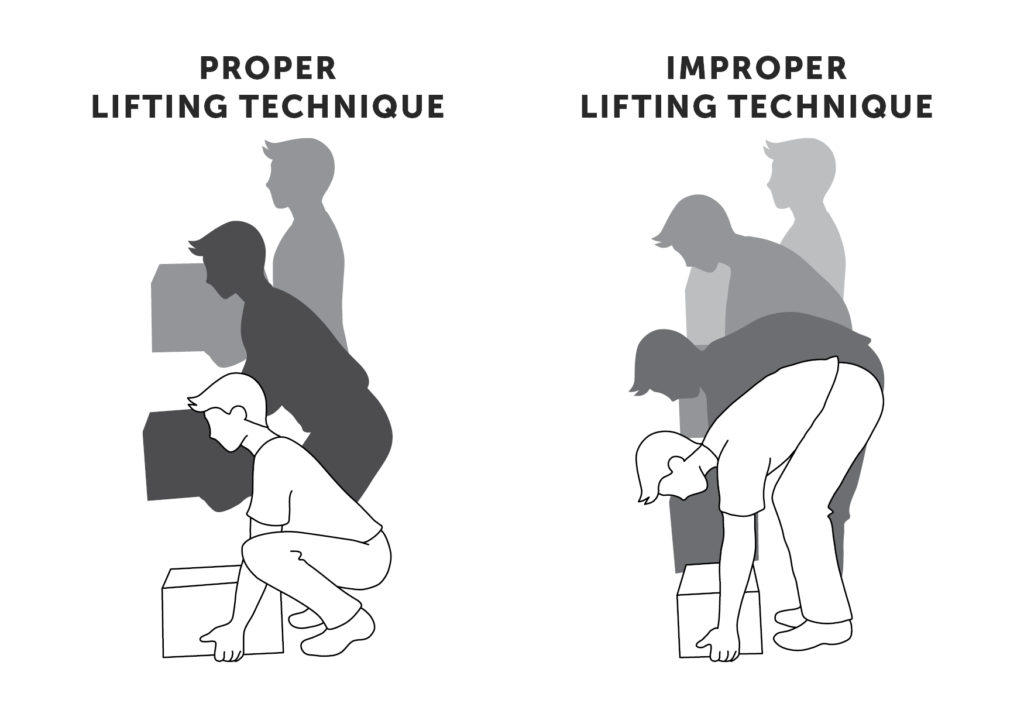
4. BEND YOUR KNEES, KEEP YOUR HEELS OFF OF THE FLOOR AND GET AS CLOSE TO THE OBJECT AS POSSIBLE.

Always lift with your legs and not your back.

Proper Lifting Technique PTandMe

5. BE CERTAIN YOU WILL BE ABLE TO MAINTAIN A HOLD ON THE OBJECT WITHOUT HAVING TO ADJUST YOUR GRIP LATER.

You can use gloves to help maintain an adequate grip, but don’t rely on gloves because they can de-sensitize the fingers making you unable to feel the object.

6. LIFT GRADUALLY

Lift gradually with your legs without using jerky motions.

7. KEEP THE LOAD CLOSE TO PREVENT ARCHING YOUR LOWER BACK.

As you begin the lift, tighten your stomach muscles, and keep your head and shoulders up. The closer the load is to your spine, the less force will be placed on your back.

8. PIVOT

Don’t twist. Move your feet in the direction of the lift. This will eliminate the need to twist at the waist.

Whether at home or at work safe lifting practices can keep your back healthy and safe. Before lifting heavy objects decide how you will lift carry & place the item before you pick it up. If you are experiencing persistent pain, please contact us. We want to help you to be at your best this holiday season.

physical therapy near me

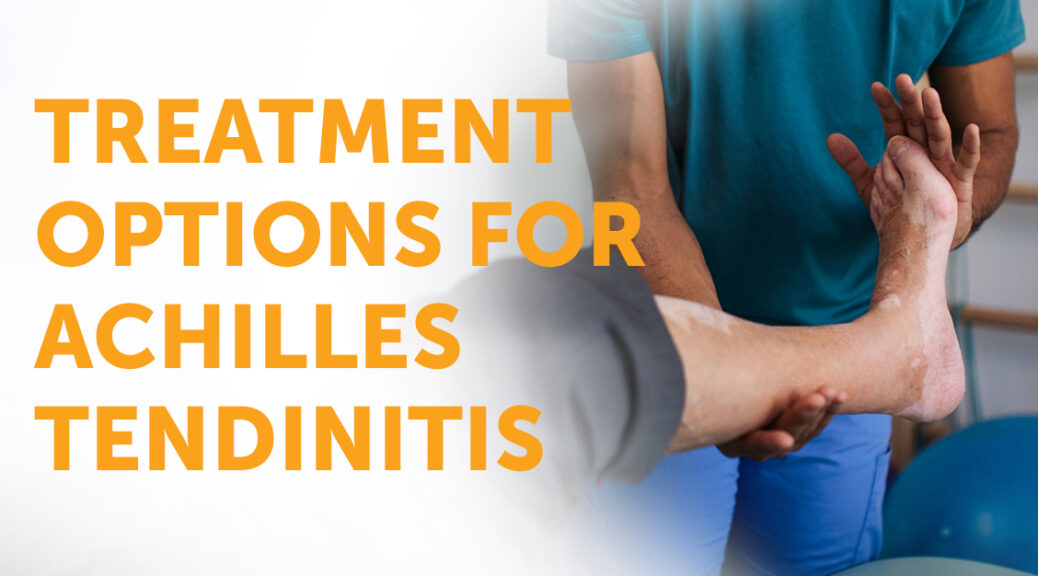
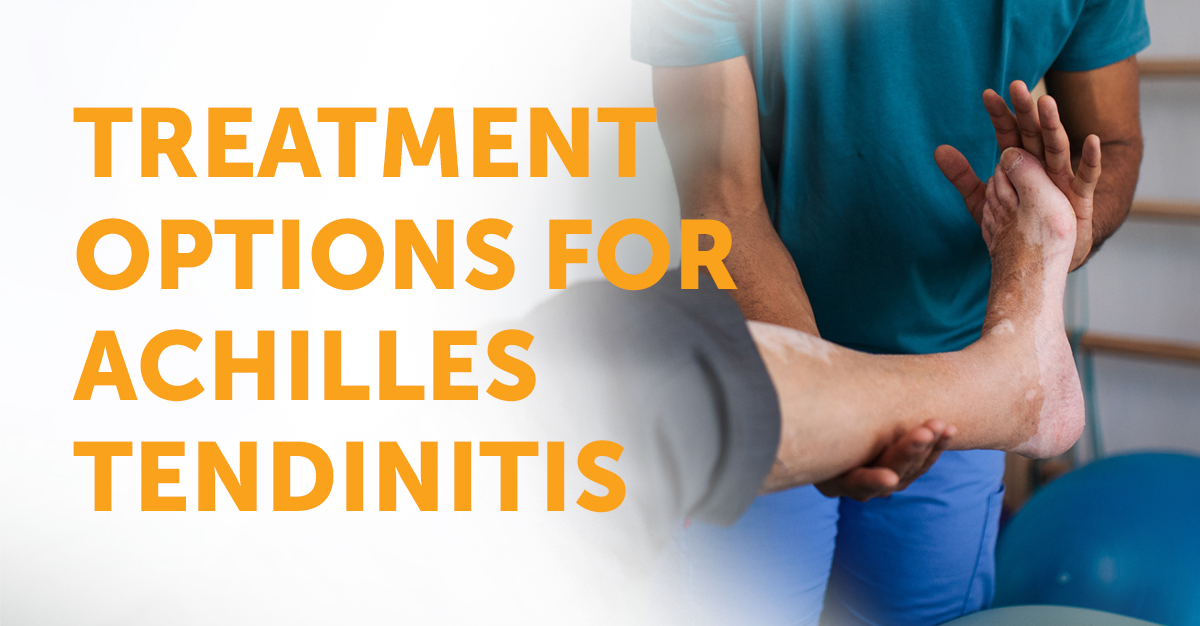
Treatment Options for Achilles Tendinitis

Treatment Options for Achilles Tendinitis

Treatment Options for Achilles Tendinitis

Physical Therapy Appointment

The Achilles tendon is the largest tendon in the body. It connects your calf muscles to your heel bone and is used when you walk, run, and jump.  Although the Achilles tendon can withstand great stresses from running and jumping, it is also prone to tendinitis, a condition associated with overuse and degeneration. Achilles Tendinitis causes pain along the back of the leg near the heel. If you suffer from Achilles Tendinitis – try these pain relief methods.

Treatment Options for Achilles Tendinitis

REST: Cut back your training by decreasing your mileage and intensity. Also, avoid hills and speedwork. You may substitute running with swimming, running in water, and biking to reduce the irritation.

ICE: Apply ice to the affected area for 10 to 20 minutes with at least one hour between applications. Do not apply ice directly to your skin – a pillowcase or dish towel works well as a protective barrier. Frozen peas or reusable gel packs are flexible and conform well to the injured area.

PROPER FOOTWEAR/ORTHOTICS: This situation can be corrected with arch supports or custom orthotics. Orthotics allow your foot to maintain the correct position throughout the gait. Avoid walking barefoot and wearing flat shoes. If your pain is severe, your doctor may recommend a walking boot or to cast you for a short time. This gives the tendon a chance to rest before any therapy is begun.

NON-STEROIDAL ANTI-INFLAMMATORY MEDICATION: Drugs such as ibuprofen and naproxen reduce pain and swelling. They do not, however, reduce thickening.

PHYSICAL THERAPY: Achilles tendinitis can be a painful, chronic condition if left untreated. Physical therapists may use stretching, massage, custom orthotics, strengthening, and/or balance activities to help your body relieve pain and heal.

CORTISONE INJECTIONS: Cortisone, a type of steroid, is a powerful anti-inflammatory medication. Cortisone injections into the Achilles tendon are rarely recommended because they can cause the tendon to rupture (tear).

physical therapy near me

More Enjoyable Bike Ride

8 Tips for an Enjoyable Bike Ride

8TipsforBikeRide_FBsize

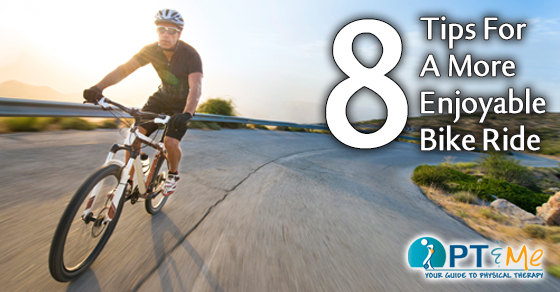
Optimizing your bike and clothing isn’t just for competitive racers. Even if you’re just looking to ride a few miles recreationally, you can be more comfortable and have more fun by following our tips for a more enjoyable bike ride!

1. Check Tire Pressure
If your tires are too soft, you have a much higher chance of “pinching” a tube, causing a flat. Low pressure also increases rolling resistance, making it more difficult for you to ride at a normal speed. Check the sidewall of your tires for recommended pressure range; it doesn’t need to be at the maximum, but be sure it’s at or above the minimum.

2. Seat Angle
Everyone has a different preference on exact seat angle and position, but it should be roughly level. Deviations of 1-2 degrees up or down are OK, but don’t point up or down too much. This can place unnecessary pressure on pelvic soft tissue or the hands/wrists.

3. Seat Height
An old belief about seat height was that you must be able to touch the ground with both feet when sitting on the saddle. If you are very new to cycling, this does improve your ability to stay upright at very slow speeds. A seat that is too low, can put excess pressure on your knees and back, making it less efficient. A “proper” seat height has the knee at about 30 degrees of bend at the lowest point in the pedal stroke.

4. Stay Hydrated
Carry water with you on any ride longer than 30 minutes (shorter in hot conditions). You can use a backpack-style hydration pack, or a simple water bottle and cage. Almost all bicycles have bolts to hold a water bottle cage. Whichever method you choose, get familiar with it and get in the habit of using it often.

5. Know How to Change a Tube
Carry the items needed to replace a tube in the event of a flat tire. Your local bike shop can help you with choosing these items. These can all be carried in a bag under your seat. You don’t need to be Nascar pit-crew-fast at it, but you want to know how to fix a flat tire so you don’t end up stranded.

6. Like Lycra
Very few people think of bike shorts as a good fashion statement. However, if you’re riding more miles, especially in warm weather, they provide comfort that can’t be matched with basketball or running shorts.

7. Be Visible
Along with the bike shorts, make sure your t-shirt or jersey is a bright color that will keep you visible in traffic. If there is a chance you’ll be riding near or in darkness, be sure to have at least a rear and preferably also a front light on your bicycle.

8. Riding Shouldn’t Hurt
Sure, if you’re looking to get a hard workout or ride fast, your legs will feel the burn. However, if your body and bike are working together properly, riding shouldn’t cause any joint pain. If you can’t ride without getting neck, back, hip, or knee pain, consider having a professional look at either your body or your bike fit. Better yet, have a physical therapist who is versed in bike fitting address both at the same time. The answer to most aches and pains is rarely just in one area (bike fit or bodywork), and a combined approach will usually work best for alleviating pain and getting the most out of your ride.

bike_couple

Let Physical Therapy help you before your pain turns into an injury.

What an ache tells you:
•  It’s the first clue your body is telling you something is wrong.
•  Your body can accommodate the ache, but eventually, a breakdown will happen.
•  While you accommodate to your ache, weakness, and lack of flexibility start.
•  Once you have a breakdown, the pain will begin, and more than likely you will stop doing the activities you currently enjoy.

How physical therapy can help prevent sports injuries:
•  Modify exercise routines when you have a minor ache and pain (This does not always mean you need to stop exercising!)
•  Get assessed for weakness and flexibility issues to address biomechanical deficits.
•  Educate on faulty or improper posture or body mechanics during exercise
•  Educate and help with techniques on exercises that help your muscles stretch farther. Flexibility training helps prevent cramps, stiffness, and injuries, and can give you a wider range of motion.
•  Correct muscle imbalances through flexibility and strength training.
•  Alleviate pain.
•  Correct improper movement patterns.

Common Cycling-related pain and injuries that Physical Therapy can treat:
•  Low Back Pain
•  Neck Pain
•  Foot numbness
•  Shoulder pain
•  Muscle strains
•  Hand pain/numbness

This information about having a more enjoyable bike ride was written by Advanced Physical Therapy, a physical therapy group that uses progressive techniques and technologies to stay on the forefront in their field. Their staff is committed to providing patients with advanced healing techniques. For more information click here.

Struggling with an ache, pain, or simply need help getting your bike fitted? Our team can help make sure you get the most out of your time on your bike!

physical therapy near me

golf stretches

Dynamic Golf Stretches

DynamicGolf_FBsize

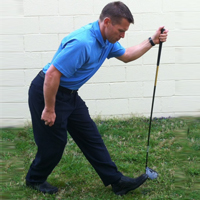
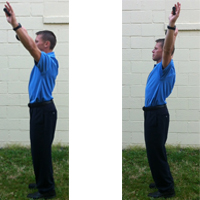
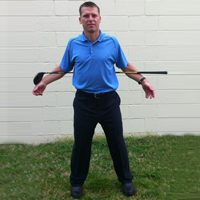
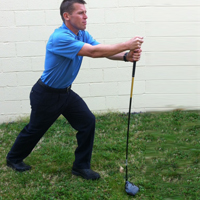
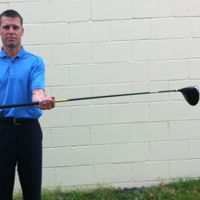
Golf requires strength, flexibility, endurance, and power to create pain-free movement and improve your game. The most common golf injury is low back pain followed by shoulder pain and knee pain. A physical therapist can assist you in improving your pain and correcting your body’s deficits.  These golf stretches will make your golf game less painful and reduce those extra strokes:

hamstring stretch

Hamstring Stretch
(move from upright into stretched position 10x)

back extension stretch

Back Extension Stretch
(hold club backwards overhead, repeat 10x)

hip back shoulder rotation

Hip/Back/Shoulder Rotation Stretch
(hold club behind back and rotate torso to each side 10x)

calf stretch

Calf Stretch
(move from upright into stretched position 10x)

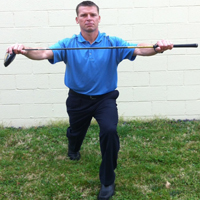
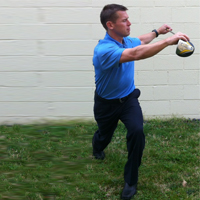
lumbar rotation 1

lumbar rotation 2

Lumbar Spine Rotation
(hold club, plant feet as shown, rotate to each side 10x)

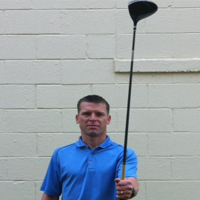
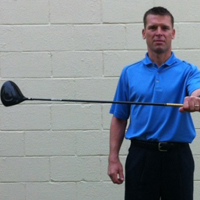
forearm rotation 1

forearm rotation 2

forearm rotation 3

Forearm Rotation
(hold club straight up, then rotate to each side 10x)

Physical Therapy Appointment

This information was written by Mishock Physical Therapy and Associates, a privately-owned, outpatient physical therapy practice operating in southeast Pennsylvania. They actively participate in the community by providing services to schools, retirement communities, and local businesses. Their mission is to provide the most efficacious, state-of-the-art physical therapy services to relieve pain, restore function and return you to the highest quality of life possible. For more information click here.

PT can Help

Elf Injuries and How PT Can Help: Part 1 of 3

Elf Injuries_2016-11_FBsize

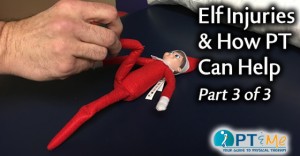
It’s that time of year, when we check in on Santa’s helpers to see if they can use some physical therapy. With their heavy lifting and high demand job they’re always experiencing injuries. Our new elf friend Ziggy, is the perfect patient for physical therapy. Let’s see how PT can help Ziggy!

Here’s part of his story…

Ziggy was working late one night in the North Pole. When all of a sudden… he lifted a large toy scooter and fell over on to his back. OUCH!

elf on PT & Me website

Luckily, Santa and his elves have an amazingly good north pole internet provider, and Ziggy was able to go online to the PTandMe website and find great physical therapy clinics in his area.

elf on pt table

Now Ziggy is at one of PT & Me’s physical therapy clinics with one of our trusted therapists to help relieve him of all his back pain. He will be back to making more toys real soon, just in time for the holiday!

See Ziggy’s complete physical therapy experience here!

elf injuries physical therapy PTandMe   Elf on the Shelf Physical Therapy

elf injuries

Special thanks to Action Physical Therapy, in Houston, TX, for accommodating the demanding work schedule of Santa’s elves. Click Here for more information about Action Physical Therapy.

PT News

This Month in PT News. Featuring articles from PTandMe partnering clinics!

back

1. My Back Pain Always Returns! What Can I Do?
Written by the Therapy Team at the Jackson Clinics – Northern Virginia

After the common cold, the most common reason Americans miss work is back pain. Unfortunately, once you have experienced back strain or injury, it can easily become a recurring problem. Read more

uncommon

2. Uncommon Injury and Treatment Process
Written by Steve Retan AT, ATC, the Center for Physical Rehabilitation – Grand Rapids, MI

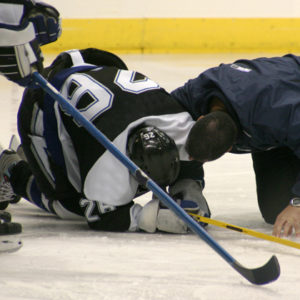
Having worked as an athletic trainer for the last 23 years, I have treated and rehabilitated countless injuries.  However there are times that athletes sustain injuries that I have not seen before.  One such injury occurred to a high school hockey player after colliding with an opponent during a game. Read more

ankle

3. Tips for Improving Your Ankle Mobility
Written by the Therapy Team at Momentum Physical Therapy – San Antonio, Texas

It’s important for a physically active body to achieve a stable balance between each active joint for maximum performance. In order for all of this to happen, ankle mobility is essential and is the root for several exercises or workouts! Read more

shin splints

PT News

This Month in PT News. Featuring articles from PTandMe partnering clinics!

flu

1. Resuming Exercise After the Flu Bug
Written by the Therapy Team at the Jackson Clinics – Northern Virginia

Flu season is in full swing, and along with the regular flu, the new H1N1 virus is infecting thousands of people. Influenza can be a serious illness. Symptoms include fever, chills, headache, body aches, sore throat , runny nose, dry cough and a general feeling of exhaustion and sickness. Read more

New Year Resolution

2. The New Way to Resolve
Written by Allison Whitteberry, PTA at the Center for Physical Rehabilitation – Cascade

According to Statistic Brain, 41% of Americans usually make New Year resolutions. However, after six months, less then half of those American’s have maintained their resolutions. Read more

Shin Splints

3. What You Need to Know About Shin Splints
Written by the Therapy Team at Momentum Physical Therapy – San Antonio, Texas

Shin splints is one of those old health terms that pop up from time to time, like “lumbago.” Lumbago refers to low back pain, which actually can be caused by different things. Read more

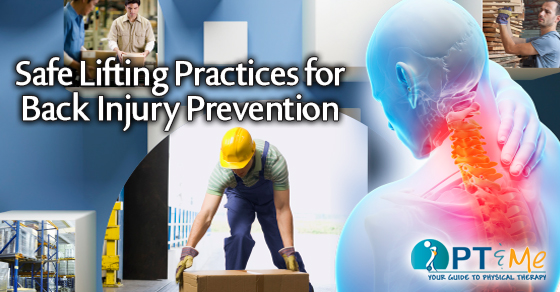
Safe Lifting Practices for Back Injury Prevention

Lifting Safety: Safe lifting practices for back injury prevention.

Whether at home or at work safe lifting practices can keep your back healthy and safe. Before lifting heavy objects decide how you will lift carry & place the item before you pick it up. Test the weight of the load by moving or tipping it. Figure out if you can break the load down by placing the contents of large containers into a number of smaller ones before moving them. Is the path clear? What is the weight of the load? How much stress will be placed upon your back? Is there traffic, a tripping hazard, a doorway to go through, or a stairway to go up or down? Avoid carrying an object that requires two hands to hold, either up or especially down a flight of stairs. Use the elevator. Plan a rest stop, if needed. Knowing what you’re doing and where you’re going will prevent you from making awkward movements while holding something heavy. Clear a path, and if lifting something with another person, make sure both of you agree on the plan.

KEY STEPS FOR SAFE LIFTING PRACTICES

Establish a Base of Support: Use a wide, balanced stance with one foot in front of the other. Make sure that you have firm footing and that your feet are a shoulders-width apart. This staggered stance gives you the stability of not falling over and being able to secure the load.

Keep Your Eyes Up: Looking slightly upward will help you maintain a better position of the spine. Keeping your eyes focused upwards helps you keep your back straight.

Get a Good Grip: With your palms and make sure you have an adequate hold on the object. Be certain you will be able to maintain a hold on the object without having to adjust your grip later. You can use gloves to help maintain an adequate grip, but don’t rely on gloves because they can desensitize the fingers and make you unable to feel the object.

Lift Gradually with Your Legs: Without using jerky motions. By using your leg strength, your chance of lower back injury is greatly reduced.

Tighten you stomach muscles: As you begin the lift and keep you head and shoulders up.

Pivot – Don’t Twist: Move your feet in the direction of the lift. This will eliminate the need to twist at the waist.

Weight: A lighter load normally means a lesser risk of injury. The weight of the object should be within the capacity of the person to handle safely.

Handling: It is easier to pull or push a load than it is to lift, put down or carry.

Keep the Load Close: Holding a 20lb object with your hands 20 inches from the body creates more compressive force on your low back than holding it 10 inches away. This is because the muscles in your back have to work to counterbalance the weight when it is further from the body. As the compressive force on your low back increases, so does the risk of muscle strains, ligament sprains and damage to the disks in the spine.

Frequency: The more times a load is handled, the more tired the muscles become, making it easier for the person to be injured.

Distance: The farther the load has to be moved, the greater the risk of injury.

Duration (TIME): Where the job involves repetitive movements, reducing the time spent on handling will help to ensure the movements are not causing unnecessary strain.

Forces Applied: Forces should be applied smoothly, evenly and close to the body. Forces exerted should be well within the capacity of the person, and the person should maintain proper posture.

Nature of the Load: Loads that are compact, stable, easy to grip, and capable of being held close to the body are much easier to handle.

Terrain: Rough ground, steep slopes, slippery and uneven floors, stairs and cluttered floors make moving a load awkward and increase the chance for injury.

Environment (Climate & Lighting): If it is too hot, too humid, too cold or the lighting is inadequate, the capacity to work safely is reduced.

Condition of the Workplace: Safe and comfortable working conditions, with adequate space to perform the task, and tools and equipment that are well-maintained, make their job safer.

Age/Gender: Young and old workers alike may be at an increased risk of injury from manual materials handling activities. Ensure abilities of employees are in line with functional job requirements.

Training: Proper training for the specific task is vital to reduce injury.

Team Lifting: If one person cannot lift or move a heavy, large or awkward object safely, organize a team lift. Team lifting reduces the risk of injury, reduces fatigue and makes the task much easier.

Raise/Lower Shelves: The best zone for lifting is between your shoulders and your waist. *Put heavier objects on shelves at waist level, lighter objects on lower or higher shelves.

Avoid Lifting from the Floor: Lifting from the floor can greatly increase your risk of injury for two reasons. Firstly, it is difficult to bring objects close to your body when picking them up from the floor, especially large objects where your knees can get in the way. Secondly, your low back must now support the weights of your upper body as you lean forward, in addition to supporting the weight of the item you are lifting. Lifting the same 20lbs from the floor more than doubles the amount of force on your low back when compared with lifting is from waist height. Even a one pound object lifted from the floor increases you risk of injury if you use a bent over posture.

Get Help When You Need It: Don’t try to lift heavy or awkward loads on your own. Even though the muscles in your upper body may be strong enough to handle the load, the muscles, ligaments and disks in your lower back may be injured because of the additional forces they have to withstand. Get help from a co-worker, and whenever possible, use a cart, hand truck or other mechanical device to move the load for you.

This content was written by Fit2WRK who has partnered with PT and Me to give a comprehensive look into the services physical and occupational therapists provide. For more information on Fit2WRK click here.


McKenzie Method

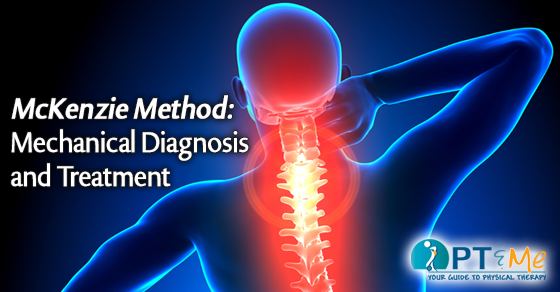
McKenzie Method: Mechanical Diagnosis and Treatment

McKenzieMethod2_FBsize

The McKenzie Method is a philosophy of active patient involvement and education that is trusted and used by practitioners and patients all over the world for back, neck and extremity problems.
McKenzie Method – Three Steps to Success:

1. A logical step-by-step process to evaluate the patient’s problem quickly. This mechanical examination can “classify” most patient conditions by the level of pain or limitation that results from certain movements or positions. A McKenzie assessment can eliminate the need for expensive and/or invasive procedures.

2. McKenzie treatment prescribes a series of individualized exercises. The emphasis is on active patient involvement, which minimizes the number of visits to the clinic. For patients with more difficult mechanical problems, a certified McKenzie clinician can provide advanced hands-on techniques until the patient can self administer.

3. By learning how to self-treat the current problem, patients gain hands-on knowledge on how to minimize the risk of recurrence and to rapidly deal with recurrence if it occurs. The likelihood of problems persisting can more likely be prevented through self-maintenance.