Category Archives: Shoulder

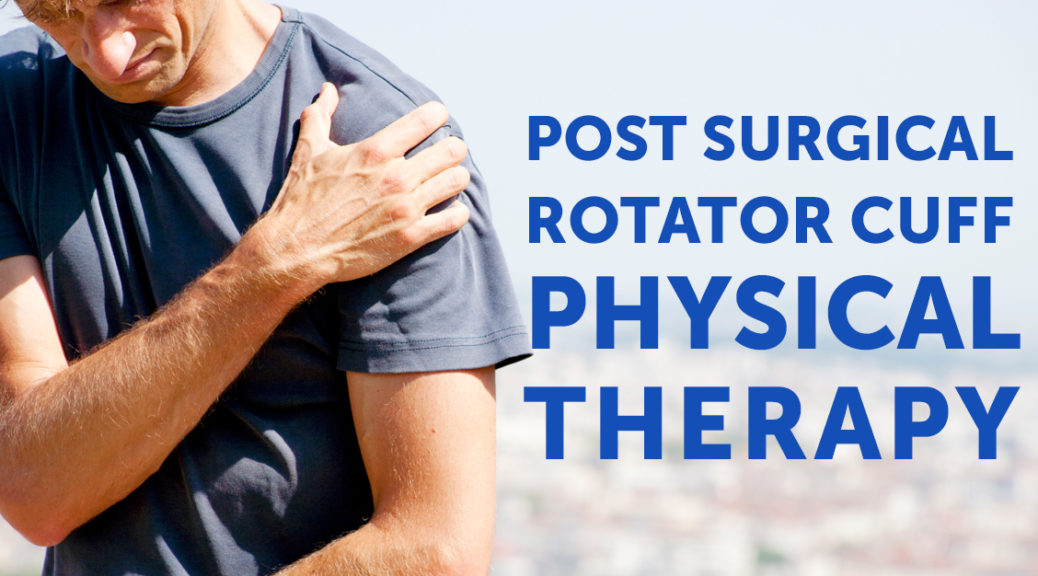
Post Surgical Rotator Cuff Physical Therapy

Post Surgical Rotator Cuff Tear Physical Therapy

Post Surgical Physical Therapy after Rotator Cuff Tear Surgery

Post Surgical Rotator Cuff Physical Therapy

A patient will typically be referred for rotator cuff tear surgery when 90% or more of the tendon is torn. The most common causes for a rotator cuff tear and rotator cuff injuries are aging, overuse of overhead activities and heavy lifting. Surgery should never be taken lightly, so we wanted to take some time to inform you about what to bring before surgery, things that can help you immediately after and then give an idea of what to expect as you go through a post-surgical rotator cuff tear physical therapy treatment plan. These are general guidelines. More specific expectations can be given by your healthcare provider.

Items to bring with you before rotator cuff tear surgery

  • Sling
  • Ice Pack or Cold Therapy Unit

Using your sling

  • You will usually wear it for about 4 weeks. (Removing only to wash up and do exercises)
  • Avoid ANY active reaching or lifting up to 6 weeks
  • Getting Dressed
    – Place the involved arm in the sleeve first.
    – Put your belt in your pants first.
    – Slip-on shoes are recommended.
  • Sleeping
    – It may be more comfortable sleeping in a recliner instead of a bed.
    – Support your arm with a towel roll or pillow if lying down.
  • Avoid showering for the first couple of days.  (Once able to shower, lean over to let your healing arm hang away from your body, while you use the other to wash.)

Icing your shoulder (Ice Pack or Cold Therapy Unit)

  • Ice for 20 minutes in your waking hour for the first few days.
  • Decrease to 3-5 times a day as needed for pain.

General Care

  • Change dressing daily as recommended by your physician/nurse.
  • No driving especially if the right arm and if taking pain medications.
  • Walk around your home at least 1 time each hour to prevent blood clots.
  • Begin therapeutic exercises as soon as instructed

After being cleared for physical therapy, the normal course of a POST-SURGICAL rotator cuff tear physical therapy has been described as having five stages:

Stage 1: Immobilization

There is a mandatory period of rest for the arm following a rotator cuff tear surgery. The tendons have been repaired but need to wait through the biological healing phase in order to be able to accept the strain of moving the arm. This period may last 4-6 weeks and may be intermittent with the therapist being able to do slight motions to the arm to keep the joint from getting stiff.

Stage 2: Passive motion

During and after the immobilization phase, you’ll begin performing passive motion exercises. At first, the therapist will provide the muscle to move the arm, but over time, you’ll be educated in the use of pulleys, stretch straps and table stretches to allow the joint to move while keeping the muscles fully relaxed.

Stage 3: Active-Assisted motion

Once the shoulder has achieved full expected passive motion, and with the permission of the surgeon, your therapist will begin active-assisted motion. This type of exercise uses less than 100% of the surgical shoulder’s power to move the arm. The therapist may instruct you in pendulum exercises that employ gravity and momentum. Self-ranging exercises use the uninvolved arm to move the involved arm, either against the weight of gravity or lying down so that the weight of gravity is minimalized. The surgical arm’s responsibility will slowly increase up to 100% of the weight of the arm. Then, you’ll be ready for active motion.

Stage 4: Active motion

The active motion phase begins when the arm is able to carry its own weight against gravity but is not yet ready to lift, push or pull objects. During this phase, your therapist will demonstrate safe motion patterns of the shoulder and shoulder blade. They will monitor the coordination of movement between the muscles to check for specific weaknesses that could put a strain on the repair. Once you can achieve full expected active range of motion against the weight of gravity, and with your physician’s approval, you’ll be ready to add weight.

Stage 5: Strengthening

The strengthening program may start out slowly. Be patient! The muscles are relearning how to work together so inflammation of the tendons and bursae are still a risk in this phase. Your therapist will recommend exercises that you can do at home in order to improve the arm’s tolerance for strength and to reduce the strain on the arm when you come into therapy. Over time, the therapist will demonstrate ways that you can safely use the arm for pushing up from a chair, pulling a door open, reaching into a cabinet and other activities of daily living.

Post-surgical rotator cuff tear physical therapy care can vary based on the patient’s needs and ability levels. Depending upon the severity of the rotator cuff tear, physical therapy can work with patients to heal the tendon and reduce pain. To find a physical therapist near you click the button below.

physical therapy near me

PT News PTandMe

PT News April 2019

PT News PTandMe

This time in PT News we recap what our clinics have been posting throughout April 2019. We are excited to begin a new year of new posts featuring published articles from PTandMe partnering clinics!

shoulder impingement

1. The Truth Behind Shoulder Impingement
Written by Spectrum Physical Therapy with 3 physical therapy locations in Connecticut.

Shoulder impingement (Subacromial Impingement Syndrome) is a condition of the shoulder that results in pain felt at the front of the shoulder, under a bone called the acromion process, that is often worse with repetitive or frequent overhead activity.  Read more


what is certified hand therapy

2. What is Certified Hand Therapy?
Written by the Therapy Team at Momentum Physical Therapy with multiple physical therapy locations throughout Greater San Antonio.

You may have heard of Certified Hand Therapists (CHTs) and wondered if they are the only therapists that can treat hand injuries. You may have also wondered why therapists needed a special certification to treat a specific body part. Read more


wrist pain

3. The Power (and Weakness) of the Wrist
Written by the physical therapy team at Cornerstone Physical Therapy with 5 locations in Ohio.

A wrist fracture has the potential to impact daily life for an extended period of time. Wrist fractures result from falls, sports activities, and improper lifting. Owing to the complex architecture of the bones, muscles, and ligaments in the wrist and hand, healing can take a while. Read more

FOOSH

FOOSH – Silly Name, Serious Injury

FOOSH

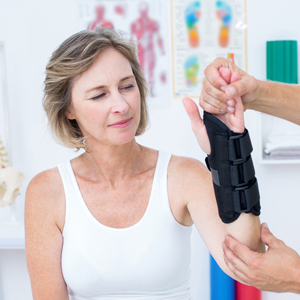
One of the most common mechanism of injury from falls is called a FOOSH (Fall on an Out Stretched Hand) injury. Don’t let the funny name fool you. A FOOSH injury is one of the most debilitating ways to injure your upper extremity and cause a significant loss of function. A Foosh occurs when a person is on their way down during a fall and tries to brace for impact using their hands. This is a natural response to falling and is difficult to try and prevent. The resulting impact of the hand and wrist on the ground can cause varying types of injuries from strains and sprains to fractures of the hand, wrist, elbow or shoulder.

What to look for if you experience a FOOSH Injury

1. Fractures: Typically, the fractures of the forearm from a FOOSH are the easiest to spot. They become swollen and bruised very rapidly and are associated with a lot of pain. Often times they produce a visible bulging of the skin of the forearm which can even protrude outside of the body. Fractures of the wrist and forearm will need to be evaluated and often times re-set and casted. Following casting the person must regain strength and range of motion through a guided exercise program before normal function can return. These injuries may take as long as 12 weeks to heal, but as many as 20 weeks for return to normalcy. This process can be expedited significantly by a referral to a well-trained physical therapist.

2. Sprains: Sprains from a FOOSH are much more difficult to spot. A sprain is a common injury to a ligament that normally holds one bone to another as a part of a joint. It most likely causes moderate to severe swelling, bruising, and pain. The pain may occur both by moving the joint yourself or having someone else move the joint while you are relaxed. During a sprain, a non-contractile piece of tissue becomes torn partially or completely. The result is a joint that is too lax to allow proper joint stability. This can cause problems for years following the initial injury. Think of the brake system on your bicycle. If the brake cable becomes elongated the brake does not function correctly until it is repaired. An evaluation by a physical therapist is necessary to diagnose and treat a sprain correctly and to prevent further injury to the injury site as well as allow for speedy recovery.

3. Strains: Strains are also difficult to spot following a FOOSH. A strain differs from a sprain in that it occurs as a tearing of the tendon instead of a ligament. This can present like a sprain with swelling and bruising, but will have a few different characteristics. Tendons attach to bone on one side and a muscle on the other. Tendons therefore hurt with both passive motion, but also with active motion. Strains of the wrist and hand can cause a significant loss in function with things like writing, typing, or even just holding an object in your hand. Without intervention, this can lead to progressively worsening problems like tendonitis and carpal tunnel syndrome which may need surgical intervention if not attended to quickly.

No matter your age or fitness level please use caution to avoid these types of debilitating injuries. If you do fall, it is important to consult your health care provider. During rehabilitation we can help you reduce pain, increase strength and regain function. Please feel free to call us for more information or to schedule an appointment.

PT News PTandMe

PT News September 2018

PT News PTandMe

This September in PT News. Featuring published articles from PTandMe partnering clinics!

Juvenile Arthritis

1. Childhood Arthritis and How Physical Therapy Can Help
Written by Cornerstone Physical Therapy with 5 physical therapy locations in Ohio.

Juvenile arthritis (JA) isn’t a specific disease, but an inflammatory and autoimmune condition in youngsters under age 16. JA affects approximately 300,000 children just in the U.S. and it’s classified within seven different types, depending upon a range of symptoms and coconditions. Read more


shoulder physical therapy

2. Hands-on physical therapy effective for common shoulder conditions
Written by the Therapy Team at Rehab Associates with physical therapy locations throughout Central, VA.

Shoulder problems are one of the more common issues that affect the musculoskeletal system, as its prevalence in the general population has been reported as high as 4.8%. The most common shoulder condition that causes pain is shoulder impingement syndrome (SIS), which often results from too much overhead activity.  Read more

Tummy Time

3. Tummy Time Positions
Written by the Therapy Team at The Center for Physical Rehabilitation (CPR) in Grand Rapids, MI and the surrounding communities.

The American Academy of Pediatrics recommends that babies are placed on their backs for sleeping and on their tummies for supervised play time as part of their daily routine. So many of our carriers, including car seats, car seat stroller combos, bouncers and swings put our kids into a supine (aka, on their backs) position and make it more challenging to incorporate tummy time into your day. Read more

Top 5 Exercises for Frozen Shoulder

Top 5 Exercises For A Frozen Shoulder

Top 5 exercises for a frozen shoulder: Frozen shoulder exercises

Adhesive capsulitis is more commonly known as frozen shoulder, and with good reason: It can render your shoulder so stiff, that it’s almost impossible to button your shirt — that is, if you aren’t in too much pain to get dressed in the first place. In general, a frozen shoulder can come on after an injury to your shoulder or a bout with another musculoskeletal condition such as tendinitis or bursitis. Quite often its cause can’t be pinpointed. Nonetheless, any condition that causes you to refrain from moving your arm and using your shoulder joint can put you at risk of developing frozen shoulder.

Physical therapy exercises for frozen shoulder focus on controlling pain and getting movement back to normal through physical therapy. When trying out the exercises below please perform them to your tolerance. If you experience pain – stop immediately.

Exercises For A Frozen Shoulder

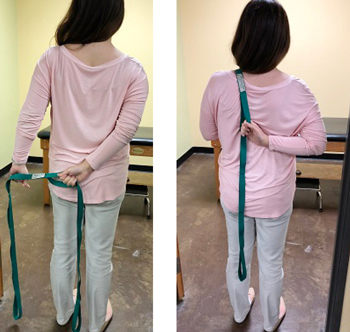
1. Internal Rotation Belt Stretch.
Exercises for Frozen Shoulder Internal Rotation Belt Stretch

Grab an old belt or dog leash. Place the involved hand behind your back and start by pulling the belt across your buttocks. Hold for 5-10 seconds. Repeat for 1 minute 2 sets.
Progression: Place the involved hand behind your back and pull the belt with the non-involved to progress the backhand upward along the spine. Repeat for 2 minutes.

2. Posterior capsule stretch
Exercises for Frozen Shoulder Posterior Capsule Stretch

Cross your involved arm across your chest and apply overpressure with your non-involved side. Hold for 1 minute, 2 repetitions.

3. Pectoralis Stretch
Exercises for Frozen Shoulder Pectoralis Stretch

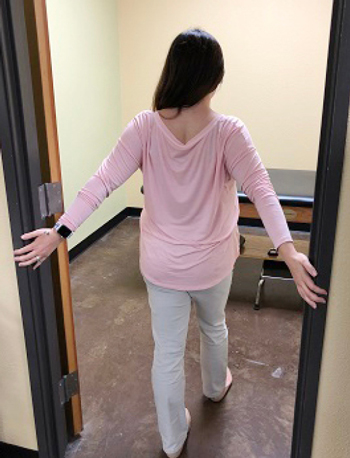
Stand in a door frame with arms by your side. Clasp onto the door frame and take a few steps forward until a stretch is felt in your bicep and shoulder area. Hold for 5-10 seconds for 1 minute, 2 repetitions.

4. Sleeper stretch
Exercises for Frozen Shoulder Sleeper Stretch

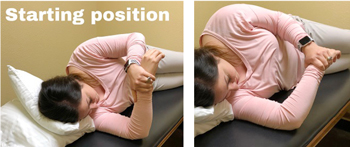
Roll onto your involved shoulder. Place your elbow in line with your shoulder. With your non-involved side, push your forearm down towards the floor. Hold for 30 seconds, 3 repetitions.

5. Upper thoracic stretch
Exercises for Frozen Shoulder Upper Thoracic Stretch

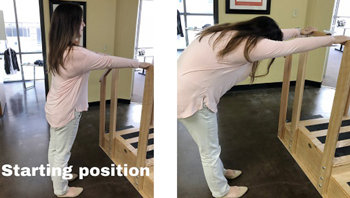
Stand about arm’s length away from a staircase banister or kitchen sink. Hold onto the banister and lean your body forward until a stretch is felt in your upper shoulders and back. Hold for 1 minute, 2 repetitions.

These exercises while designed to help a patient experiencing frozen shoulder may not be beneficial to patients during all stages of recovery. For the best results, please find a physical therapist in your area to schedule an appointment. They will be able to tailor a treatment program designed specifically to meet your needs and ability levels.

Frozen Shoulder

physical therapy near me

These exercises for frozen shoulder were compiled and demonstrated by the staff at Green Oaks Physical Therapy – Irving. Green Oaks is located throughout the greater Dallas and Fort Worth areas. More information about Green Oaks physical therapy can be found here.

PT News PTandMe

PT News May 2018

PT News PTandMe

This Month in PT News. Featuring articles from PTandMe partnering clinics!


2. Hands-on physical therapy effective for common shoulder conditions
Written by the Therapy Team at Rehab Associates of Central Virginia 

Shoulder problems are one of the more common issues that affect the musculoskeletal system, as its prevalence in the general population has been reported as high as 4.8%.  Read more

3. What to expect on your first visit with a pelvic Physical Therapist
Written by the Therapy Team at Ability Rehabilitation – Central Florida

You may be wondering how this will help with your concerns and symptoms. You may be wondering “how does this work”. What will happen during the first visit and follow up treatments? Read more

labral tear physical therapy

ATC Tip: The Labrum

Anatomy of the Shoulder
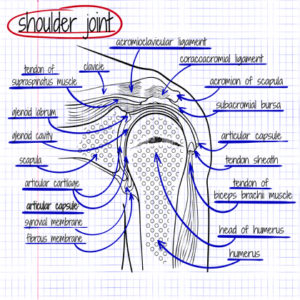
The shoulder can move in almost every plane of motion, it’s the most mobile joint in the human body; but more mobility = more instability. The shoulder joint is often described as a “ball in socket,” but it’s wide range of motion makes it a highly vulnerable joint. We have a network of soft tissue structures, such as the rotator cuff and ligaments, whose main job is to keep the humeral head in its assigned seat. However, often these muscles alone are not sufficient as they can become weak or tight and thus less efficient. The labrum is a small ring of cartilage that provides additional stability to the shoulder joint.

How Does a Labrum Become Damaged?
Direct trauma, shearing forces, or repetitive stress can cause damage to the labrum. Often, this damage will present as a tear in the labrum, which can restrict motion, decrease strength, and cause pain in the shoulder. Picturing that ring of cartilage, imagine a roughening of the edges of the bowl-like golf tee, or even a rip that flaps when the ball is spun around. It is not uncommon for a shoulder dislocation or subluxation to be accompanied by a labral tear; chronic shoulder instability can also lead to labrum injury.

What Does a Labrum Do?
Because the “ball and socket” is so shallow, the shoulder joint is often described, quite accurately, like a “golf ball sitting on a tee.” To picture the shoulder labrum, imagine a ring around the outer edge of a golf tee, effectively deepening the overall bowl shape, almost suctioning the humerus into the space. The labrum helps stabilize the shoulder by making the “ball” more difficult to remove from the “tee.”

How Can I Prevent a Labrum Injury?
The best way to prevent a labral tear is to strengthen the musculature surrounding the shoulder joint. The best case scenario is all of the muscles are working together to keep the shoulder joint moving fluidly through its full range of motion. Important within this group of muscles are the muscle that control the shoulder blades. By strengthening the stabilizing muscles individually and functionally, it helps them stay balanced and strong with the other, stronger muscles (like the RTC). The other way to prevent a labrum tear is to avoid excessive contact, repetitive overhead motions, and falls.

This article about athletic injuries was provided by PT & Me physical therapy partner: The Center for Physical Rehabilitation. More information about the center and their locations throughout Grand Rapids, MI can be found on their website at www.pt-cpr.com

To see a shoulder strengthening program visit our Sports Medicine Tip Page by clicking here.

throwing injuries PTandMe

Guidelines to Prevent Throwing Injuries

In this monthly series, we examine the proper ways to exercise and prevent throwing injuries in baseball. If you have any sudden significant increase in pain, swelling, or discoloration while performing or following exercise, discontinue immediately and contact your primary care provider.


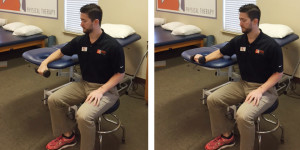
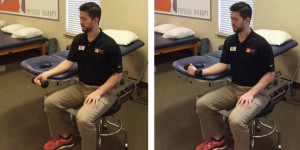
WRIST EXTENSION
Start with the arm supported on a table and your wrist facing toward the ground. Hold the weight off the edge of the table and bring the back of your hand toward the ceiling.


WRIST FLEXION
Start with the arm supported on a table and your wrist facing toward the ceiling. Hold the weight off the edge of the table and bring your palm toward the ceiling.

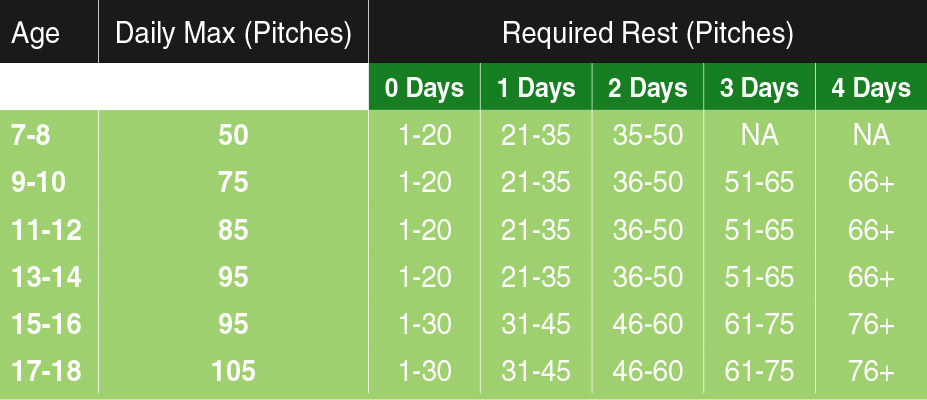
ASMI GUIDELINES TO HELP PROTECT PITCHERS FROM SHOULDER & ELBOW THROWING INJURIES:

Don’t throw too much:
Daily, weekly and annual overuse is the greatest risk to a pitcher’s arm health. Numerous studies have shown that pitchers who throw more pitches per game and those who do not adequately rest between appearances are at an elevated risk of injury. While medical research does not identify optimal pitch counts, pitch count programs have been shown to reduce the risk of shoulder and elbow injury in Little League Baseball by as much as 50% (Little League, 2011). The most important thing is to set limits for a pitcher and stick with them throughout the season.

Don’t pitch through arm fatigue:
Individuals are 36 times more likely to develop shoulder and elbow injuries when routinely pitching with arm fatigue.

Don’t pitch more than 100 innings per year:
If an athlete throws over 100 innings they are 3.5 times more likely to be injured than those who did not exceed 100 innings pitched.

Don’t throw more than 8 months per year:
Athletes who throw > 8 months per year are 5 times as likely to suffer an injury requiring surgery of the elbow or shoulder. Pitchers should refrain from throwing for at least 2-3 months per year and avoid competitive pitching for at least 4 months per year.

Don’t pitch on consecutive days:
Pitchers who pitch on consecutive days have more than 2.5 times greater risk of experiencing arm pain.

Don’t play catcher following pitching:
If the player catches following pitching they are 2.7 times more likely to suffer a major arm injury.

Don’t play on multiple teams at the same time:
There is increased risk of injury due to the difficulty in monitoring pitch limits and rest time. If the player is on multiple teams, make meticulous efforts to keep track of the amount of pitches thrown to allow adequate rest.

Don’t forget the shoulder in strength and conditioning programs:
Numerous studies have shown that deficits in upper extremity strength and mobility are strongly correlated to serious arm injuries. Shoulder and forearm strengthening exercises can build strength, endurance and motor control which can prevent injury.

Be cautious with throwing curve balls and sliders:
While existing research has not consistently shown a strong connection between the curveball and injuries, Yang et al., found that amateur pitchers who threw curveballs were 1.6 times more likely to experience arm pain while pitching and Lyman et al, found that youth pitchers who throw sliders are 86% more likely to experience elbow pain.

Be cautious with the radar gun:
Radar guns do not directly cause harm to a pitcher, however, the gun may cause the pitcher to over throw beyond their normal comfort level. This could possibly create arm strain.

Following these guidelines may keep the throwing athlete safe from the debilitating shoulder and elbow throwing injuries seen on a regular basis in physical therapy clinics.

Pitching Guidelines Chart

This information was written by Advance Rehabilitation Physical Therapy, an outpatient physical therapy group with 24 locations in Georgia and Florida. Advance Rehabilitation is a physical therapy practice that focuses on providing the highest quality rehabilitation services. They specialize in physical therapy, sports medicine, industrial rehabilitation and athletic training. Their staff includes highly-trained professionals that serve as a bridge between injury and recovery to help patients get back to pre-injury status as quickly as possible. For more information click here.

See the entire Guidelines to Prevent Throwing Injuries series here:

   Prevent Throwing Injuries

   prevent throwing injuries

throwing injuries PTandMe

prevent throwing injuries

Guidelines to Prevent Throwing Injuries

throwing injuires

In this monthly series about how to prevent throwing injuries, we examine the proper ways to exercise and prevent throwing injuries in baseball. If you have any sudden significant increase in pain, swelling, or discoloration while performing or following exercise, discontinue immediately and contact your primary care provider.


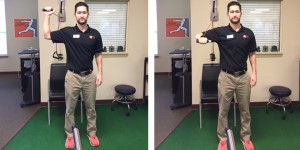
PRONE ROW
Lay on your stomach with your arm hanging off the edge toward the ground. Squeeze your shoulder blade and bring your elbow toward the ceiling while keeping your forearm perpendicular to the ground.


PRONE ROW WITH EXTERNAL ROTATION
Lay on your stomach with your arm hanging off the edge toward the ground. Turn your wrist so your palm is toward your feet. Squeeze your shoulder blade and bring your elbow toward the ceiling while keeping your forearm perpendicular to the ground. Once your arm is parallel with the ground rotate the back of your hand toward the ceiling while keeping the elbow bent.


PRONE T (HORIZONTAL ABDUCTION)
Lay on your stomach with your arm hanging off the edge toward the ground. Lift your arm straight out to your side and squeeze your shoulder blade with the palm continuing to face toward the ground.


PRONE Y (SCAPTION)
Lay on your stomach with your arm hanging off the edge toward the ground. Lift your arm at a 45 degree angle over your head with your thumb facing toward the ceiling. Squeeze your shoulder blade down and toward your spine.

This information was written by Advance Rehabilitation Physical Therapy, an outpatient physical therapy group with 24 locations in Georgia and Florida. Advance Rehabilitation is a physical therapy practice that focuses on providing the highest quality rehabilitation services. They specialize in physical therapy, sports medicine, industrial rehabilitation and athletic training. Their staff includes highly-trained professionals that serve as a bridge between injury and recovery to help patients get back to pre-injury status as quickly as possible. For more information click here.

See the entire Guidelines to Prevent Throwing Injuries series here:

   Prevent Throwing Injuries

   prevent throwing injuries

throwing injuries PTandMe

Guidelines to Prevent Throwing Injuries

GuidelinesPreventThrowingInjuries#3_FBsize

In this third intallment of our series to prevent throwing injuries, we examine the proper ways to exercise and prevent throwing injuries in baseball. If you have any sudden significant increase in pain, swelling, or discoloration while performing or following exercise, discontinue immediately and contact your primary care provider.


INTERNAL ROTATION WITH SHOULDER AT 90 DEGREES OF ABDUCTION
Attach band high up on a doorway and face away from door. Hold band and move your arm out sideways away from your body until your arm is parallel with the ground. Bend your elbow to 90 degrees and point your fist toward the ceiling. Rotate from your shoulder bringing your hand forward while keeping your arm parallel to the floor and your elbow bent to 90 degrees.


EXTERNAL ROTATION WITH SHOULDER AT 90 DEGREES OF ABDUCTION
Attach band high on a doorway and face toward the door. Hold band and move your arm out sideways away from your body until your arm is parallel with the ground. Bend your elbow to 90 degrees and point your fist toward the door. Rotate from your shoulder bringing your hand away from the door while keeping your arm parallel to the floor and your elbow bent to 90 degrees.


SHOULDER INTERNAL ROTATION AT SIDE
Attach band to the doorway at chest height. Stand perpendicular to the doorway with the arm you are exercising closest to the door. Keep your arm at your side with a towel roll under the arm and bend the elbow to 90 degrees. Bring your hand toward your stomach while keeping the elbow bent to 90 degrees.


SHOULDER EXTERNAL ROTATION AT SIDE
Attach band to the doorway at chest height. Stand perpendicular to the doorway with the arm you are exercising furthest from the door. Keep your arm at your side with a towel roll under the arm and bend the elbow to 90 degrees. Bring your hand away from your stomach while keeping the elbow bent to 90 degrees.

This information was written by Advance Rehabilitation Physical Therapy, an outpatient physical therapy group with 24 locations in Georgia and Florida. Advance Rehabilitation is a physical therapy practice that focuses on providing the highest quality rehabilitation services. We specialize in physical therapy, sports medicine, industrial rehabilitation and athletic training. Our staff includes highly-trained professionals that serve as a bridge between injury and recovery to help patients get back to pre-injury status as quickly as possible. For more information click here.

See the entire Guidelines to Prevent Throwing Injuries series here:

   Prevent Throwing Injuries

   prevent throwing injuries

throwing injuries PTandMe