Tag Archives: injury

dry needling physical therapist

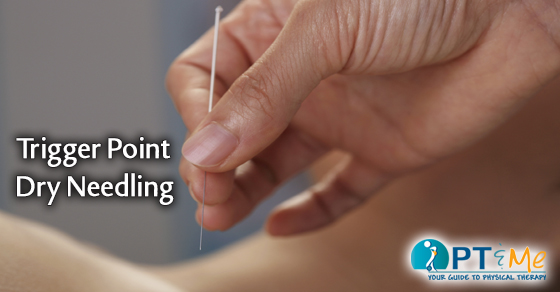
Trigger Point Dry Needling

Trigger Point dry needling_FBsize

Dry needling uses small, thin needles to stimulate underlying myofascial trigger points, muscular and connective tissues for the management of many orthopedic conditions, both acute and chronic. By inserting a needle into the dysfunctional tissue, it often leads to a contraction of the muscle which then stimulates a relaxation. This leads to a reduction of pain, improvements in flexibility and a restoration of normalized movement when combined with corrective exercises.

WHAT IS A MYOFASCIAL TRIGGER POINT?
A myofascial trigger point is a hyperirritable spot within a taut band of skeletal muscle that produces local or referred pain. The trigger point can lead to increased pain, decreased flexibility and decreased muscle function if not treated. Trigger point dry needling is a safe, effective and efficient treatment technique to release these painful spots.

dry needling

WHAT TYPE OF PROBLEMS CAN BE TREATED?
Muscle dysfunction can be the primary or secondary contributing factor to many neuromusculoskeletal conditions.

WHAT YOU NEED TO KNOW:
• Dry needling must be specifically prescribed by a physician.
• Dry needling is not covered by insurance, it is a cash based modality.

This information was written by The Jackson Clinics, a locally owned physical therapy practice in multiple locations throughout Northern Virginia. They specialize in outpatient orthopedics and sports rehabilitation. Their therapists and assistants possess advanced clinical skills in spinal disorders, sacroiliac joint dysfunction and peripheral joint problems, including rotator cuff injuries, knee injuries and foot and ankle pain. They also also have specialty programs in breast cancer rehab, vestibular rehab, pediatrics, post-cancer rehab, aquatic therapy and women’s health. For more information click here.

postoperative physical therapy

Postoperative Physical Therapy

Postopertive physical therapy after surgery

Postoperative physical therapy after a Total Hip Replacement is essential to your recovery. Your physical therapist will follow your physician’s protocol and will focus on range of motion exercises, progressive strengthening exercises, gait training, balance training, and activity specific training to meet your specific needs. Modalities such as ice and e-stim may be used to help reduce discomfort and swelling. It is very important to complete your home exercise program as directed by your physical therapist and physician.

RANGE OF MOTION EXERCISES
Swelling and pain can make you move your knee less. Your physical therapist can teach you safe and effective exercises to restore the range of motion to your knee so that you can perform your daily activities.

STRENGTHENING EXERCISES
Weakness of the muscles of the thigh and lower leg is typical after surgery. Your physical therapist can determine the best strengthening exercises for you with the goal of no longer needing a cane or walker to walk.

post op

BALANCE TRAINING
Specialized training exercises can help your muscles “learn” to adapt to changes in your world such as uneven or rocky ground. When you are able to put your full weight on your knee without pain, your physical therapist may add agility exercises so that you can safely and quickly change directions or make quick stops or starts. They may use a balance board that will challenge your balance and knee control. These exercises will be safe and fun.

GAIT TRAINING
Your physical therapist will work with you in retraining your gait following your surgery using appropriate assistive devices such as a walker or cane. They will make sure that you will be able to safely and confidently go up and down stairs, negotiate curbs, and inclines, etc.

ACTIVITY SPECIFIC TRAINING
Depending on the requirements or your job or the type of recreational activities you enjoy, your physical therapist will tailor your program so that you can meet your specific demands.

This article about postoperative physical therapy was written by STAR Physical Therapy, an outpatient physical therapy group with over sixty locations in Tennessee. Established in 1997 with one clinic and one mission – to serve. Today, they have grown to offer that direct service in more than 60 clinics, and while they’ve grown, one thing that has not changed is their commitment to you, their communities, and their employees. For more information click here.

exercise at the gym

Exercising Do’s and Dont’s

AtTheGym#3_FBsize

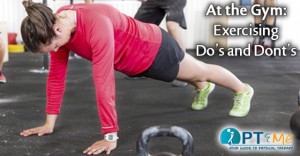
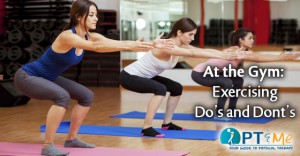
In the third installment of our gym series we examine the proper ways to exercise at the gym from start to finish. If you have any sudden significant increase in pain, swelling, or discoloration while performing or following exercise, discontinue immediately and contact your therapist at your next therapy session.

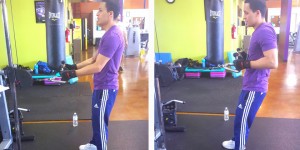
SCAPULAR RETRACTION / ROW

START POSITION
• Standing or seated with back in neutral with feet shoulder width apart.
• Squeeze shoulder blades together.
• Elbows slightly bent and forearms parallel to the floor.

ENDING POSITION
• Elbows at 90⁰ flexion.
• Shoulders pulled back.
• Hands at your sides at shoulder width and forearms parallel to the floor.

DON’T
• Swing body back and forth.
• Let the weight pull you forward between repetitions (keep the shoulders back).
• Shrug.

exercise at the gym

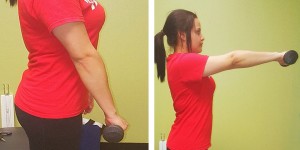
ANTERIOR DELTOID – FRONTAL RAISE

START POSITION
• Standing with spine in neutral position with feet shoulder width apart.
• Palms facing down.

ENDING POSITION
• Arm raised to 90⁰ directly in front of you.
• Elbow in full extension.

DON’T
• Raise arm past 90 degrees.
• Swing body back and forth.
• Rotate wrist.
• Shrug shoulders.

exercise at the gym

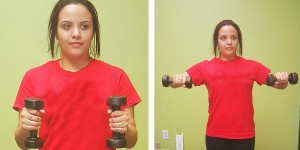
LATERAL DELTOID – LATERAL RAISES

START POSITION
• Standing with spine in neutral position with feet shoulder width apart.
• Elbows bent at 90 degrees.

ENDING POSITION
• Arms raised to 90 degrees at your side.
• Palms facing down.

DON’T
• Raise arms past 90 degrees.
• Swing body back and forth.
• Shrug shoulders.

exercise at the gym

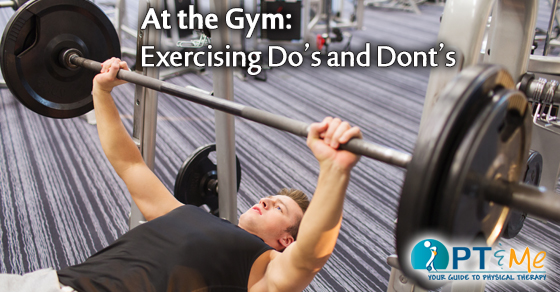
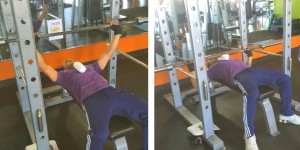
BENCH PRESS

START POSITION
• Lay flat on bench with both feet flat on the ground.
• Place a rolled towed in the center of the chest.
• Arms extended with wide grip to facilitate 90 degree bend at the elbow at the bottom of repetition.

ENDING POSITION
• Lower slowly until the bar touches the towel
• Elbows should not pass the height of the bench bending to about 90 degrees.

DON’T
• Lift feet off the ground.
• Arch your back.
• Bounce bar off your chest (barbell should only touch the towel lightly).

This information about exercise at the gym was written by STAR Therapy Services, an outpatient physical therapy group with six locations in Houston, Texas. At Star Houston Therapy Services, their number one priority is the patient. They strive to provide individualized treatment with hands-on, compassionate care. They perform comprehensive evaluations and encourage patient input for treatment planning and goal setting. For more information click here.

View the complete Exercising Do’s and Don’ts series below:


exercising do's and dont's

Safe Lifting Practices

Safe Lifting Practices: Back Injury Prevention

SafeLiftingPractices_FBsize

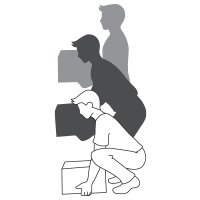
Whether you are getting ready for a move, or need to lift things at work, it’s important to use safe lifting practices. Don’t end up with a hurt back – use these tips to keep yourself injury free.

• ESTABLISH A BASE OF SUPPORT: Use a wide, balanced stance with one foot in front of the other. Make sure that you have firm footing and that your feet are a shoulders-width apart. This staggered stance gives you the stability of not falling over and being able to secure the load.•

• KEEP YOUR EYES UP: Looking slightly upward will help you maintain a better position of the spine. Keeping your eyes focused upwards helps you keep your back straight.

• GET A GOOD GRIP: with your palms and make sure you have an adequate hold on the object. Be certain you will be able to maintain a hold on the object without having to adjust your grip later. You can use gloves to help maintain an adequate grip, but don’t rely on gloves because they can desensitize the fingers and make you unable to feel the object.

• LIFT GRADUALLY WITH YOUR LEGS: without using jerky motions. By using your leg strength, your chance of lower back injury is greatly reduced.

• TIGHTEN YOU STOMACH MUSCLES: as you begin the lift and keep you head and shoulders up.

• PIVOT  DON’T TWIST: Move your feet in the direction of the lift. This will eliminate the need to twist at the waist.

• WEIGHT: A lighter load normally means a lesser risk of injury. The weight of the object should be within the capacity of the person to handle safely.

• HANDLING: It is easier to pull or push a load than it is to lift, put down or carry.

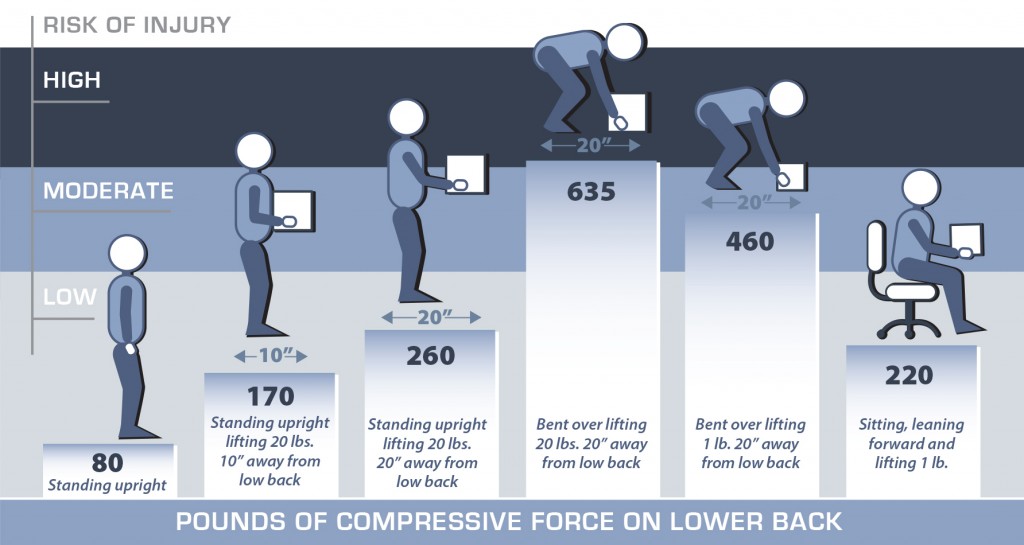
• KEEP THE LOAD CLOSE: Holding a 20 lb. object with your hands 20 inches from the body creates more compressive force on your low back than holding it 10 inches away. This is because the muscles in your back have to work to counterbalance the weight when it is further from the body. As the compressive force on your low back increases, so does the risk of muscle strains, ligament sprains and damage to the disks in the spine.

• FREQUENCY: The more times a load is handled, the more tired the muscles become, making it easier for the person to be injured.

• DISTANCE: The farther the load has to be moved, the greater the risk of injury.

• DURATION TIME: Where the job involves repetitive movements, reducing the time spent on handling will help to ensure the movements are not causing unnecessary strain.

• FORCES APPLIED: Forces should be applied smoothly, evenly and close to the body. Forces exerted should be well within the capacity of the person, and the person should maintain proper posture.

• NATURE OF THE LOAD: Loads that are compact, stable, easy to grip, and capable of being held close to the body are much easier to handle.

• TERRAIN: Rough ground, steep slopes, slippery and uneven floors, stairs and cluttered floors make moving a load awkward and increase the chance for injury.

• ENVIRONMENT (CLIMATE & LIGHTING): If it is too hot, too humid, too cold or the lighting is inadequate, the capacity to work safely is reduced.

• CONDITION OF THE WORKPLACE: Safe and comfortable working conditions, with adequate space to perform the task, and tools and equipment that are well-maintained, make their job safer.

• AGE/GENDER: Young and old workers alike may be at an increased risk of injury from manual materials handling activities. Ensure abilities of employees are in line with functional job requirements.

• TRAINING: Proper training for the specific task is vital to reduce injury.

• TEAM LIFTING: If one person cannot lift or move a heavy, large or awkward object safely, organize a team lift. Team lifting reduces the risk of injury, reduces fatigue and makes the task much easier.

• RAISE/LOWER SHELVES: The best zone for lifting is between your shoulders and your waist. Put heavier objects on shelves at waist level, lighter objects on lower or higher shelves.

• AVOID LIFTING FROM THE FLOOR: Lifting from the floor can greatly increase your risk of injury for two reasons. Firstly, it is difficult to bring objects close to your body when picking them up from the floor, especially large objects where your knees can get in the way. Secondly, your low back must now support the weights of your upper body as you lean forward, in addition to supporting the weight of the item you are lifting. Lifting the same 20lbs from the floor more than doubles the amount of force on your low back when compared with lifting is from waist height. Even a one pound object lifted from the floor increases you risk of injury if you use a bent over posture.

• GET HELP WHEN YOU NEED IT: Don’t try to lift heavy or awkward loads on your own. Even though the muscles in your upper body may be strong enough to handle the load, the muscles, ligaments and disks in your lower back may be injured because of the additional forces they have to withstand. Get help from a co-worker, and whenever possible, use a cart, hand truck or other mechanical device to move the load for you.

PROPER LIFTING TECHNIQUE
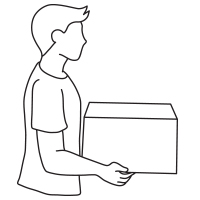
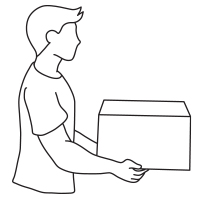
proper lifting

IMPROPER LIFTING TECHNIQUE

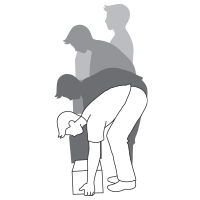
improper lifting

POSTURE

Posture diagram

GOOD POSTURE

good posture

BAD POSTURE
bad posture

Taking Care of Your Scar

Self-Care: Taking Care of Your Scar at Home

ScarCare_FBsize

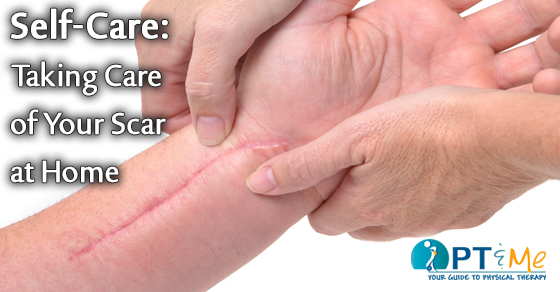
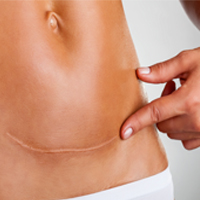
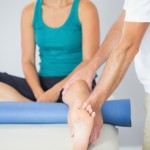
Taking care of your scar well is an important aspect of your recovery from surgery. You must follow your surgeon’s order faithfully.This includes keeping it dry and covered as long as your doctor tells you it is necessary. If your scar becomes excessively red or painful, notify your doctor or therapist.

scar

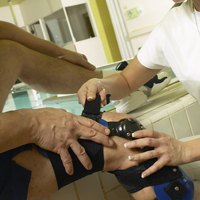
When you doctor tells you it is safe, you will need to start treating your scar at home. This is important because excessive scarring can lead to restricted movement and pain. The best approach to controlling your scar formation is to use your hands to free up skin around your scar. Rubbing Vitamin E oil or cocoa butter into your hands before massaging will also help your skin heal.
This information about taking care of your scar was written by Plymouth Physical Therapy Specialists, an outpatient physical therapy group with fourteen locations in the surrounding Plymouth, Michigan area. At Plymouth Physical Therapy Specialists, they are committed to using evidence-based treatments in their practice. This means that their therapists utilize the most current and clinically relevant treatments in their approach to rehabilitation. For more information click here.

McKenzie Method

McKenzie Method: Diagnosis & Treatment

McKenzieMethod_FBsize

MECHANICAL DIAGNOSIS PHASE:
This system is based on the symptomatic and mechanical responses of patients to various repeated movements or static loading forces(that is a mechanical evaluation). It allows the classification of patients into broad, rather than tissue-specific, categories and thus leads to the formulation of treatment. Rather than seeking to make a diagnosis, which is the identification of a disease by the means of its signs and symptoms, The McKenzie system concentrates on syndrome identification. A syndrome is a characteristic group of symptoms and pattern responses characteristic of a particular problem. The system is now widely used to classify and treat patients with mechanical disorders.

PHYSICAL EXAMINATION PHASE:
• Explanation of problem to patient and reason for required exercise program
• Time scale
• The appropriate loading strategy, or strategies needed to manage the condition demonstrated to and practiced by the patient.
• The repetitions and regularity of exercise program explained to patient
• The expected pain response explained to patient

knee stretch

ASSESMENT PHASE:
• Symptomatic diagnosis
• Mechanical Diagnosis

PATIENT MANAGEMENT PHASE:
• Patient education component of management
• Information about the problem itself
• What patients can do to help themselves
• Information about tests, diagnosis and interventions
• Active Mechanical Therapy component:
• The specific exercises should be demonstrated to the patients, they should practice these, the expected pain response should be explained, as well as any warnings against lasting aggravation of their condition and as necessary progressions and alterations should be given.

This information was written by Hamilton Physical Therapy Services, L.P., an outpatient physical therapy group with five locations in Mercer County, New Jersey since 1978. Their modern state-of-the-art facilities are equipped to offer patients an excellent opportunity to reach their optimal functional abilities. Managed and operated by physical therapists mandates that patient care is our number one priority. For more information click here.

PT Month

Physical Therapy: Treating the Cause, Not Just the Symptoms of Pain

PT_treating the Cause of Pain_FBsize

This PT Month, instead of using prescribed pain killers, try physical therapy first.

WHY YOU SHOULD CHOOSE PHYSICAL THERAPY OVER PRESCRIPTION PAIN KILLERS
Physical therapy treats the cause of pain, more often than not leaving patients stronger and more able to enjoy life and function fully. In stark contrast, pain relievers treat only the symptoms – and can leave patients dependent or addicted.

drugs

PHYSICAL THERAPY IS THE SMART ALTERNATIVE TO OPIOIDS
More than 40 people die every day from overdoses involving prescription opioids. At least half of opioid overdose deaths involve a prescription opioid.

Wishing everyone a wonderful PT Month!

Information provided by the Center for Disease Control and Prevention. To learn more about the CDC click here.

Physical Therapy Day

World Physical Therapy Day

WorldPTDay_FBsize

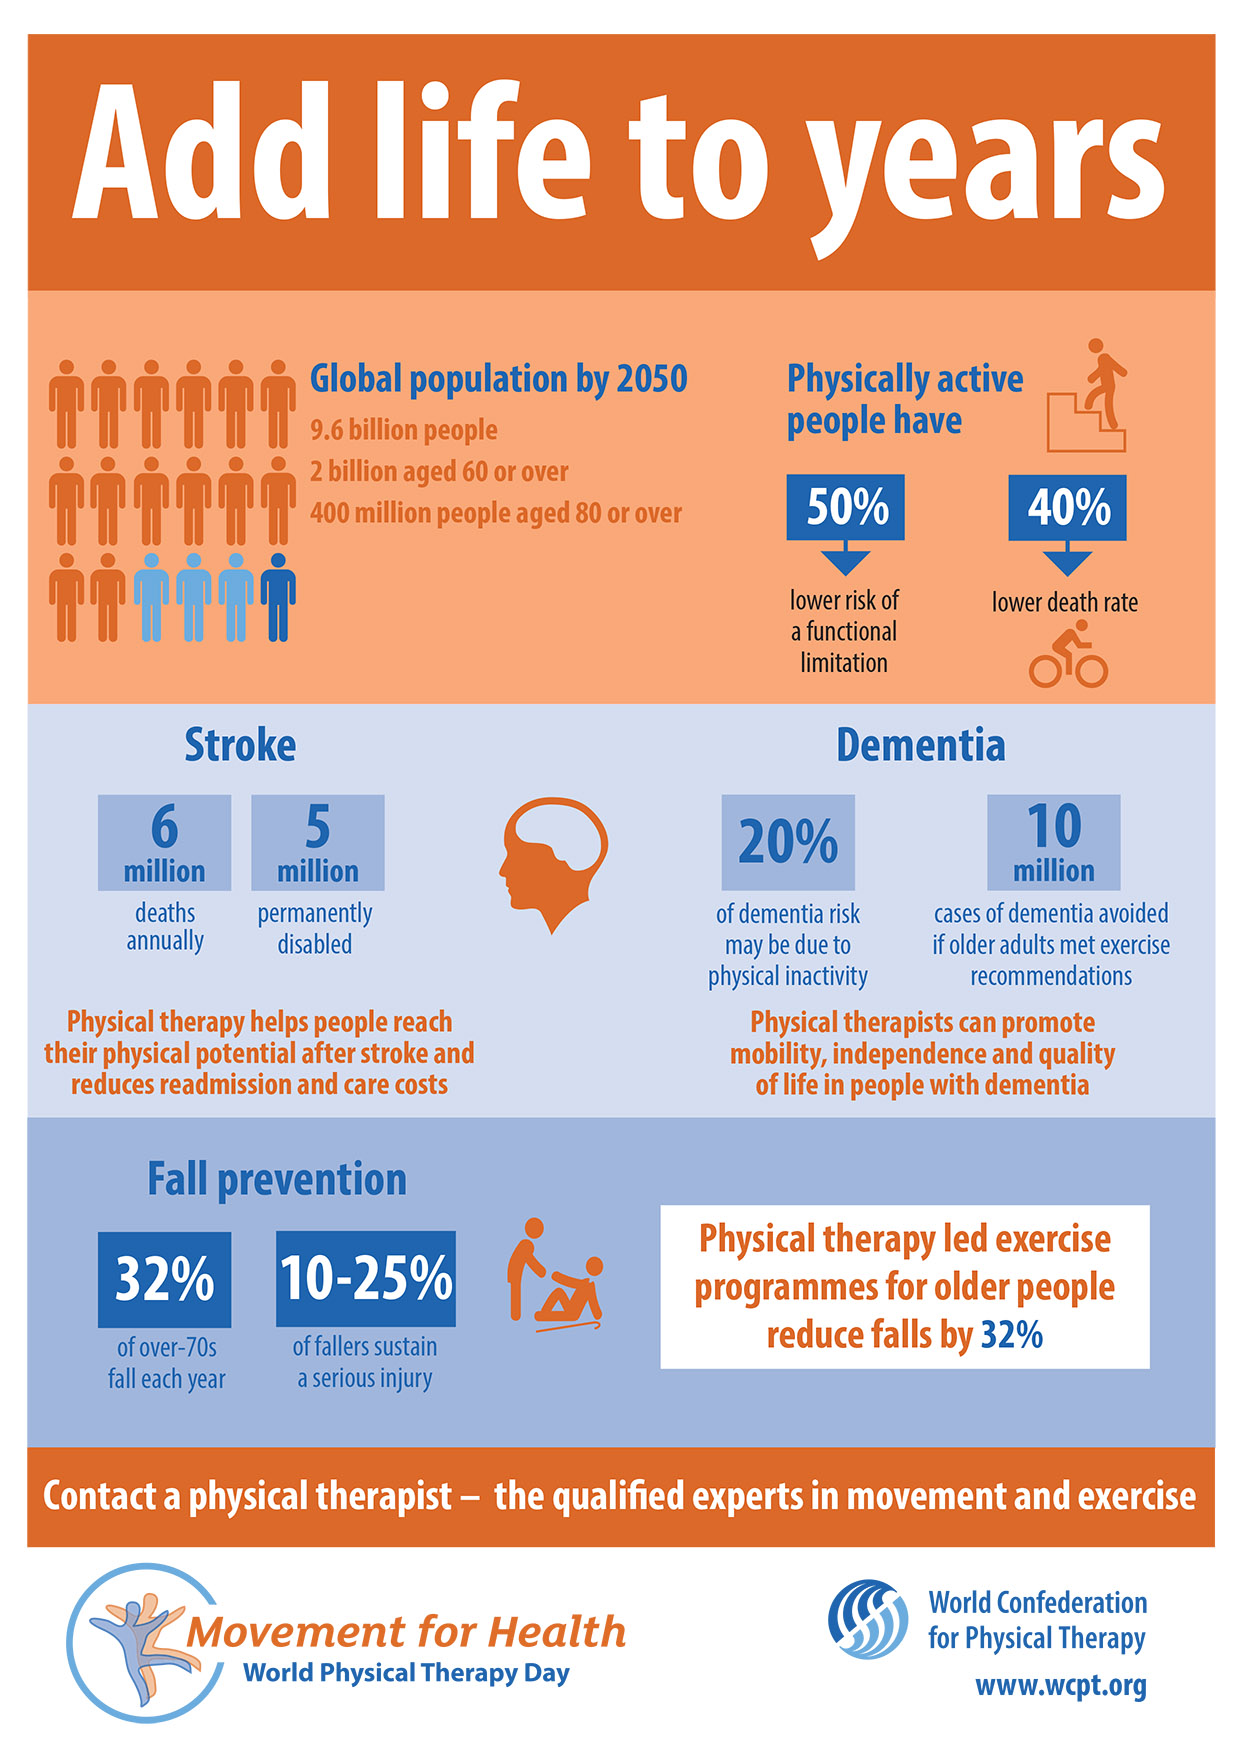
World Physical Therapy Day is on September 8th. The day is an opportunity for physical therapists from all over the world to raise awareness about the crucial contribution the profession makes to keeping people well, mobile and independent. This year the focus is on adding years to your life by being physically active! See how a little bit of movement can go a long way!

WPTD2016_infographic_A4_FINAL

To  learn more about World Physical Therapy Day click here.

concussion

True or False: A Person With a Serious Head Injury or Concussion Should Be Kept Awake

TrueorFalse_FBsize

All head injuries should be treated seriously. While most won’t cause lasting effects, if improperly treated, they can lead to long-term disabilities or even death.

The most common type of head injury is a concussion. It is a jarring trauma to the brain that can cause a person to lose consciousness or have amnesia.

What do you do if you are around someone who experiences a serious head injury or concussion? You may have heard that you should not let the person go to sleep, but is this true? Most health professionals don’t think so. It is generally considered safe for people with head injuries or concussions to go to sleep. In some cases, a doctor may recommend waking the person regularly to make sure his or her condition has not worsened.

Evidence for the Health Claim
Many people will go to great lengths to keep a person who has had a head injury from falling asleep. They argue that keeping the person awake will decrease the risk that he or she slips into a coma.

This misunderstanding probably stems from hearing about a rare occurrence known as a lucid interval that has been associated with certain types of severe head injuries. A lucid interval occurs when the initial bleeding in the brain does not cause loss of consciousness. The bleeding eventually worsens and brain structures become compressed. The person’s condition can rapidly deteriorate, requiring emergency brain surgery.

Evidence Against the Health Claim

Most medical professionals say it is fine—sometimes even advised—to let people sleep after incurring a head injury.

The American Academy of Family Physicians states it is not necessary to keep a person awake after a head injury. If a person needs to be watched that closely, a doctor will most likely admit him or her to the hospital. The Dartmouth College of Sports Medicine advises that it is fine to go to sleep after a concussion so long as someone wakes you up every two hours. They are to check to make sure you can be easily awakened and aren’t displaying symptoms of a worsening condition.

In a study in the September-October 2005 issue of the Journal of Head Trauma Rehabilitation, researchers reported greater levels of fatigue in people who have had head injuries, compared with those who have not. The researchers concluded that regular rest breaks and increasing intervals of restful sleep should be a part of the rehabilitation from head injury.

neon concussion

Conclusion
If you are around someone who has a head injury or possible concussion, monitor the symptoms closely. It is important to call a doctor or go to a hospital immediately if the person has worrisome symptoms such as:
• Open wound in the scalp or misshapen deformity of the skull
• Severe or progressive worsening headache
• Changes in behavior (eg, confusion, restlessness, irritability, lethargy)
• Dilated pupils or pupils of different sizes
• Convulsions or seizures
• Difficulty waking from sleep
• Trouble walking or speaking
• Bleeding or drainage of fluids from nose or ears
• Unusual sleepiness or decreasing alertness
• Severe or persistent nausea, or vomiting more than twice
• Weakness or numbness in the arms or legs

When a head injury is serious enough to require medical care, a doctor will give you instructions on how to monitor and treat the injury once the person is released from the hospital or clinic. These instructions will generally not include keeping the person awake and alert.

by Krisha McCoy, MS

More PTandMe articles about concussions can be found here:

concussion physical therapy   concussion treatment


REFERENCES:
Head injuries. KidsHealth.org website. Available at: http://www.kidshealth.org/parent/firstaid_safe/emergencies/head_injury.html. Accessed November 5, 2008.

Head injuries: what to watch for afterward. Familydoctor.org website. Available at: http://familydoctor.org/084.xml. November 5, 2008.

Head injury: concussion. Dartmouth College of Sports Medicine website. Available at: http://www.dartmouth.edu/~sportmed/concussion.html. November 5, 2008.

Radiology for traumatic brain injury. Trauma.org website. Available at:http://www.trauma.org/neuro/neuroradiology.html. Accessed July 23, 2006.

Subjective reports of fatigue during early recovery from traumatic brain injury. Journal of Head Trauma Rehabilitation. 2005;20:416-425.

EBSCO Information Services is fully accredited by URAC. URAC is an independent, nonprofit health care accrediting organization dedicated to promoting health care quality through accreditation, certification and commendation.

Recovering from knee surgery

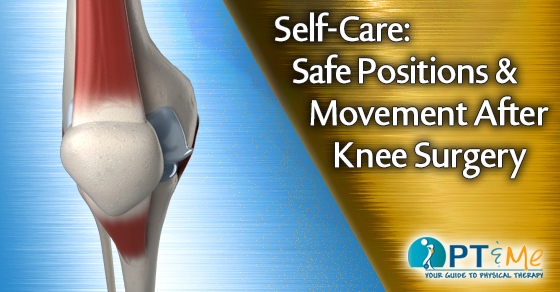
Self-Care: Safe Positions & Movement After Knee Surgery

SelfCareKneeSurgery_FBsize

ACTIVITY GUIDELINES
Recovering from knee surgery does not have to prevent you from moving or taking care of yourself. Listed below are guidelines on how to do some common movements and activities without hindering the healing process.

SLEEP & POSITIONING
• It is very important that when recovering from knee surgery you get enough rest following your surgery. If you cannot get comfortable in your bed, please talk to your therapist.
• Sleep on a bed with a firm mattress. Ideally, the bed should come up to your mid-thigh while you stand.
• Sleep flat on your back and position your leg so your toes and kneecaps point at the ceiling.
• Do not place pillows under your operative leg. If you wish to elevate your leg, support the whole leg with pillows while keeping the knee straight.

Sitting Up In Bed:
• If possible, get out of bed toward non-operated side so that the operated leg is supported as much as possible.

From Sitting on the Side of the Bed to Standing with the Walker:
• Straighten the operated leg in front of you before standing.
• Ensure you have good sitting balance with the walker close in front of you.
• Push up from the bed with both hands and keep weight on the non-operative leg.

From Standing to Getting Into Bed:
• Sit down on the edge of the bed; place at least one hand on the bed as you lower yourself. Remember to keep the operated leg further ahead to avoid straining it.
• Enter your bed leading with the operated side if possible.
• Bring your legs onto the bed while lowering your upper body with your hands then elbows.

BATHING/SHOWERING:
You may shower in a bathtub or shower stall only after your doctor has given their permission.

Getting Into the Tub to Take a Shower:
• Have the tub bench or tub chair placed in the direction facing your shower faucets.
• Using your walker, back up to the bench.
• Reach back with one hand to the bench and sit down with your legs outside of the tub.
• Place one leg at a time into the tub.

Getting Out of the Tub:
• While seated on the tub bench/chair turn your body and place your legs one at a time outside of the tub.
• Push up from the tub bench and stand using both hands on the walker.

knee brace

TOILET TRANSFERS:
When recovering from knee surgery the low surface may cause excessive painful bending at the knee. If this is the case, your therapist may help you with getting a raised toilet seat or a three-in-one commode that can be used over your toilet.

Getting Up and Down From a Toilet:
• Back up to the toilet.
• Reach back for the armrests/raised toilet seat/seat.
• Slide your operated leg slightly forward and lower yourself slowly onto the toilet.
• To stand, use a grab bar or place your hand at the middle of the center bar of the walker.
• Stand up and get your balance before placing both hands on the walker.

DRESSING:
• Put on your top or shirt as you normally would while seated.
• Do not twist the knee too much when dressing or putting on shoes.
• Your therapist may recommend a sock aid, dressing stick, reacher or long-handled shoe horn to help with dressing.

STAIRS:
You should only try to go up or down stairs when your doctor or therapist says it is okay. Do not try to use stairs while using a walker.
• When going up the steps, first step up with your non-operative leg, followed by the operative leg.
• When going down steps, first step down with your operative leg, followed by the non-operative leg.
• Complete only one step at a time and always have help.

CAR TRANSFERS:

While you are recovering from knee surgery you will need someone to help you with getting in and out of the car for both your safety and comfort. The seat would ideally be at the height of your mid thigh. Avoid cars with low or bucket seats.
• Have someone slide the seat back as far as possible prior to entering the car, preferably on the front passenger side.
• Slightly recline the seat back if possible.