Tag Archives: stretching

strength training

Age Appropriate Strength and Performance Training

In recent years there has been discussion on training for our adolescent athletes and what is appropriate, whether it be how much, how soon, how specialized? Here are some answers to common strength training questions we hear:

When Can My Athlete Start Lifting Weights?
The NSCA’s position statement states pre-adolescence (7-8 y/o) is a safe age to begin resistance training with graduated modalities and loads. Basically, if the athlete is ready for organized sports, they are ready for some kind of resistance training.

Why Can’t I Just Buy a Blu-Ray Workout for My Adolescent to Train By?
No athlete is the same, and doing a cookie-cutter workout without properly screening for potential injury risk would be negligent. The risk is too great to potentially hurt an athlete by trying to perform exercises their bodies cannot physically handle.

What Should I Look for with Overtraining?
Ongoing decreased performance on field. Often injured or sick. Disengagement from sport and school. Mood swings. Physically tired all the time. Sleep issues. Overreactive emotional response to failure. Depression. Nutrition issues.

A strength training and conditioning specialist can screen each athlete’s movements in order to determine a baseline level of movement and strength. They then develop exercises and drills that will enhance the good movement qualities while addressing any bad motor patterns that may exist. Main components that are often noticed by trained professionals are mobility(flexibility) and stability (strength) issues.

For more on strength & conditioning or to inquire about training with the Center for Physical Rehabilitation at the Academy for Sports & Wellness, please visit: www.pt-cpr.com/academy

throwing injuries PTandMe

Guidelines to Prevent Throwing Injuries

In this monthly series, we examine the proper ways to exercise and prevent throwing injuries in baseball. If you have any sudden significant increase in pain, swelling, or discoloration while performing or following exercise, discontinue immediately and contact your primary care provider.


WRIST EXTENSION
Start with the arm supported on a table and your wrist facing toward the ground. Hold the weight off the edge of the table and bring the back of your hand toward the ceiling.


WRIST FLEXION
Start with the arm supported on a table and your wrist facing toward the ceiling. Hold the weight off the edge of the table and bring your palm toward the ceiling.

ASMI GUIDELINES TO HELP PROTECT PITCHERS FROM SHOULDER & ELBOW THROWING INJURIES:

Don’t throw too much:
Daily, weekly and annual overuse is the greatest risk to a pitcher’s arm health. Numerous studies have shown that pitchers who throw more pitches per game and those who do not adequately rest between appearances are at an elevated risk of injury. While medical research does not identify optimal pitch counts, pitch count programs have been shown to reduce the risk of shoulder and elbow injury in Little League Baseball by as much as 50% (Little League, 2011). The most important thing is to set limits for a pitcher and stick with them throughout the season.

Don’t pitch through arm fatigue:
Individuals are 36 times more likely to develop shoulder and elbow injuries when routinely pitching with arm fatigue.

Don’t pitch more than 100 innings per year:
If an athlete throws over 100 innings they are 3.5 times more likely to be injured than those who did not exceed 100 innings pitched.

Don’t throw more than 8 months per year:
Athletes who throw > 8 months per year are 5 times as likely to suffer an injury requiring surgery of the elbow or shoulder. Pitchers should refrain from throwing for at least 2-3 months per year and avoid competitive pitching for at least 4 months per year.

Don’t pitch on consecutive days:
Pitchers who pitch on consecutive days have more than 2.5 times greater risk of experiencing arm pain.

Don’t play catcher following pitching:
If the player catches following pitching they are 2.7 times more likely to suffer a major arm injury.

Don’t play on multiple teams at the same time:
There is increased risk of injury due to the difficulty in monitoring pitch limits and rest time. If the player is on multiple teams, make meticulous efforts to keep track of the amount of pitches thrown to allow adequate rest.

Don’t forget the shoulder in strength and conditioning programs:
Numerous studies have shown that deficits in upper extremity strength and mobility are strongly correlated to serious arm injuries. Shoulder and forearm strengthening exercises can build strength, endurance and motor control which can prevent injury.

Be cautious with throwing curve balls and sliders:
While existing research has not consistently shown a strong connection between the curveball and injuries, Yang et al., found that amateur pitchers who threw curveballs were 1.6 times more likely to experience arm pain while pitching and Lyman et al, found that youth pitchers who throw sliders are 86% more likely to experience elbow pain.

Be cautious with the radar gun:
Radar guns do not directly cause harm to a pitcher, however, the gun may cause the pitcher to over throw beyond their normal comfort level. This could possibly create arm strain.

Following these guidelines may keep the throwing athlete safe from the debilitating shoulder and elbow throwing injuries seen on a regular basis in physical therapy clinics.

Pitching Guidelines Chart

This information was written by Advance Rehabilitation Physical Therapy, an outpatient physical therapy group with 24 locations in Georgia and Florida. Advance Rehabilitation is a physical therapy practice that focuses on providing the highest quality rehabilitation services. They specialize in physical therapy, sports medicine, industrial rehabilitation and athletic training. Their staff includes highly-trained professionals that serve as a bridge between injury and recovery to help patients get back to pre-injury status as quickly as possible. For more information click here.

See the entire Guidelines to Prevent Throwing Injuries series here:

   Prevent Throwing Injuries

   prevent throwing injuries

throwing injuries PTandMe

prevent throwing injuries

Guidelines to Prevent Throwing Injuries

throwing injuires

In this monthly series about how to prevent throwing injuries, we examine the proper ways to exercise and prevent throwing injuries in baseball. If you have any sudden significant increase in pain, swelling, or discoloration while performing or following exercise, discontinue immediately and contact your primary care provider.


PRONE ROW
Lay on your stomach with your arm hanging off the edge toward the ground. Squeeze your shoulder blade and bring your elbow toward the ceiling while keeping your forearm perpendicular to the ground.


PRONE ROW WITH EXTERNAL ROTATION
Lay on your stomach with your arm hanging off the edge toward the ground. Turn your wrist so your palm is toward your feet. Squeeze your shoulder blade and bring your elbow toward the ceiling while keeping your forearm perpendicular to the ground. Once your arm is parallel with the ground rotate the back of your hand toward the ceiling while keeping the elbow bent.


PRONE T (HORIZONTAL ABDUCTION)
Lay on your stomach with your arm hanging off the edge toward the ground. Lift your arm straight out to your side and squeeze your shoulder blade with the palm continuing to face toward the ground.


PRONE Y (SCAPTION)
Lay on your stomach with your arm hanging off the edge toward the ground. Lift your arm at a 45 degree angle over your head with your thumb facing toward the ceiling. Squeeze your shoulder blade down and toward your spine.

This information was written by Advance Rehabilitation Physical Therapy, an outpatient physical therapy group with 24 locations in Georgia and Florida. Advance Rehabilitation is a physical therapy practice that focuses on providing the highest quality rehabilitation services. They specialize in physical therapy, sports medicine, industrial rehabilitation and athletic training. Their staff includes highly-trained professionals that serve as a bridge between injury and recovery to help patients get back to pre-injury status as quickly as possible. For more information click here.

See the entire Guidelines to Prevent Throwing Injuries series here:

   Prevent Throwing Injuries

   prevent throwing injuries

throwing injuries PTandMe

crossfit

The Skinny on CrossFit

If you find going to a new gym nerve-wracking, joining a CrossFit gym might be downright terrifying. Walking into the warehouse-like gym and seeing people flipping tires while loud music pumps out of the stereo system and primal grunts and screams reverberate off the walls can be intimidating. Just take a deep breath, slip on your sneakers, grab your water bottle, and get ready to change your life completely.

Created by Gary Glassman, CrossFit is a high-intensity strength and conditioning program. It uses functional movements and varied workouts to help people lose weight, build muscle, and live healthier lives. While every CrossFit trainer is certified and able to adapt workouts to your needs, it is important that you consult your physician about any pre-existing conditions before beginning a new workout regime.

If you are nervous about going to your first CrossFit class, you can rest easy knowing it probably will not be very intense. Before you can participate in the daily workouts, you need to complete the Foundation Training. This is where you will learn the proper form and technique for the nine fundamental movements. Once you feel comfortable with these movements you can join the masses.

You first week at a Crossfit gym (typically called a “Box”) will be like your first week at a new school. There will be new friends to make, lots of questions to ask, and new skills to learn. You won’t be doing advanced moves in the beginning but you will still be working hard and will find yourself sore and tired by the end of the week.

Each class consists of a 15-minute warm-up, followed by 15 minutes of skill work. This is a great opportunity to improve on a move you are struggling with, or tackle an exercise you are nervous about in the Workout of the Day (WOD). After the skill work segment, you will move on to the WOD. The amount of time to complete a workout varies depending on the objective. Sometimes you will be racing against the clock, while other times you will be aiming for a timed personal best. A cool-down will round out your workout.

10 Components of CrossFit

Doing CrossFit is a full mind and body experience. There are 10 specific elements of physical fitness you will practice during each workout. Your overall fitness level will be determined based on your competency in all these domains.

  • Cardiovascular and Respiratory
  • Stamina
  • Strength
  • Flexibility
  • Power
  • Speed
  • Coordination
  • Agility
  • Balance
  •  Accuracy


Building Blocks of CrossFit
There are nine foundational movements every new CrossFit member must understand and master to ensure they get the most out of their workout and avoid injury. The three basic movements are: Squats, Presses, and Lifts. These movements increase in difficulty from Level 1 to Level 3. Once an athlete is comfortable with the form and technique associated with an exercise, they can progress to the next level.

Squats
The first movement you will learn when you join a CrossFit gym is an air squat. This basic movement is the foundation for the next two levels of squats. Squats are excellent lower-body exercises that engage your hamstrings, glutes, and quadriceps. As you progress through the three levels of squats, you will also begin to engage your upper body and core, making the squat a full-body workout.

Level 1 – Air Squat:

  • Stand with your knees shoulder-width apart and your toes angled out at approximately 10 degrees.
  • Keep your back, shoulders, and core tight.
  • Extend your arms out in front of you.
  • Press your hamstrings back and down.
  • As you lower yourself to the ground, press your knees out.
  • At the lowest point of the movement, your hips should be lower than the crease in your knees.
  • Press up through your hamstrings and glutes to return to the starting position.
  • Rest your hands at your side.

Level 2 – Front Squat:

  • Begin in the same stance as for an air squat.
  • Hold a bar in front rack position. (Rack position: Rest the bar on your shoulders across your chest. Your elbows should be up and your triceps parallel to the floor. Loosely grip the bar at slightly wider than shoulder width, with palms facing the ceiling.)
  • Once you are comfortable holding the bar, complete the same downward movement executed in an air squat.

Level 3 – Overhead Squat:

  • Begin in the same stance as for an air squat.
  • Hold a bar over your head with your palms facing forward.
  • Elbows should be locked and your wrist and forearms aligned (no bend or flexion).
  • Complete the same downward movement executed in an air squat.
  • Keep your chest up and eyes forward during this movement. If you feel like you are leaning too far forward you might be compromising the exercise. Reduce your weight and continue.

Presses
Presses are fantastic for targeting and toning your upper body. They will engage your arms, shoulders, back, and, depending on what level you are on, your legs. As with squats, there are three levels of press.

Level 1 – Shoulder Press:

  • Stand with your feet hip-width apart and eyes looking forward.
  • Rest the bar across the front of your shoulders, gripping it slightly wider than shoulder width.
  • Use a hook grip to secure your hands around the bar. (Hook Grip: Cross your middle finger and index finger over your thumb.)
  • Press the bar upwards.
  • As the bar moves straight up, only your head should move back to allow the bar to travel in front of your face.
  • At the top of the movement your arms should be fully extended above your head with elbows locked.
  • Follow the same line to lower the bar back to the starting position.

Level 2 – Push Press:

  • Hold the bar in the same position as for a shoulder press.
  • Keep your torso upright and your core engaged, and slightly lower your body by bending your knees.
  • Explosively straighten your knees and use the momentum in the movement to press the bar above your head.
  • Arms should be fully extended with locked elbows at the top of the movement.
  • Lower the bar back to starting position.

Level 3 – Push Jerk:

  • Hold the bar in the same position as for a shoulder press.
  • Lower your body into a quarter-squat position.
  • Perform a vertical jump.
  • When you are in the air, press the bar above your head.
  • Land with your feet in the exact same spot they took off from and with a slight bend in your knees.
  • Finish the movement by fully extending your hips and knees.
  • Return the bar to your shoulders.

Lifts
The three progressive lifts in CrossFit engage your entire body. These full body movements allow you to make the most out of any workout. If you are short on time, incorporate these exercises into your routine to torch calories and burn muscle.

Level 1 – Deadlift:

  • Place the bar in front of you and stand with your feet hip-width apart.
  • Bend forward at the hips, bending your knees slightly, and grip the bar at a point that is wider than hip-width.
  • The bar should be in contact with your shins and your shoulders should be slightly ahead of it.
  • Keep a flat back as you lower your glutes and pull up on the bar (arms should not bend).
  • Straighten your back and legs while lifting the bar in a vertical line up your body.
  • When the bar passes your knees, fully extend your hips forward.

Level 2 – Sumo Deadlift High Pull:

  • Use a wide stance for this movement.
  • With your hands narrowly apart (about two fist-widths), grip the barbell in front of you with your palms facing down.
  • Keep your arms straight and chest up while you slightly bend your knees into a quarter-squat.
  • Explosively stand up and shrug your shoulders, pulling the bar up in a vertical line.
  • By the time your hips are fully extended, your elbows should be above the bar pointing up and your hands should be aligned with your shoulders.
  • Slowly lower the bar back to the ground by reversing this movement to complete the repetition.

Level 3 – Medicine Ball Clean:

  • Swap out the barbell for a medicine ball.
  • Squat down over the ball.
  • Keep your chest up and gaze ahead.
  • Keep your arms straight and grab the ball on opposite sides.
  • Explode up, shrug your shoulders, and slip your body under the ball so that it lands in front of your face.
  • Catch the ball at the bottom of a front squat with your hips below your knee joints.
  • Complete the movement by standing up with your arms remaining bent, and the ball in front of your face.

WOD are you Talking About?
It’s no secret that CrossFit has a lingo of its own. If you’ve ever heard someone talking about CrossFit, you might wonder what language they are speaking and why they hate their friends Josh and Nancy so much. While they might be talking about a person, it is more likely your CrossFit friends are discussing a tough workout they just did. Each WOD is given a name. WODs are usually named after women (in the same way storms are, because they are so intense they leave you feeling like you were hit by a hurricane) or after fallen war heroes. Here are two notorious WODs that people love to trash.

Six Benefits of CrossFit
CrossFit is a tough workout, you can’t deny that. But, if you are willing to take a shot and get your sweat on, you will reap the rewards. Here are just a few of the many benefits CrossFit will have on your health and life.

The best thing to do if you are considering joining a CrossFit gym is to stop by and check one out. They have certified coaches on site who will be more than willing to answer your questions and put your fears to rest. Who knows, you could be the next breakout star at the CrossFit games!

Chronic Disease Relief

Exercise for Chronic Disease Relief


For people in need of chronic disease relief, exercise can decrease discomfort, improve daily functioning, and enhance overall quality of life. There are many activity choices. Overall, find something that you enjoy doing and a place that is comfortable for you to do it in. Although being physically active is good for anyone, some exercises provide specific benefits. Here is how different types of exercise can help people with specific chronic diseases.

CHRONIC DISEASE RELIEF : TYPES OF EXERCISE
There are 3 basic categories of exercise:

Aerobic Exercise
These are exercises that raise your heart rate through repetitive movement of large muscles groups. The 2 types of aerobic exercise are:

  • Weightbearing exercise —Your muscles work against the force of gravity. Examples include jogging, walking, and dancing.
  • Non-weightbearing exercise —The force of gravity does not play a major role. Examples include biking, swimming, and rowing.

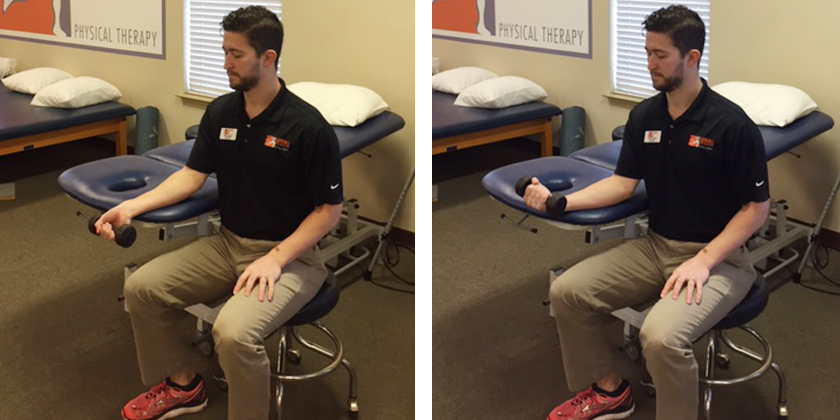
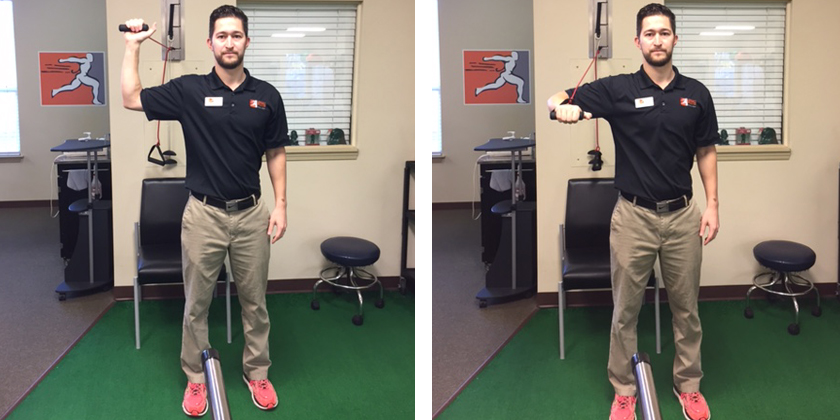
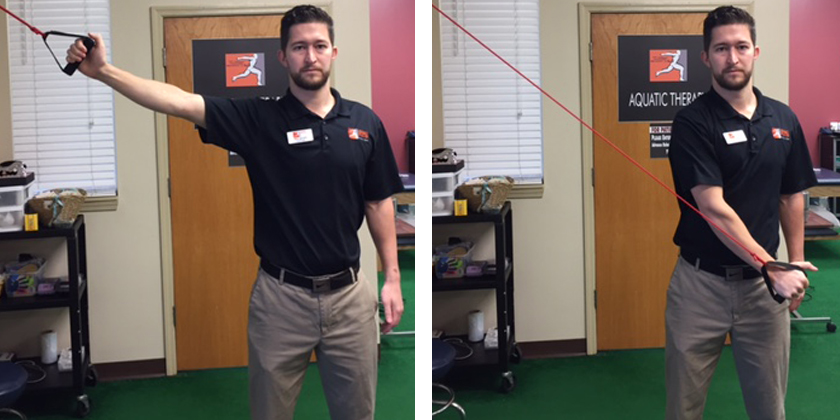
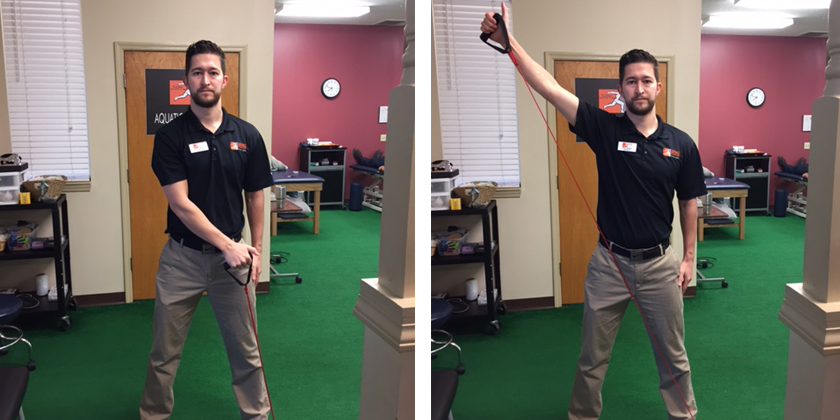
Strength Training Exercise
These are exercises that increase the power, tone, and efficiency of individual muscles by contracting isolated muscles against resistance. An example is lifting weights. The increase in heart rate is short-lived compared to aerobic exercise.

Stretching

These are exercises that improve or maintain the flexibility of your muscles. Good flexibility is important to keeping a full range of motion and decreasing your chances of injury. Ideally, you should stretch after each exercise session.

DISEASE IMPACT
Overall, all 3 types of exercises are important in a chronic disease relief program. However, the list below demonstrates how a certain types of exercise can directly impact your specific health condition.

Heart Disease
Researchers and healthcare professionals have found that regular exercise reduces the risk of having a heart attack, particularly for people with coronary artery disease (CAD).

Specific benefits of exercise for people with heart disease include:

  • Stronger heart muscle
  • Reduced cholesterol
  • Reduced plaque build-up inside the arteries
  • Better weight and blood pressure control

Type of exercise that can reduce risk of heart disease and heart attack: Aerobic

High Cholesterol
Cholesterol is found in cells throughout your body. Although it tends to get a bad rap, cholesterol is actually essential for life. It only contributes to heart disease when you have too much of certain types of cholesterol or too little of other types.

Exercise can help reduce cholesterol, and even better, it can help raise your HDL (good) cholesterol. Aim for at least 30 minutes of exercise most days of the week. Even short, 10-minute spurts of exercise can help. Exercise also has the added benefit of weight loss, which can also help to lower cholesterol levels.

Type of exercise that has been shown to improve cholesterol levels: Aerobic

Diabetes

Diabetes is a disorder of the body’s insulin production and usage, and it is a major risk factor for coronary artery disease. If there is not enough insulin, glucose (fuel for all cells) cannot get from the blood to the cells. As a result, the body is essentially starved and the glucose builds up in the blood. Exercise can make the cells more sensitive to insulin, and more glucose can move from the blood into cells.

Since exercise changes the way your body reacts to insulin, you may need to check your blood sugar before and after exercising. Talk to your doctor before you begin an exercise program to learn about what your levels should be.

Types of exercise that influence insulin sensitivity and cardiovascular risk factors: Aerobic and strength training

High Blood Pressure
The risk of high blood pressure increases as we age. Exercise can help to lower your risk and even control your blood pressure if it’s already high. Exercise helps with blood pressure by making your heart work more efficiently. This means your heart does not have to work as hard to pump blood, so there is less pressure on your arteries.

A good target for blood pressure is 120/80 mm Hg. Adding moderate physical activities to your normal routines can help you get there. You should aim for at least 30 minutes of aerobic activity on most days of the week. Even several 10-minute spurts throughout the day can help.

Types of exercise that have been shown to lower blood pressure: Aerobic and strength training

Stroke
A stroke occurs when not enough blood is reaching part of the brain. This causes the cells in that area to die. People who have already had a stroke are at increased risk for recurrent stroke or other cardiovascular problems.

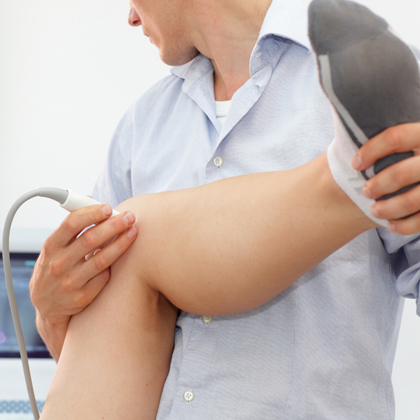
A stroke can create some physical impairments. Exercise may improve strength and coordination of the affected muscles. Exercise recommendations may vary depending on the severity of the stroke and the person’s limitations.

Type of exercise for stroke recovery: Aerobic, strength training, and stretching

Cancer
Studies suggest that people with cancer who do not have depression have a better chance of survival than those who do. Exercise is a great way to avoid depression and improve your overall mood. It’s not clear exactly how exercise impacts mood, but it probably works by causing the brain to release chemicals, like endorphins, and increase body temperature, which can have a calming effect.

Types of exercise found to boost energy and mood: Aerobic and strength training

Lung Disease
Chronic obstructive pulmonary disease (COPD), including emphysema and chronic bronchitis, is the most common form of lung disease in adults. Exercise improves activity levels and decreases symptoms.

Types of exercise shown to improve respiratory ability: Aerobic
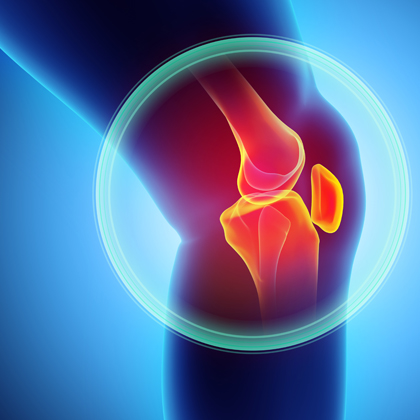
Arthritis

Continuous motion is essential for the health of your joints, especially arthritic ones. Regular exercise promotes strength and flexibility, and helps preserve the resiliency of joint surfaces.

Types of exercise shown to improve joint health: Nonweightbearing aerobic, strength training, and stretching (water exercises are ideal)

Osteoporosis
Osteoporosis is a bone-thinning disease that can lead to fractures. Weightbearing exercises maintain bone density and strength by tipping the balance in favor of bone formation. Weightbearing activities include walking, jogging, hiking, dancing, stair climbing, tennis, and other activities that you do while on your feet.

Type of exercise shown to improve bone density: Weightbearing aerobic and strength training

In any condition, a well-rounded exercise program will have all 3 types of exercise involved. Aerobic exercise will increase your endurance and ability to get through longer workouts. Strength training will build muscle strength and allow you to tolerate higher intensities as well improve balance and agility. Stretching can decrease stiffness and increase mobility.

Talk to your doctor before beginning any exercise program. You can also consult with an exercise specialist to help you develop a routine.

by Carrie Myers Smith, BS

RESOURCES:
National Institutes of Health
http://www.nih.gov

The American Orthopaedic Society for Sports Medicine
http://www.aossm.org

CANADIAN RESOURCES:
Canadian Society of Exercise Physiology
http://www.csep.ca

Healthy Canadians
http://www.healthycanadians.gc.ca

REFERENCES:
Depression. EBSCO DynaMed website. Available at: http://www.ebscohost.com/dynamed. Updated February 11, 2016. Accessed March 23, 2016.

Exercises for arthritis. Arthritis Foundation website. Available at: http://www.arthritis.org/living-with-arthritis/exercise/. Accessed March 23, 2016.

Fagard RH. Exercise characteristics and the blood pressure response to dynamic physical training. Med Sci Sports Exerc 33. S484-S492; 2001.

Gordon NF, Gulanick M, Costa F, Fletcher G, Franklin BA, Roth EJ, Shephard T. AHA scientific statement: Physical activity and exercise recommendations for stroke survivors. Circulation. 2004;109: 2031-2041. Circulation website. Available at: http://circ.ahajournals.org/content/109/16/2031.full. Accessed March 23, 2016.

Junnila JL, Runkle GP. Coronary artery disease screening, treatment, and follow-up. Primary Care: Clinics in Office Practice. 2006 Dec; 33(4).

Onitilo AA, Nietert PJ, Egede LE. Effect of depression on all-cause mortality in adults with cancer and differential effects by cancer site. Gen Hosp Psychiatry. 2006 Sep; 28(5): 396-402.

Physical activity for cardiovascular disease prevention. EBSCO DynaMed website. Available at: http://www.ebscohost.com/dynamed. Updated December 21, 2015. Accessed March 23, 2016.

Physical activity guidelines for Americans. EBSCO DynaMed website. Available at: http://www.ebscohost.com/dynamed. Updated January 9, 2013. Accessed March 23, 2016.

Weightbearing exercise for women and girls. American Academy of Orthopaedic Surgeons Ortho Info website. Available at: http://orthoinfo.aaos.org/topic.cfm?topic=A00263. Updated October 2007. Accessed March 23, 2016.

Last reviewed March 2016 by Michael Woods, MD Last Updated: 5/8/2014

EBSCO Information Services is fully accredited by URAC. URAC is an independent, nonprofit health care accrediting organization dedicated to promoting health care quality through accreditation, certification and commendation.

PT News

This Month in PT News. Featuring articles from PTandMe partnering clinics!

1. Decreasing Cartilage Loss in Osteoarthritis
Written by the Therapy Team at The Jackson Clinics Physical Therapy – Northern Virginia

Although some over-the-counter nutritional supplements have been advertised as capable of rebuilding cartilage in arthritic joints, the claims most often do not stand up under scientific scrutiny. Read more

2. Treating Degenerative Meniscus Tears
Written by the Therapy Team at The Jackson Clinics Physical Therapy – Northern Virginia

During the aging process, the fibrous cartilage between the thighbone (femur) and the shinbone (tibia) within the knee can degenerate and become prone to tearing. Read more

3. Five Stretching Tips Before You Workout
Written by the Therapy Team at Momentum Physical Therapy – San Antonio, TX

As temperatures start to warm up, many of you will start to hit the streets, trails, and parks to exercise outdoors. Read more

Guidelines to Prevent Throwing Injuries

GuidelinesPreventThrowingInjuries#3_FBsize

In this third intallment of our series to prevent throwing injuries, we examine the proper ways to exercise and prevent throwing injuries in baseball. If you have any sudden significant increase in pain, swelling, or discoloration while performing or following exercise, discontinue immediately and contact your primary care provider.


INTERNAL ROTATION WITH SHOULDER AT 90 DEGREES OF ABDUCTION
Attach band high up on a doorway and face away from door. Hold band and move your arm out sideways away from your body until your arm is parallel with the ground. Bend your elbow to 90 degrees and point your fist toward the ceiling. Rotate from your shoulder bringing your hand forward while keeping your arm parallel to the floor and your elbow bent to 90 degrees.


EXTERNAL ROTATION WITH SHOULDER AT 90 DEGREES OF ABDUCTION
Attach band high on a doorway and face toward the door. Hold band and move your arm out sideways away from your body until your arm is parallel with the ground. Bend your elbow to 90 degrees and point your fist toward the door. Rotate from your shoulder bringing your hand away from the door while keeping your arm parallel to the floor and your elbow bent to 90 degrees.


SHOULDER INTERNAL ROTATION AT SIDE
Attach band to the doorway at chest height. Stand perpendicular to the doorway with the arm you are exercising closest to the door. Keep your arm at your side with a towel roll under the arm and bend the elbow to 90 degrees. Bring your hand toward your stomach while keeping the elbow bent to 90 degrees.


SHOULDER EXTERNAL ROTATION AT SIDE
Attach band to the doorway at chest height. Stand perpendicular to the doorway with the arm you are exercising furthest from the door. Keep your arm at your side with a towel roll under the arm and bend the elbow to 90 degrees. Bring your hand away from your stomach while keeping the elbow bent to 90 degrees.

This information was written by Advance Rehabilitation Physical Therapy, an outpatient physical therapy group with 24 locations in Georgia and Florida. Advance Rehabilitation is a physical therapy practice that focuses on providing the highest quality rehabilitation services. We specialize in physical therapy, sports medicine, industrial rehabilitation and athletic training. Our staff includes highly-trained professionals that serve as a bridge between injury and recovery to help patients get back to pre-injury status as quickly as possible. For more information click here.

See the entire Guidelines to Prevent Throwing Injuries series here:

   Prevent Throwing Injuries

   prevent throwing injuries

throwing injuries PTandMe

Prevent Throwing Injuries

Guidelines to Prevent Throwing Injuries

In our second installment of “Guidelines to Prevent Throwing Injuries” we examine the proper ways to exercise and prevent throwing injuries in baseball. If you have any sudden significant increase in pain, swelling, or discoloration while performing or following exercise, discontinue immediately and contact your primary care provider.


SHOULDER ABDUCTION
Begin with your arms at your side with your palms facing forward. Raise your arm straight out to the side until they are straight overhead.


SHOULDER SCAPTION
Begin with your arms at your side. Raise your arms at a 45 degree angle creating a V shape with your arms until they are overhead.


D2 EXTENSION
Secure band to wall or top of the doorway. Pull diagonally down across your body toward your opposite hip. Make sure to keep the elbow straight. Return to the starting position with a straight elbow and repeat.


D2 FLEXION
Secure band to bottom of the doorway. Pull diagonally up across your body away from your body. Make sure to keep the elbow straight. Return to the starting position with a straight elbow and repeat.

This information was written by Advance Rehabilitation Physical Therapy, an outpatient physical therapy group with 24 locations in Georgia and Florida. Advance Rehabilitation is a physical therapy practice that focuses on providing the highest quality rehabilitation services. We specialize in physical therapy, sports medicine, industrial rehabilitation and athletic training. Our staff includes highly-trained professionals that serve as a bridge between injury and recovery to help patients get back to pre-injury status as quickly as possible. For more information click here.

See the entire Guidelines to Prevent Throwing Injuries series here:

   Prevent Throwing Injuries

   prevent throwing injuries

throwing injuries PTandMe


PTandMe therapists

Clinic Spotlight: PT & Me Therapists

Clinc Spotlight_PT&MeTherapists_FBsize

This month we are featuring stories from some of our PT & Me therapists. We asked them how they got into the awesome world of physical therapy and what they enjoy about it. These are their stories…

Kelly_wilson
Name:
Kelly Wilson, PT, DPT at University Physical Therapy – 8 locations conveniently located throughout the New River Valley in Virginia

Why did you chose physical therapy as a career?
I took an anatomy class in high school with a teacher who absolutely changed my life. I could not get enough of the curriculum and wanted to learn more about how we work and how we can make ourselves better. I stayed after school one day to ask how I could learn about this topic forever. My teacher suggested that I look into physical therapy. I started shadowing a PT in my hometown and loved it! I was hooked!

What is your favorite thing about going to work each day?
I get to work with the absolute best people on the face of the planet.


Name:
Lea Ann Rumlin, PT, Clinic Owner at DeKalb Comprehensive Physical Therapy – Lithonia, Georgia

Why did you chose physical therapy as a career? 
I had an opportunity to observe a PT in high school and found it was very interesting. I thought it was cool to observe a diverse variety of ailments in people.

What is your favorite thing about going to work each day?
I’ve been doing physical therapy for a long time, but it still feels new. I feel blessed to have the opportunity to help people.


Name:
Wendy Richards, MSPT, DPT at Port City Physical Therapy – Portland, Maine

Why did you chose physical therapy as a career? 
I wanted to be in a helping profession. Growing up in rural Maine most of the careers were either in healthcare or nursing. That is why I was drawn to physical therapy. I especially liked the stroke patient rehab and spinal rehab aspect of it. Helping people with paralysis was especially fulfilling.

What is your favorite thing about going to work each day? 
I enjoy working in a team environment. Working in an outpatient climate and helping patients to get better. Being able to resolve their limitations and improve their lives.


Name:
Jocelyn Zolna-Pitts, PT, Director at Metro Spine & Sports Rehabilitation – Chicago, Illinois

Why did you chose physical therapy as a career?
It combined my interest of medicine with sports. I was always interested in medicine and helping others.

What is your favorite thing about going to work each day?
The daily satisfaction of watching people get better. The challenge and variety of problems patients face and solving their problems through critical thinking with them. I enjoy the fact that you get to play every day at work and it’s a lot of fun!

Athletic Training Month

March is National Athletic Training Month

MarchNationalAthleticTrainingMonth_FBsize

March is National Athletic Training Month! Your protection is our top priority. Athletic trainers are health care for life and sport.

Athletic trainers specialize in patient education, injury prevention, and are an athlete’s first line of defense from the time of injury to recovery. Athletic trainers work closely with coaches and parents and may refer athletes to other health care professionals such as physicians, physical therapists and surgeons when needed.

What is an Athletic Trainer?
Athletic trainers hold at least a four year degree from a BOC (Board of Certification) accredited institution. they are licensed, certified health care professionals working with athletes on and off the field. Generally they are the first responders when injuries occur during sporting events.

Athletic trainers work closely with coaches and parents and will refer athletes to other health care professionals such as physicians, physical therapists and surgeons when needed.

Athletic trainers hours are determined by sports schedules. Typically they are available after school and stay until sporting events have concluded.

For more information about our athletic trainers, and what they do visit NATA’s websites at: www.nata.org or www.atyourownrisk.org