When talk focuses on childhood obesity in the United States, words like “critical” and “epidemic” are often used. The tried-and-true prescription of more exercise and better nutrition still holds true, but overweight children face unique challenges when it comes to weight loss.
Why Has Childhood Obesity Increased and What Are the Effects?
The statistics are disturbing. Not only are the overall obesity rates increasing, the heaviest kids are heavier than they were 30 years ago. Why is this happening? Experts who have studied childhood obesity attribute it to a change in lifestyle. The active lifestyle of the past—walking to school, playing outside, and engaging in after-school activities—has been replaced by a sedentary lifestyle of watching TV, playing video games, and using electronic devices like phones, computers, and tablets. Eating habits have changed noticeably, with convenience foods that are higher in fat and calories replacing fruits and vegetables.
The consequences of obesity are significant. A child who is obese may develop high blood pressure, high cholesterol, and type 2 diabetes. These conditions can increase the risk of cardiovascular disease such as a heart attack and stroke. In addition, older teens who are obese may have an increased risk of death during adulthood.
Obesity can also affect emotional health. A child who is obese may have emotional problems in school, and struggle with low self-esteem and depression.
What Is One of the Best Solutions?
Exercise is one of the main tools to fight childhood obesity. The US Department of Health and Human Services encourages children of all ages to be physically active. If your child is overweight, obese, or even of normal weight, recommendations to improve your child’s health include:
- Encouraging your young child (aged 1-4 years old) to actively play daily in a safe environment
- Encouraging your older child (aged 5 years and up) to participate in moderate to vigorous activity every day—Your child should aim for at least one hour per day of moderate to vigorous activity. At least 3 days out of the week should be vigorous activity.
Since children often engage in shorter bursts of activity throughout the day, it is okay to count these times as exercise.
Examples of different types of physical activity include:
Moderate-intensity: Brisk walking, hiking, skateboarding, baseball, rollerblading, and bike riding
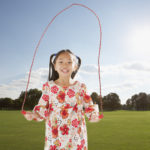
Vigorous-intensity: Jumping rope, running, and playing sports like basketball, hockey or tennis
The main difference between moderate- and vigorous-intensity exercises is the demand on the body. Vigorous activities force the body to work harder. The heart beats faster and breathing becomes more rapid, but energy is used up faster.
- Rollerblading
- Learning karate
- Playing organized sports (field hockey, soccer, football)
- Swimming
- Gymnastics
- Strength training with weights
- Rock climbing
- Cross-country skiing
Before your child jumps into a new fitness routine, it is important that you work with your child’s doctor. Being obese can put a strain on muscles and bones, possibly causing back pain and foot or ankle problems. The doctor can assess your child’s overall health and recommend safe exercises.
What Else Can Be Done to Encourage Activity?
Another important piece to the puzzle is to focus on screen time. Screen time refers to how many hours per day your child spends in front of a screen—whether it be watching TV, playing video games, or using electronic devices. These are sedentary activities that contribute to obesity. The NHLBI recommends that screen time should be limited to less than 2 hours per day, which leaves more time for exercise. You can further encourage your child to be active by planning family outings, like going on a hike, riding bikes, or playing flag football. That way, the whole family can become healthier together.
by Patricia Kellicker, BSN and Rebecca J. Stahl, MA
RESOURCES:
American Council on Exercise
http://www.acefitness.org
Shape Up America
http://www.shapeupus.org
CANADIAN RESOURCES:
Health Canada
http://www.hc-sc.gc.ca
Healthy Alberta
http://www.healthyalberta.com
REFERENCES:
Aerobic, muscle, and bone-strengthening: What counts? Centers for Disease Control and Prevention website. Available at: http://www.cdc.gov/physicalactivity/basics/children/what_counts.htm. Updated June 5, 2015. Accessed March 2, 2016.
Chapter 3: Active children and adolescents. US Department of Health and Human Services website. Available at: http://www.health.gov/paguidelines/guidelines/chapter3.aspx. Accessed March 2, 2016.
How much physical activity do children need? Centers for Disease Control and Prevention website. Available at: http://www.cdc.gov/physicalactivity/basics/children/index.htm. Updated June 4, 2015. Accessed March 2, 2016.
Krul M, van der Wouden JC, Schellevis FG, van Suijlekom-Smit LW, Koes BW. Musculoskeletal problems in overweight and obese children. Ann Fam Med. 2009;7(4):352-356.
NCHBI integrated guidelines for pediatric cardiovascular risk reduction. EBSCO DynaMed website. Available at: http://www.ebscohost.com/dynamed. Updated February 12, 2013. Accessed March 2, 2016.
Obesity in children and adolescents. EBSCO DynaMed website. Available at: http://www.ebscohost.com/dynamed. Updated February 10, 2016. Accessed March 2, 2016.
Last reviewed March 2016 by Michael Woods, MD Last Updated: 3/2/2016
EBSCO Information Services is fully accredited by URAC. URAC is an independent, nonprofit health care accrediting organization dedicated to promoting health care quality through accreditation, certification and commendation.